Sharing my love of all things paper-craft: Card making, Scrapbooking, Gift Boxes, Invitations, Party Favours, Craft Supplies and more. (Formally Stampin'Fantastic)
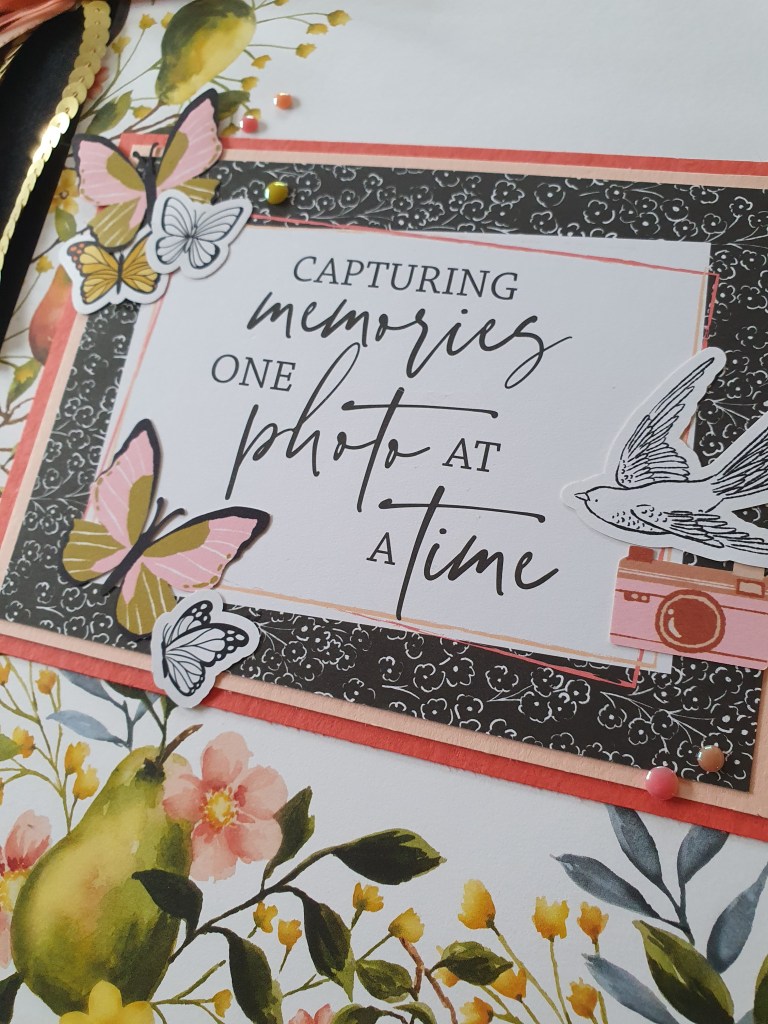
I had a bit if a dilemma when I was decorating my album cover. I had put off doing it for so long but my album was full. It was finally time to finish it properly.
Originally, I kept it simple. Just stamps and ink.
I love the words from this new Peaceful Days stamp set. They are perfect for scrapbooking.
Then I decided I wasn’t completely happy with how plain it was, so I got out my Memories and More Mixed Media Floral card packs and some Stampin Up ephemera, plus retired ribbon and trim to create this cover.
The Designer series paper for the front was a perfect base. Plenty of colour but not too busy, with the pattern only around two edges. The paper is called Painterly Pears and is a new Online Exclusive.
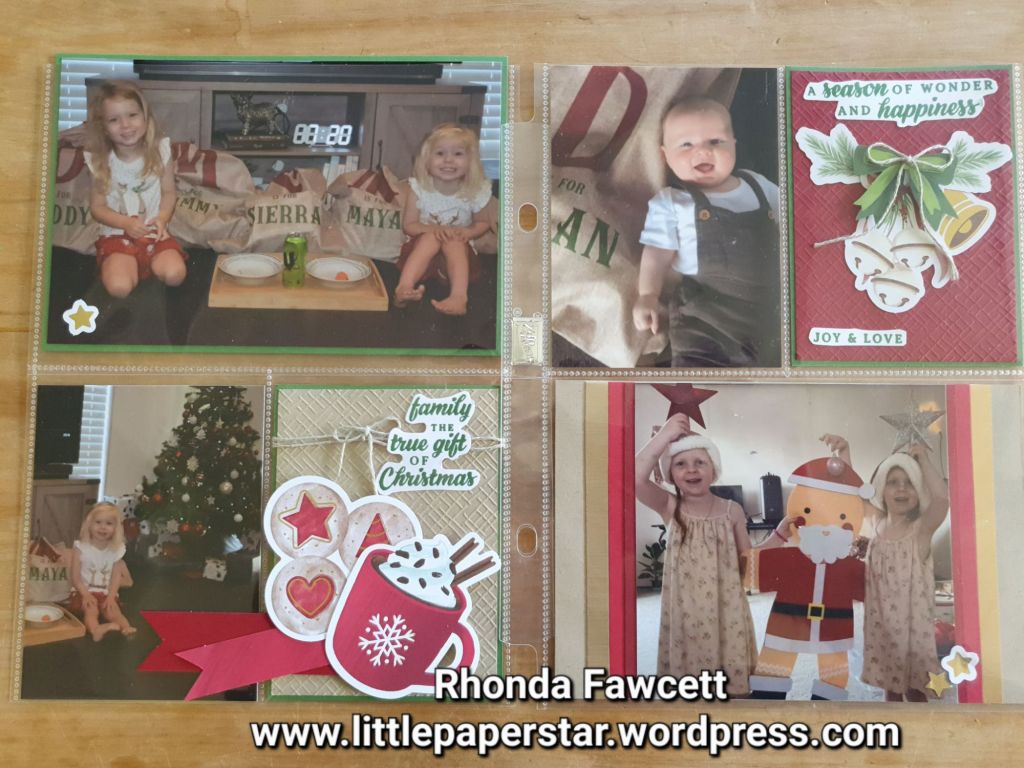
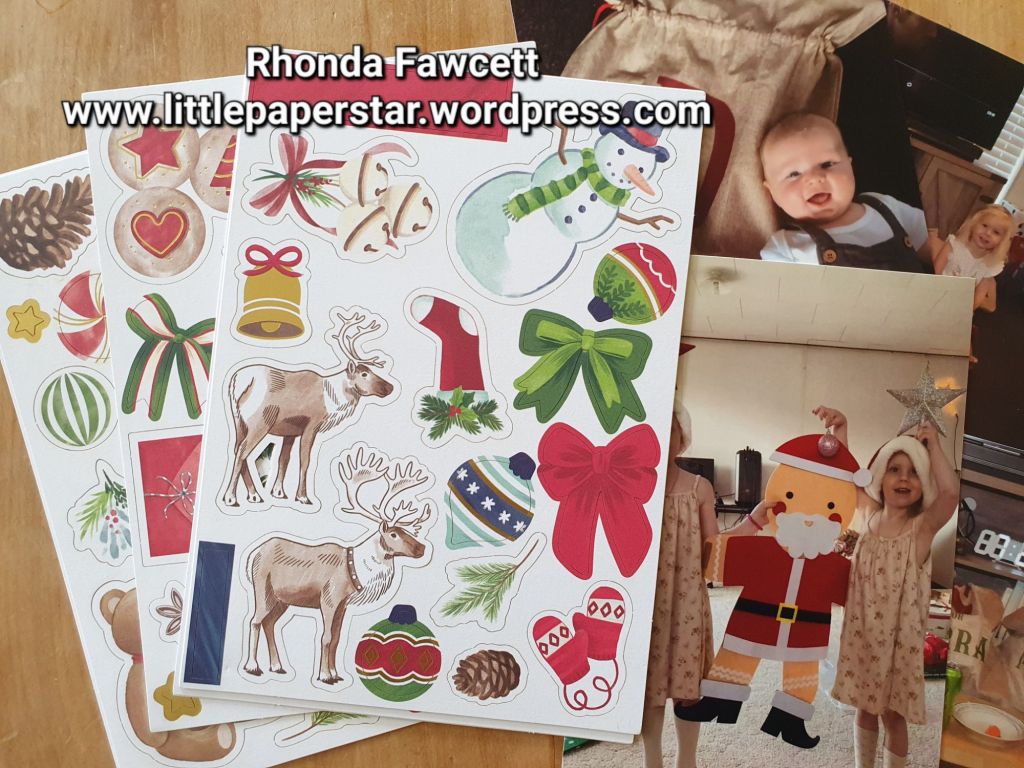
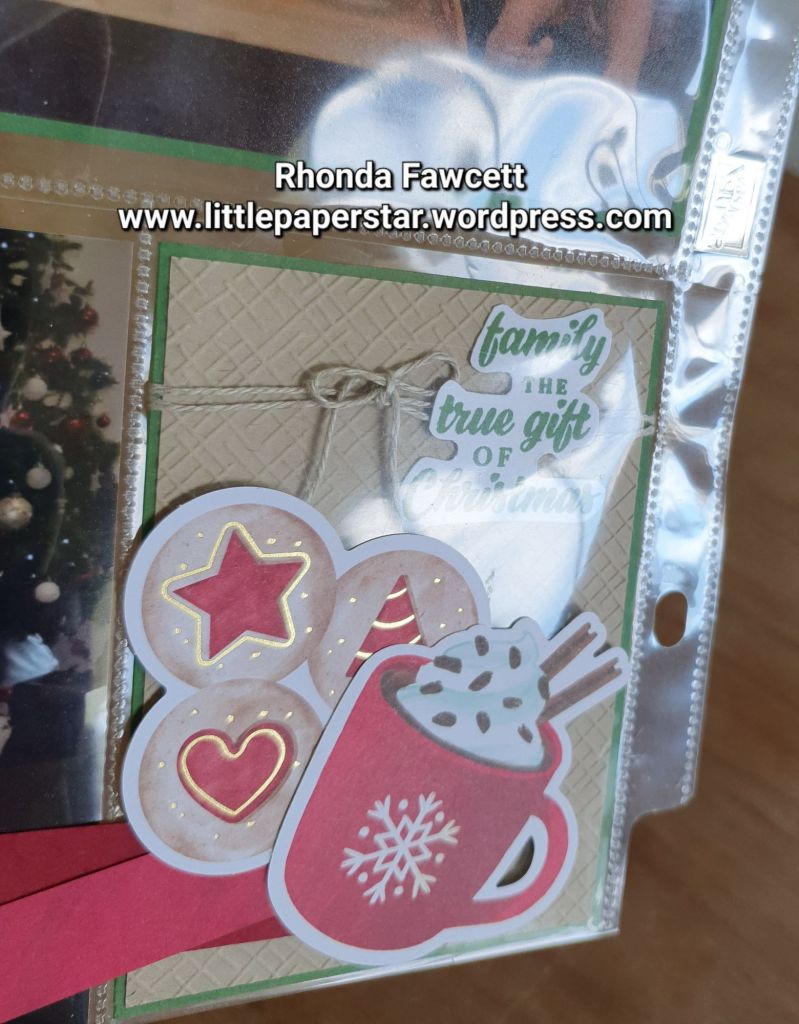
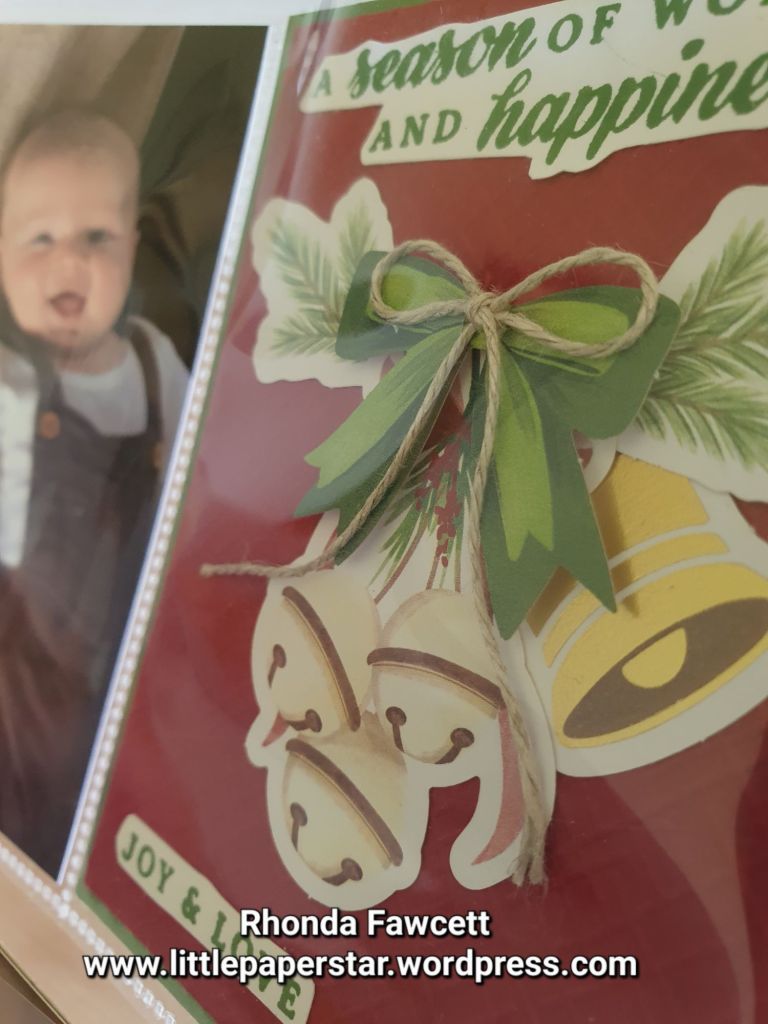
I recently purchased the Joyful images ephemera pack from Stampin’ Up! and I used it to create a layout for my Memories and More album.
There were so many printed and die cut images to choose from. Each pack contains 8 sheets of 4 different designs.
I combined a few images together to create filler cards for the pockets in my Christmas Memories and More album.
I love the touch of gold on some of the images. Some images came cut with a white border and some without. I used both in my layout.
The words I used were from the Peaceful Season stamp set and inked with Garden Green ink to match the card and photo mats.
Did you notice the Real Red and Cherry Cobbler banners on the photo above? They lay across two pockets so I had to adhere them to the outside. Have you ever done this? Do you think it’s okay or do you prefer to have everything adhered down and safely contained inside the pockets?
I was excited to get my hands on this new card and sticker pack. It’s the only item in the catalogue that has come down in price. I love the bright and happy colours. They would work well for any party celebration photos. I used them for an Easter egg hunt layout.
If you live in New Zealand and want a pack of the cards and stickers. Send me a message or order from my online store rhondafawcett.stampinup.net
I have been sick all week but today I got out of bed long enough to do some scrapbooking. Those of you who follow my blog will know that I like the Stampin’ Up! small pocket albums.
I have just recieved a new pack of cards and stickers. It is called “Enjoy the adventure memories and more card pack”. It is NZ $21 and contains 50 cards or pocket inserts. They are great for journal boxes as I have used above. The cards are a mix of 4 x 6″ size and the smaller pocket size of 3 × 4″.
There is also 4 sheets of stickers.
I know this type of memory keeping is not everyone’s style. However these insert cards are also great for making a quick greeting card. No stamping needed!
For this birthday card. I grabbed one of the 4 x 6″ insert cards and trimmed a smidgen off each side so that it fitted onto a folded A5 card. I added some stickers from the same pack and some rhinestones. I cut a piece of Basic White card to go inside and I cut 2 cm off another large insert card. The same design as the one on front, just so I could bring the pattern through to the inside.
It was so fast to make. If you don’t like the idea of trimming these inserts to fit your card base, don’t worry Stampin’ Up! has got it covered. They make a card and envelope pack that matches these insert cards perfectly. Both the big and small ones!
You may think that the Designer series paper (DSP) called “He’s the man”, is just for men, right?
Wrong. It is good for many projects and I want to show you some more scrapbooking ideas that I have used these papers and die-cuts for. The die-cuts are great because there are so many affirmative sayings that you can use on a scrapbooking page. There is also a caravan that would be perfect on a holiday page. The papers are all in browns and rust colours and while one side does have a masculine print on it, the other side is good for any autumn pages.
This first page features 3 die-cut elements. One of which is a journal box the perfect size for our Stampin’ Up! 6 x 8 albums.
Here is a page that I did for my champion of a granddaughter, Duskie.
The stars, photo corners, banner, oval sentiment, journal piece and background paper are all from “He’s the man” paper pack. Here is some more dies below.
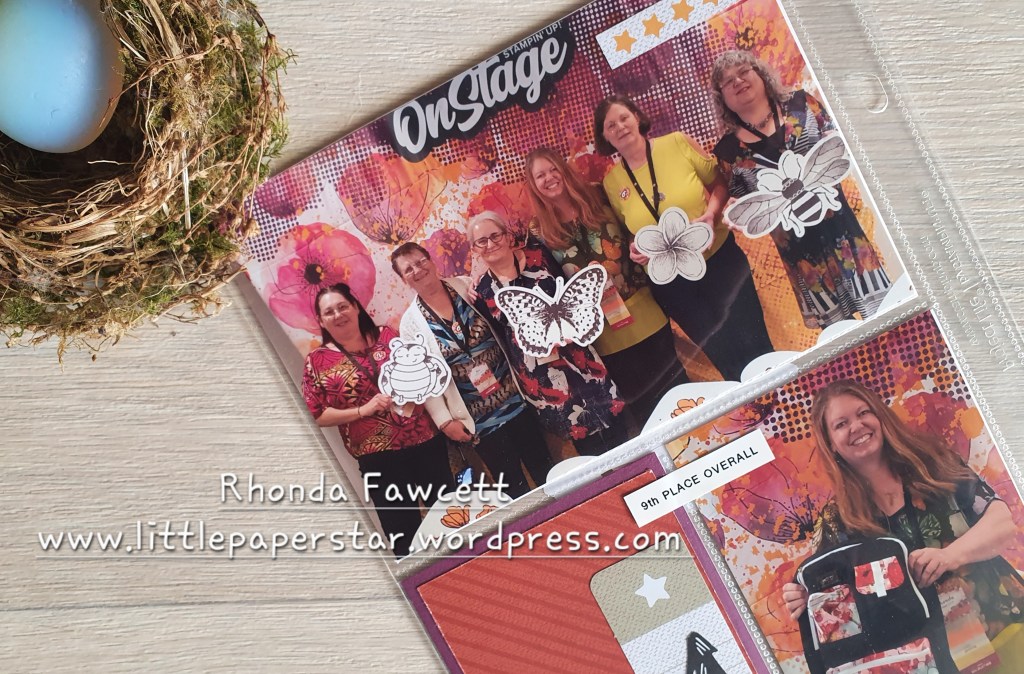
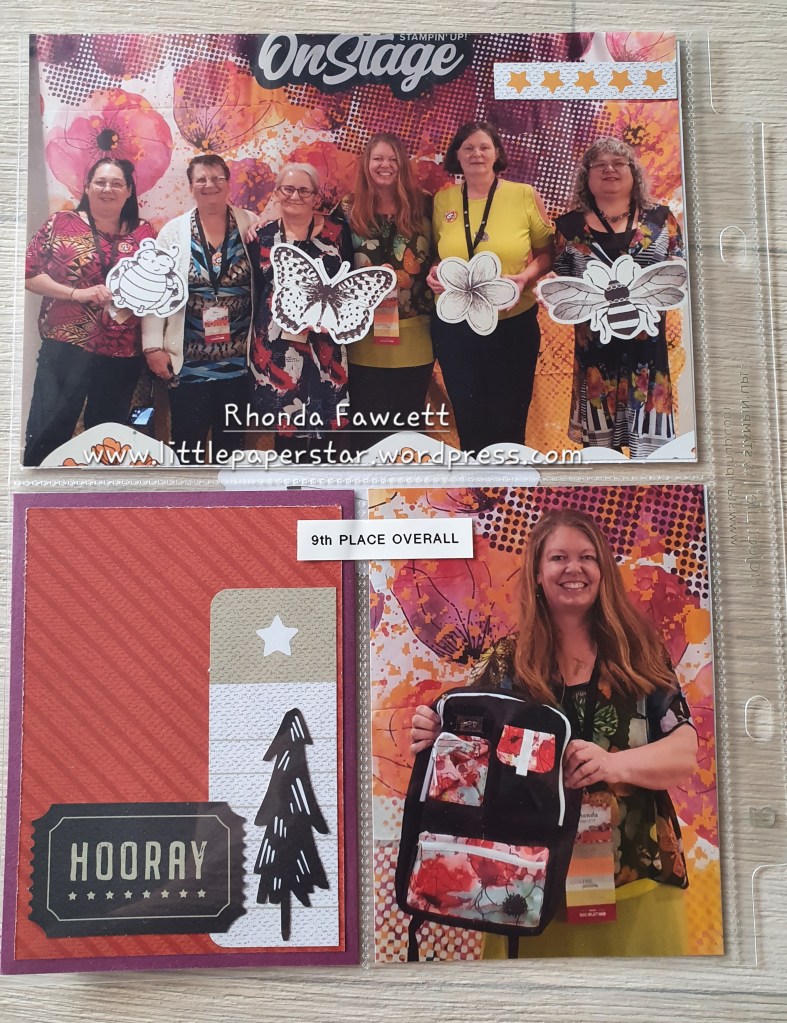
This next page is very special to me because it was one of the last times that some of my team members were all together. Two very special ladies have passed away since this photo was taken.
Another reason why this page is special, is because this year, I got into the top 10 demonstrators for our country.
I was given a 14 karat gold necklace amongst other things. I did feel very spoilt.
I hope these few pages from my album, inspire you to give the “He’s the man” paper a second look. It is in the current annual catalogue and is available for purchase until June next year.
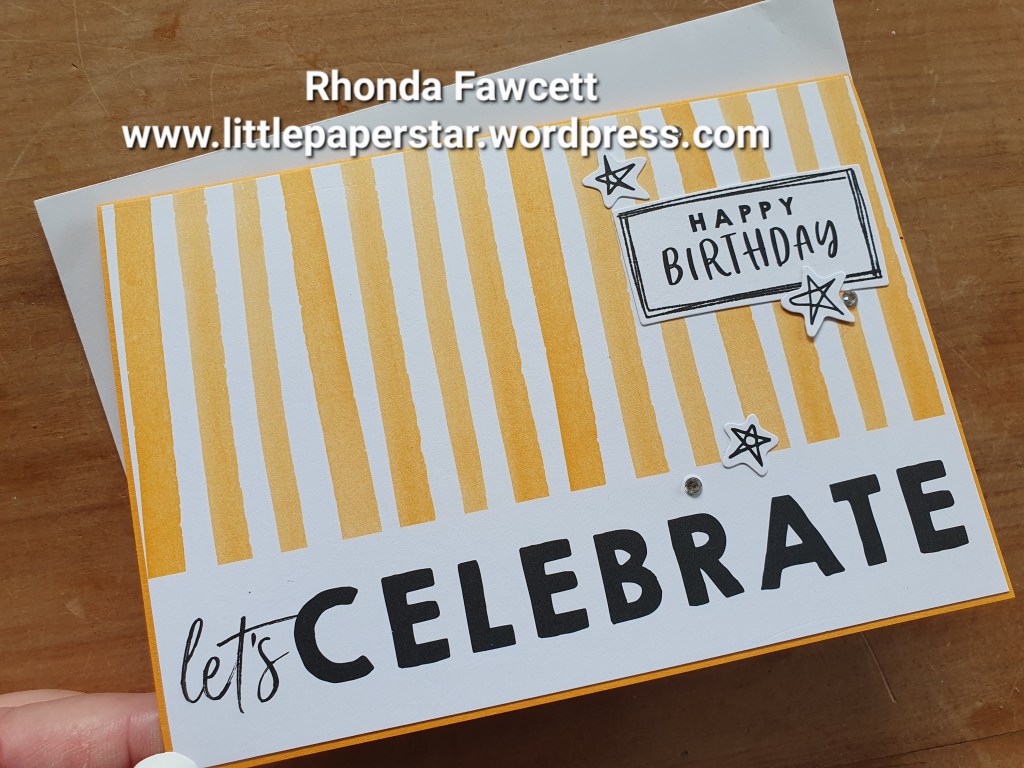
I teach Memories and More scrapbooking classes. Each week the focus is on a different technique. We make title cards, filler cards and journal cards to go in our albums.
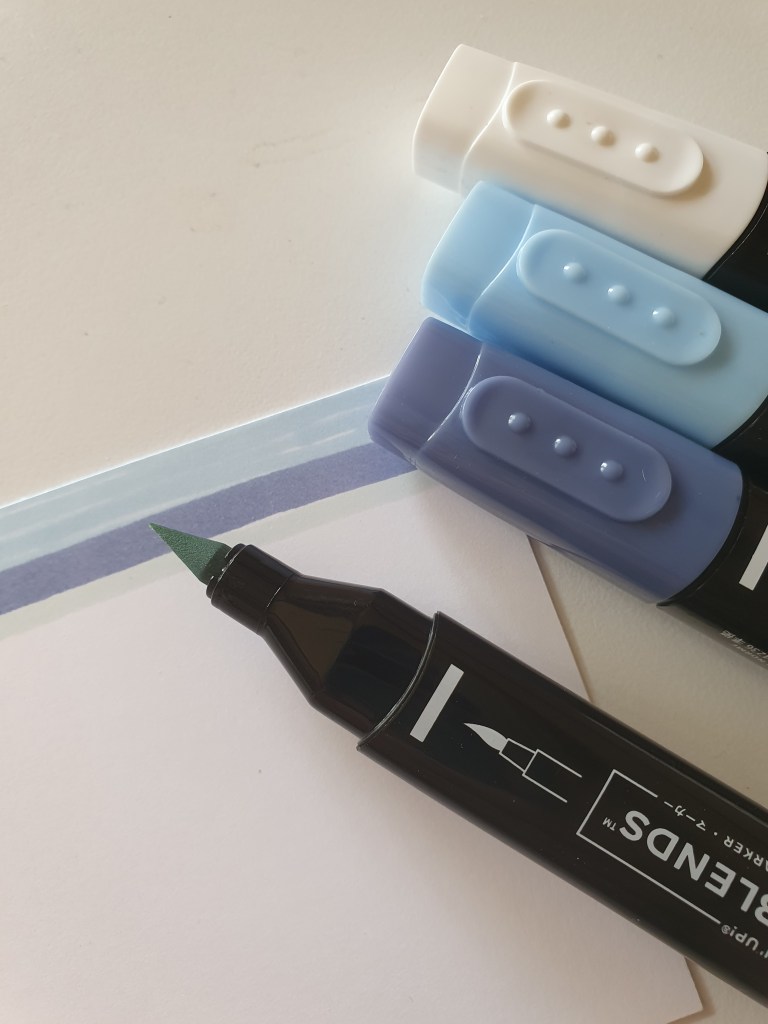
The Happy Day filler card above was made by creating stripes with the Stampin Blends, then using a colour lifter in the opposite direction to create a gingham pattern.
The Happy Day words are from the Birthday Chick dies. I separated the words out so I could remove birth and just keep day.
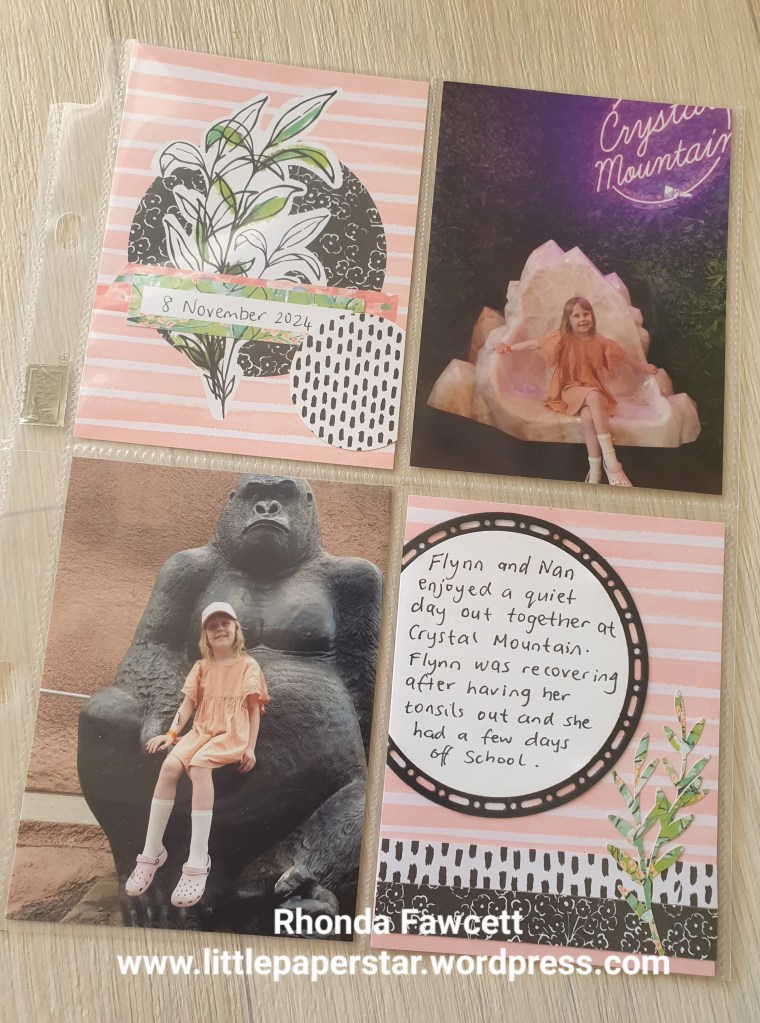
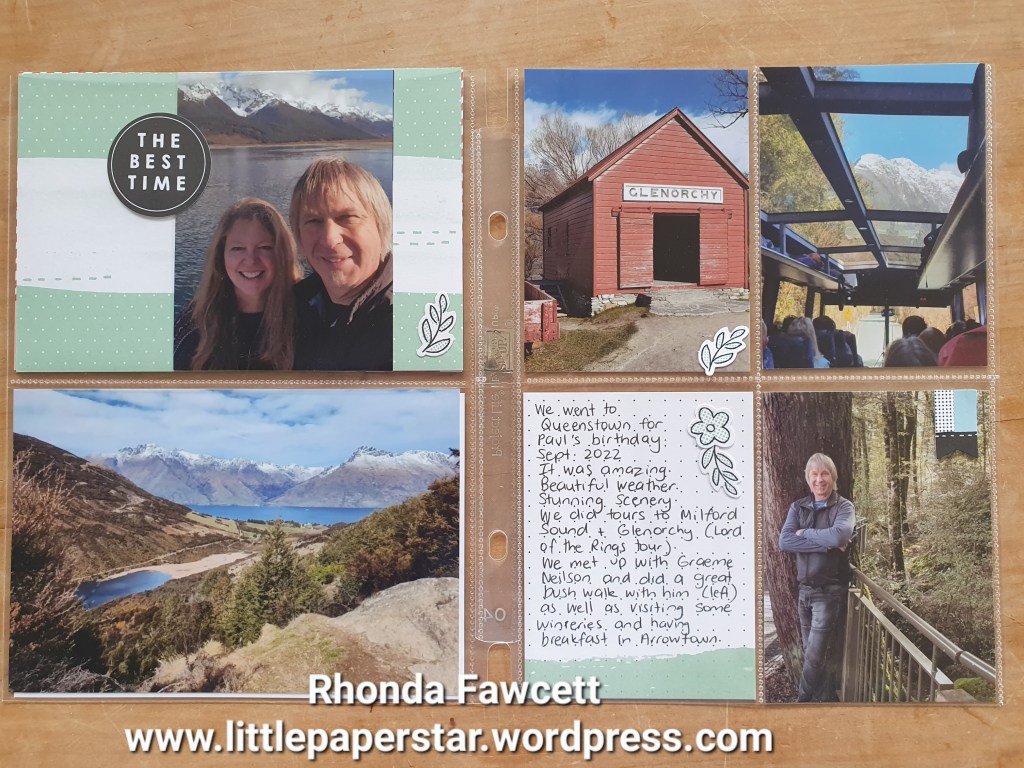
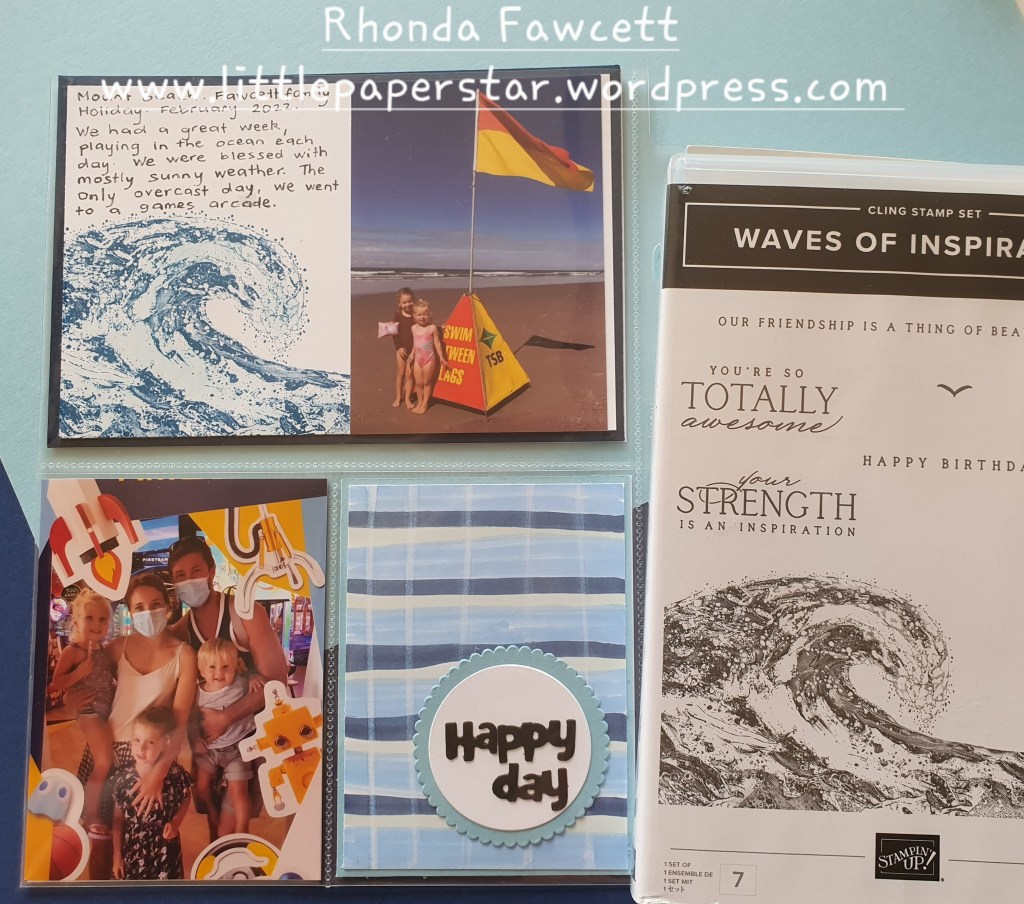
I have been doing some more simple scrapbooking by putting my recent holiday pics in an album. I am loving using the Stampin’ Up! mini 6 x 8 album with the pocket pages as it is super quick to get photos in.
I used the Many Messages bundle to add some wording and new Abstract Beauty Ephemera Pack to add some embellishment.
People have asked me how do I scrapbook the large portrait photos when our 6 x 8 albums don’t have pockets for them.
Well, I used to try and cut them down to fit into a small pocket or just put them in the large pocket sideways but neither of those options were ideal. But good news is that I have found a way to print two portrait size photos together on to one landscape 6 x 4 photo.
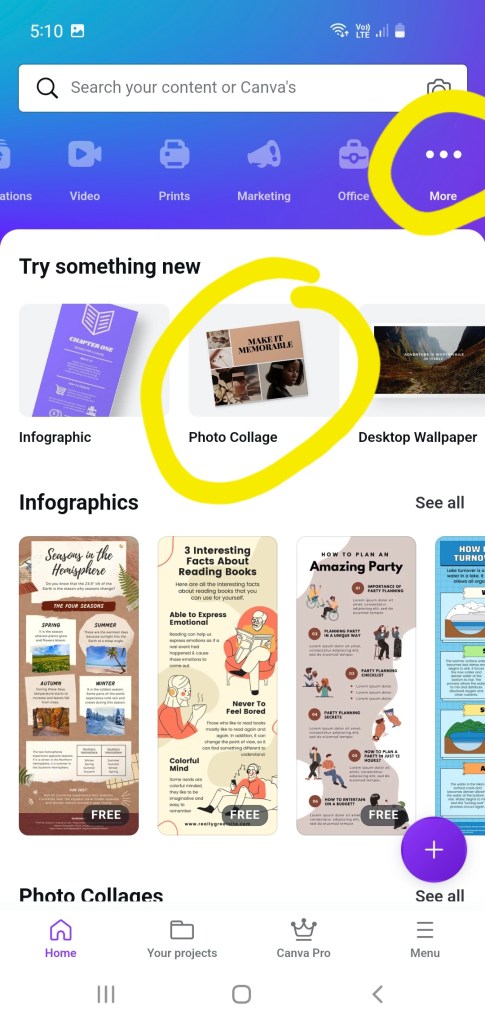
Here’s how: I use two apps on my Samsung phone. One is printicular which sends my photos straight to my nearest Warehouse Stationery to get printed. The kind staff at Warehouse Stationery loaded the app on my phone for me. The other app is Canva and this is where I edit my photos.
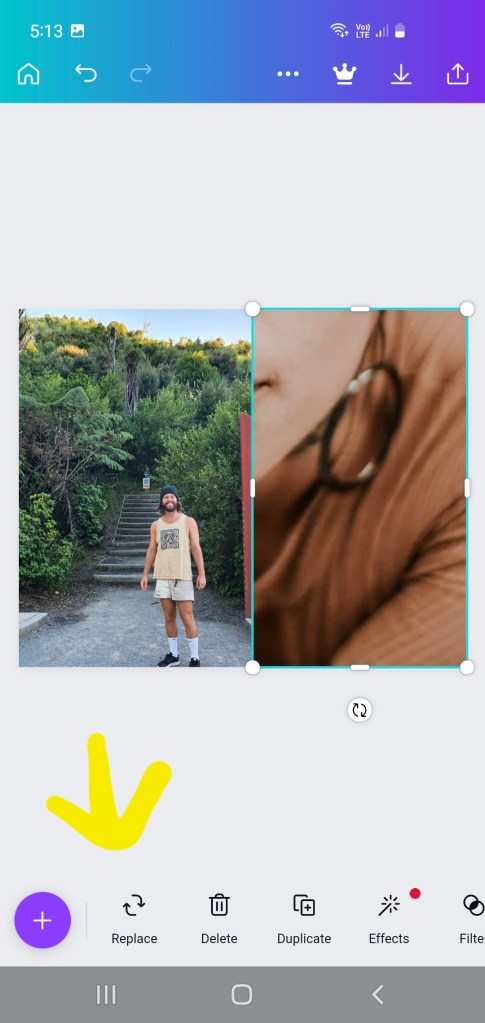
I open canva app. At the top blue banner, I go along until I find the … more button, then select photo collage.
Select a free template that doesn’t have too many elements in it. Click on the photos and words and start deleting them, until you have only two photos left.
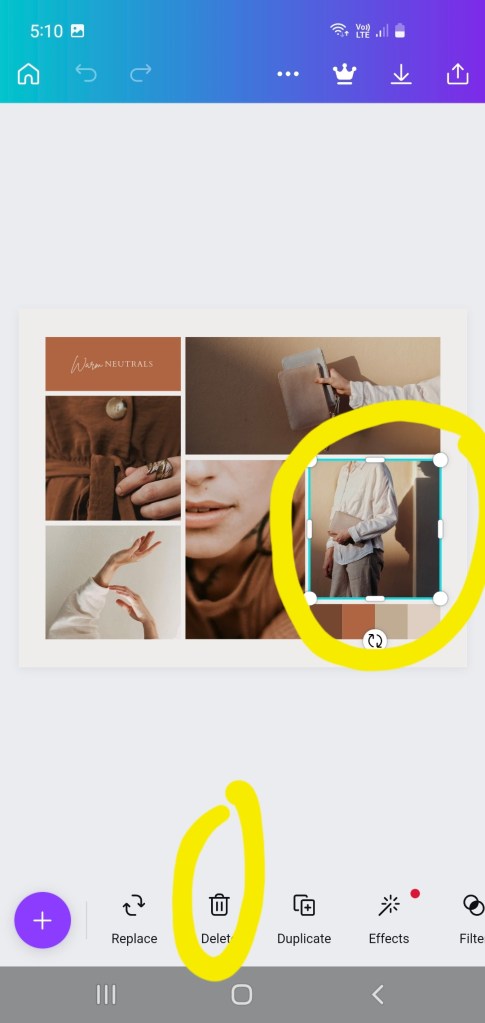
Click on the photos, one photo at a time and use the side bars and corners to move and enlarge both photos until they take up half the template each.
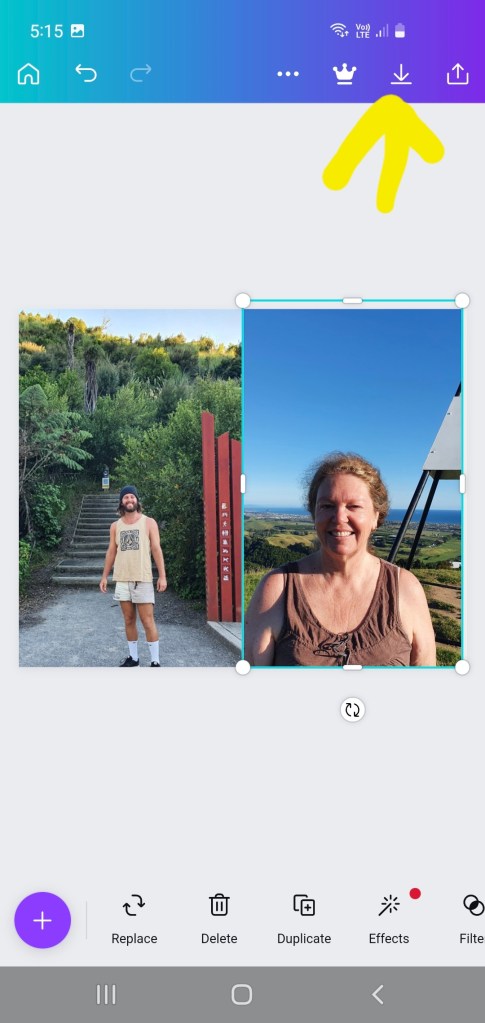
Then click replace, it should bring up photos from your phone’s photo gallery with which you can replace the photos, (one at a time).
Then click download and save (see photo above).
It will say, preparing your design. Then it will say “saved to gallery”.
You will find it in your photo gallery app under canva category. You can then open your printicular app and select photos to print.
I selected the photo below and once it is printed, I get an email from Warehouse Stationery to go and collect it. I cut it in half to fit in my album pockets and save money as I get two photos for price of one! 😄
Once you have made up this and saved it in Canva, you can next time go directly to your projects and swap out the two photos for two new ones. You won’t need to go through the whole process again.