Cute as a Bug

I am having a lot of fun using the new Cute as a Bug Designer Series Paper (DSP) from Stampin’ Up!

I particularly liked this sheet with block designs on that you can cut up into 9 individual pieces to use for card making or scrapbooking.

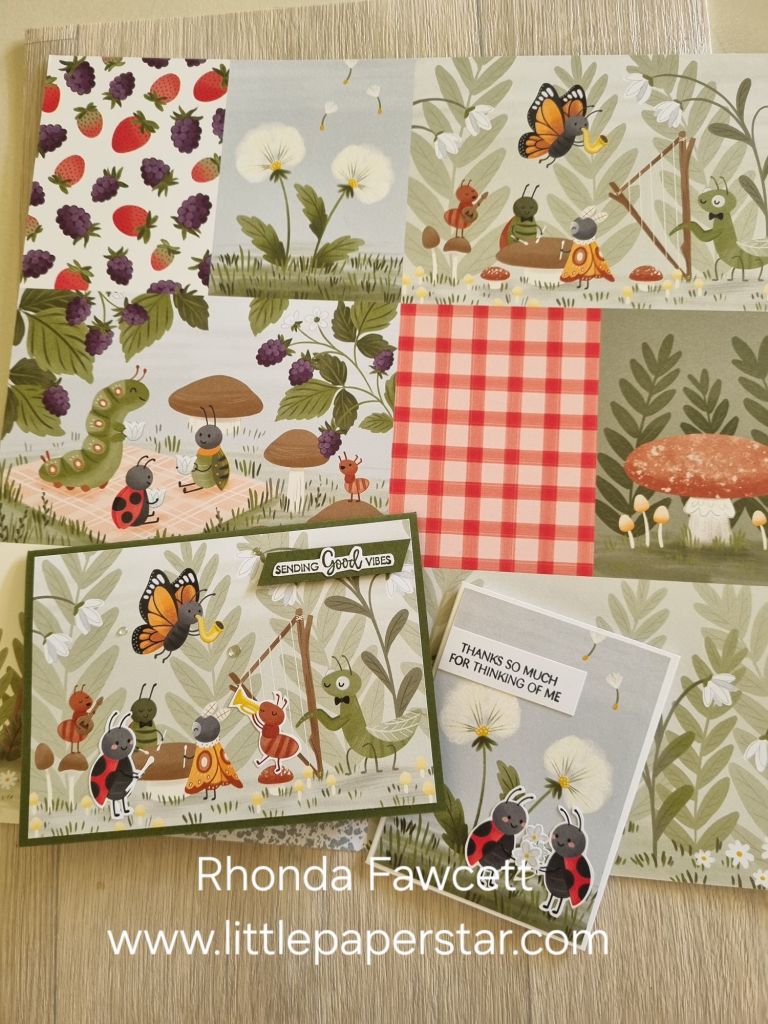
The good thing is once you separate the blocks, there is no further cutting you need to do. Just use them…They are the correct size to use with Memories and More cards and envelopes.

They are also the correct size for our Memories and More albums

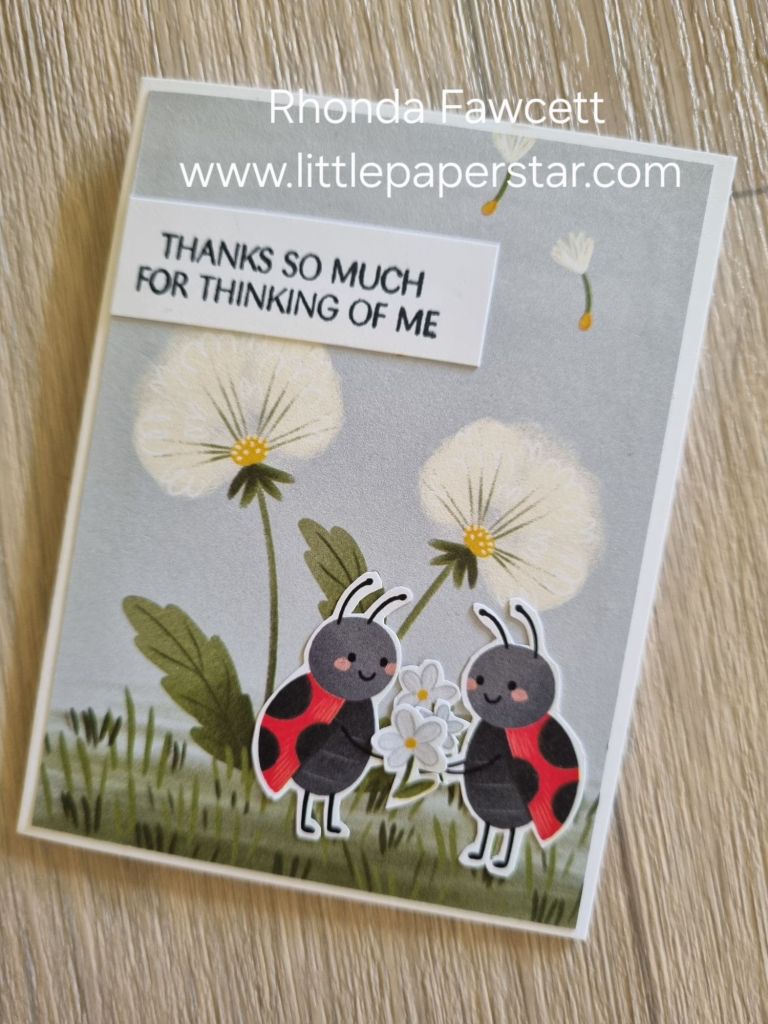
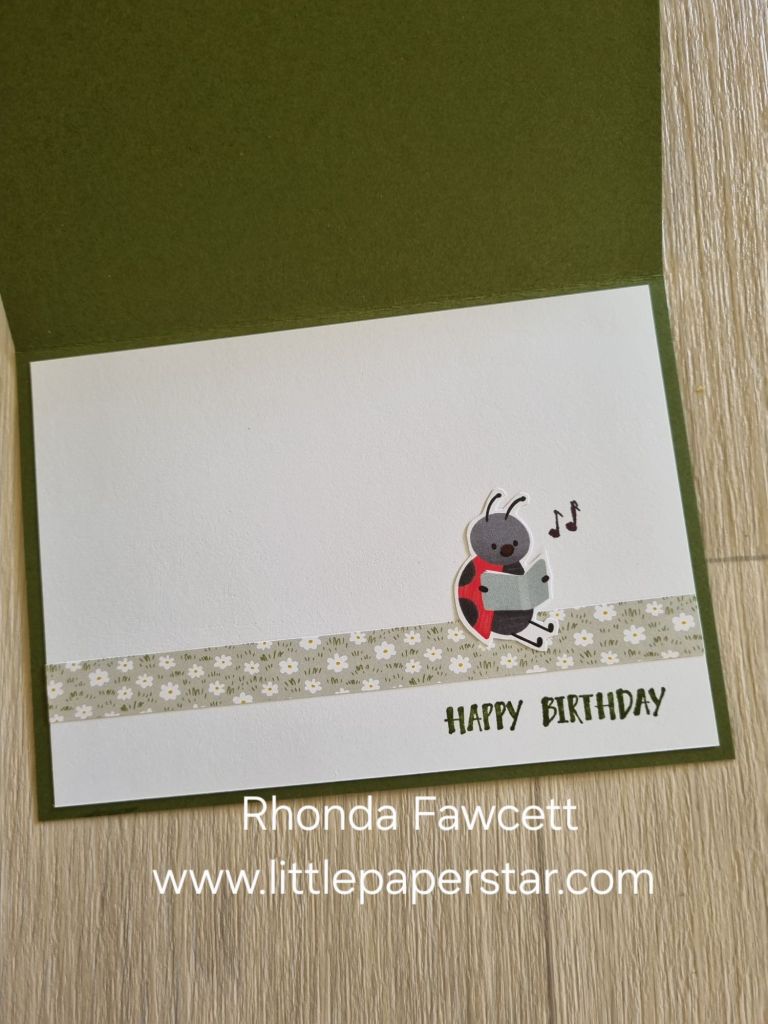
I did trim one block down slightly to make this folded A5 card. I added extra bugs which I fussy cut out. There are dies you can buy and use if you don’t like fussy cutting.

I cut out another ladybug for the inside. There is a matching stamp set  I could have used here instead. I coloured the bugs mouth and drew music notes with a fine black permanent marker.

The paper has lots of bugs, strawberries, blackberries and mushrooms.

It is very whimsical. Go to Stampinup.com to check it out. Any New Zealand orders for this DSP (placed through me) will be given a free tutorial via email as token of thanks 😊

Iridescent Treat Bags

Stampin’ Up! currently has these gorgeous treat bags for sale. They have a lovely yellow pink shimmer gloss to them. They come in packs of 20 and are the same size as a photo 6 x 4″. They are super versatile. Here are some ideas:

1) The first and most obvious use is to put treats inside and tie it off with a ribbon.

I recently was at a church women’s night and we decorated these Christmas iridescent baubles. The Stampin’ Up iridescent bags were the perfect packaging for them.

I used them at Christmas time to make gusseted treat cards. For the cards,  I was still using the Iridescent Treat Bags like a normal treat bag but stepped it up by putting the treat bag inside a decorated card.

2) Embellishments: One of the lollipops on the card front was made by die cutting a circle from another treat bag.  These treat bag make great embellishments when you cut them out. I have seen lovely flowers and leaves made from  them.


3) Shaker cards: Another way to use the Iridescent Treat Bags is to make a simple Shaker card. This card was cased from Lynsay Mahon. I placed a 10 cm  x 14.4 cm piece of white card inside the Iridescent Treat Bag , then added sprinkles before taping it closed. I did have to fold over one edge to make sure it was tight around the vanilla card. I then taped this to my night of navy card front. And finally added a greeting to the front.


4) Shimmery background for cards.
I used the Iridescent Treat Bags to make this glimmering background.  We put a piece of Vanilla card inside the Iridescent Treat Bag.  The bags measure 4″ x 6 “, so I cut the card 3/16” smaller. Then I heated the Iridescent Treat Bag with my heat gun. This caused it to wrinkle and shrink and melt onto the card. I turned the card over and melted both sides. You do have to be careful not to overdo it though as you can melt the Iridescent Treat Bag so that it disappears completely and then you will see a portion of the card underneath and no shimmer in that spot.  (See my last photo).
Once you have melted the bag onto the card, you can then use it as a background for any of your card designs.

What ideas do you have to use these little bags?

Tractor and Co

This birthday card was fun and easy to make using the Tractor and Co Bundle from Stampin’ Up!The Christmas version was taken from the Stampin’ Up! website and the birthday version was adapted from that.

The Thoughtful Journey DSP made the perfect sunrise background for the feeding out of the hay. The Christmas version had glitter foam star embellishments so for the birthday card I decided to use the brushed brass birds instead.

Love and Courage

I have been busy lately with fundraising for Breast Cancer support. Some of my team and I have run a very successful fundraising night where we made cards using the Stampin Up kits. We also promoted the Love and Courage stamp set.

This stamp set is special because it is Pink Ribbon Month this month and Stampin Up are donating $4.25 from every one of these stamp sets sold to support the fight against breast cancer.

We made several cards to give away and a ton of thank you cards for the businesses who supported our event.

This is a beautiful stamp set,worth having in your stash as so many people today are affected by cancer either directly or indirectly and giving a card of support, hope and encouragement is a great way to show that you care.

Here’s some photos from our pink ribbon supper.

Peaceful Garden Fancy Fold Card

This is a card I made for a recent card swap. The pretty paper is called Peaceful Garden Designer Series Paper. I matched it up with the Peace on Earth dies.

Aren’t those little die cut envelopes cute? The sentiment is from the Notes and Totes stamp set. I used the new Black and White and Gold baker’s twine for a touch of elegance.

There is a pop up surprise inside…

I don’t know what the name of this type of pop up card would be. It’s quite small and triangular.

I glued on a stamped dove from the Peaceful Days stamp set to the pop up middle .

I added some extra stamped flowers too. These flowers match the DSP ones on the front.

Black out technique

This was an easy card to make. We put white card through the Sunflower embossing folder, then swiped our Early Espresso ink pad over the debossed side. It filled in all the raised areas with brown ink and left the debossed flowers white.

We then coloured in the flowers using a mix of Blends and daubers.

The sentiment is from the Notes and Totes stamp set.

Tractor and Co.

I used this fun tractor and Christmas tree die set to make a kiwi Christmas card. Tractors are a common sight around NZ but our Christmas time is always in summer so I wanted a Christmas card that showed that, and this is what I came up with.

I chose green and yellow to be like a John Deere tractor. These tractors also have a yellow stripe along the side, so I used the thin piece that makes the roof to die cut the side stripe.

Aren’t the Christmas lights cute? They are die cut from the heads of corn die (which is part of this same tractor set). They’re the perfect shape to make little lights!!!

Inside the card, I used the sentiment from the Notes and Totes stamp set and I sponged a bit of yellow on first to keep it looking bright and summery.

What do you think? Does it still look like a Christmas card even though it’s a summer Christmas?

One sheet wonder

I recently participated in a demonstrator online event which showed us how to get the most out of one sheet of Designer Series Paper. (DSP). We made 6 cards, all using different techniques and using sketches from page 52 of the new Christmas mini catalogue.

We cut our DSP into the separate sections that we needed for each card, then using different colouring and cutting techniques we made our 6 basic cards. Once we completed the 6 templates we went back and added sentiments and embellishments.

For this card, I used a retired Christmas greeting and cut it out with a Stylish Shape die. I matted it on top of the new gold and white twine.

The technique used here is sponging ink over the DSP for a different look. I chose to just sponge the edges with Crumb Cake ink. It gave a antique look for this card which I really loved.

Here are the rest of the cards I made using the sketch guide and techniques on page 52. If you want to learn what I did, follow me on Friday the 3rd of October where I will be doing a Facebook live demonstration of this One Sheet Wonder.

Memories and More album cover

I had a bit if a dilemma when I was decorating my album cover. I had put off doing it for so long but my album was full. It was finally time to finish it properly.

Originally, I kept it simple. Just stamps and ink.

I love the words from this new Peaceful Days stamp set. They are perfect for scrapbooking.

Then I decided I wasn’t completely happy with how plain it was, so I got out my Memories and More Mixed Media Floral card packs and some Stampin Up ephemera, plus retired ribbon and trim to create this cover.

The Designer series paper for the front was a perfect base. Plenty of colour but not too busy, with the pattern only around two edges. The paper is called Painterly Pears and is a new Online Exclusive.

Sunrise Sailing

I love this double z fold card, that was taught to me by Irene Wardlaw at our annual stamp camp earlier this year.

One of the great techniques is the use of the two tone paper. This paper has a white core, which once embossed can be sanded to bring out the textures even more, by revealing the white core.

The birch wood embossing folder was perfect to make waves for this card. Who would have thought a wood grain type of embossing folder would make such effective waves and clouds?

The stamps and dies used are from the Sunrise Sailing bundle. The sailboat dies reminded me of a punch I had a few years ago. The middle Sunrise Sailing die is very similar in size to my old punch. The retired punch is on the left with Basic Beige sails. The current die is on the right with white sails.

Another great thing about this card, is that it can be folded flat for posting.