Sharing my love of all things paper-craft: Card making, Scrapbooking, Gift Boxes, Invitations, Party Favours, Craft Supplies and more. (Formally Stampin'Fantastic)
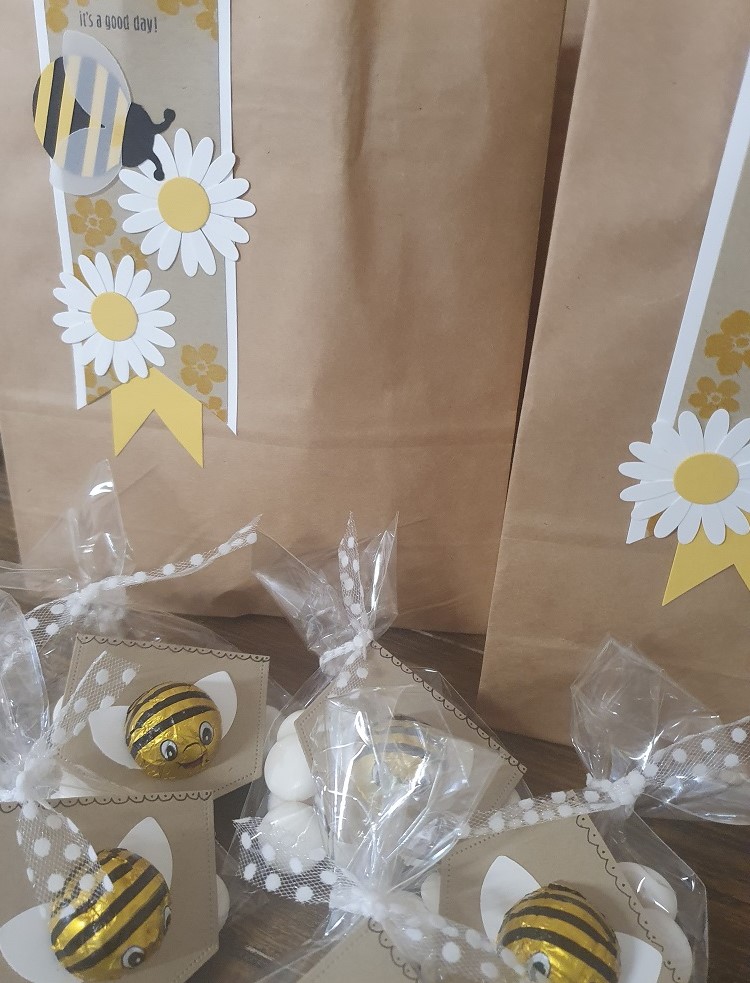
I used the ladybug punch and the daisy punch to create these gift bag tags for the people attending my Auckland cardmaking event. I was excited to discover some little bee chocolates and thought they would make a good addition to go inside the bags.
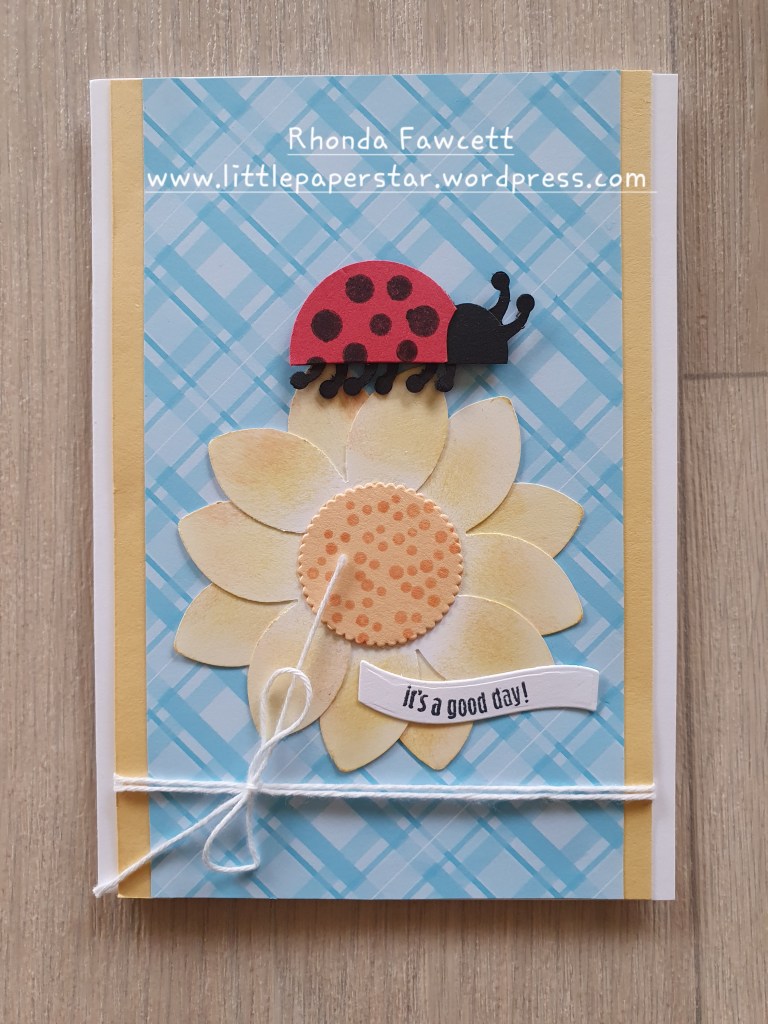
I woke up in the middle of the night thinking about the ladybug punch and wondering if I could create a punch art ladybug to match the one with the smiley face in the stamp set. I was excited to give it a go the next morning. And it worked! (Some of my night time ideas are not realistic!) 😬
I punched the ladybug body from black card and cut it in half. I punched a second body out of Sweet Sorbet card. I cut it in half also and cut off it’s head, I punched out more antenna to add a second one for the head and the rest to make feet.
The sunflower is made with the ladybug wings. Punch out six wings. Sponge with So Saffron ink. Make a square with four wings overlapping the edges. Cut the remaining two wings in half and adhere the single half wing in the centre of each double wing. Adhere a die cut scallop circle on top to finish.
The DSP is the new in colour Tahitian Tide. I love this shade of blue. I think it makes a nice happy card when it is matched with the So Saffron card. I hope you like it.
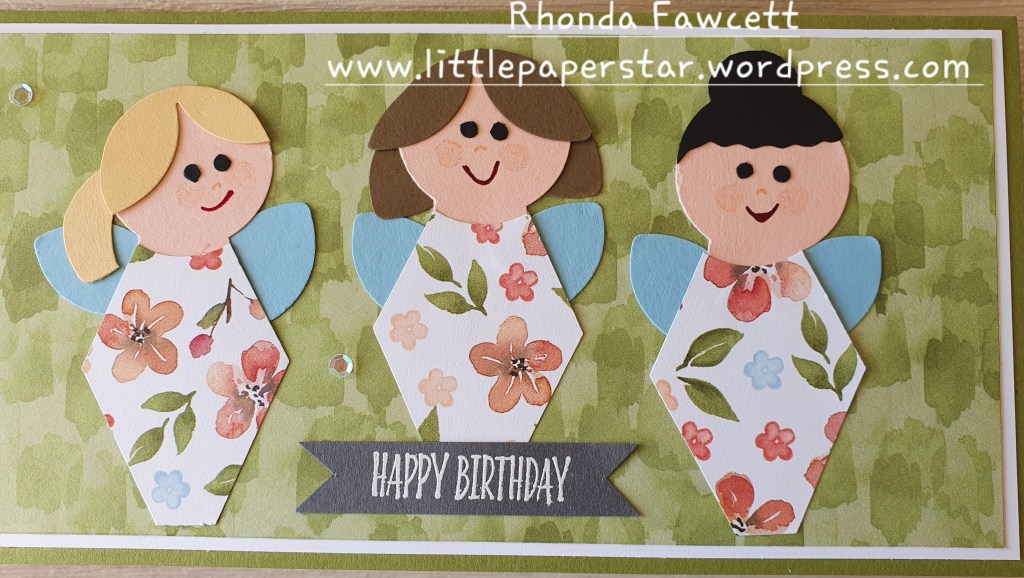
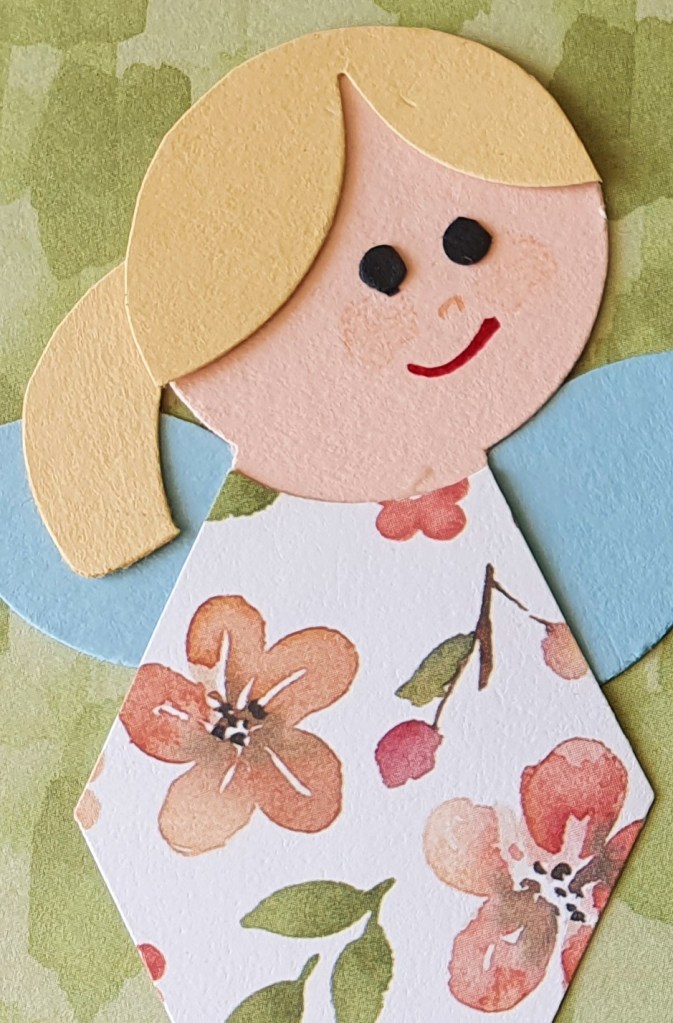
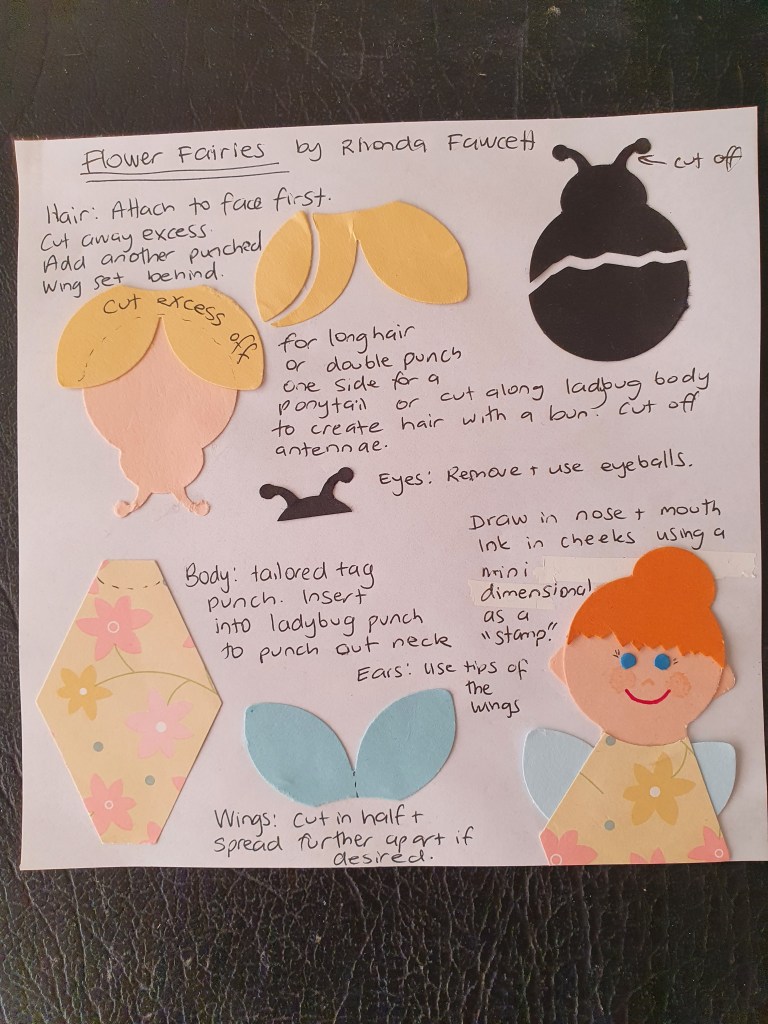
These simple Flower Fairies were made using the ladybug punch and Tailored Tag punch.
I used a marker pen to draw in their nose and mouths. I trimmed the points off a mini dimensional and placed it on the end of a pen. Then I used that to “stamp” some rosy cheeks on the fairy girl’s faces. I stamped off on scrap paper first so that the final result was quite subtle.
Below is a guide to how I put the punched pieces together to create the fairies on my card.
I didn’t give my fairies ears but it is easy to do, if you look at the example below.