An oldie but a goodie. This is the Spotlight technique where you choose a portion of the stamped image to spotlight and just colour in that portion.
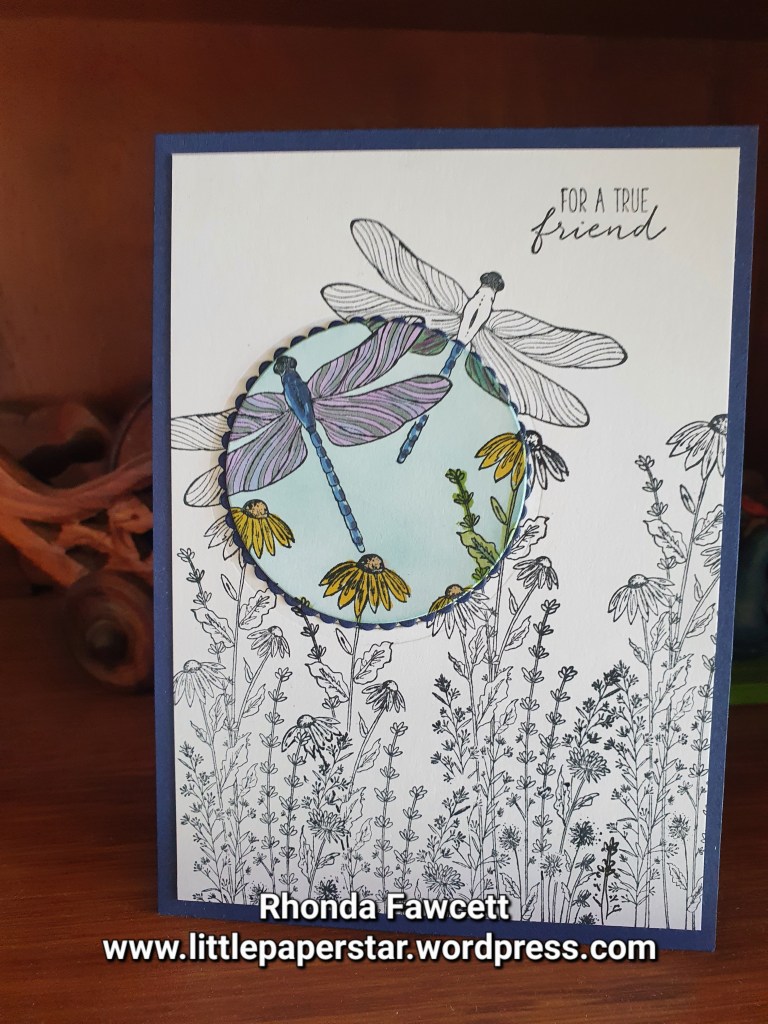


An oldie but a goodie. This is the Spotlight technique where you choose a portion of the stamped image to spotlight and just colour in that portion.

This is a fun and slightly messy technique to create interesting backgrounds for card.
Start with a thin layer of shaving foam. I used the cheapest I could find and I spread it out on a large piece of tin foil. Use three different colour re inkers from Stampin’ Up! and drop in several drops of each colour. Use a tooth pick to swirl the colours. Don’t mix too much. Then lay your basic white card piece into the foam. Lift it off and scrap away the excess foam with a plastic knife. Pat the card dry on a paper towel and set aside to dry completely. (It doesn’t take long, maybe 10 minutes). Then repeat.
Each time you drop the card into the shaving foam, you will get a different pattern or result. Sometimes the colours become very muddy as the excess foam that has been scrapped back in has mixed all up together. You can always add fresh drops of ink when this happens and keep going. One lot of shaving foam spread out on tinfoil will make many card fronts.
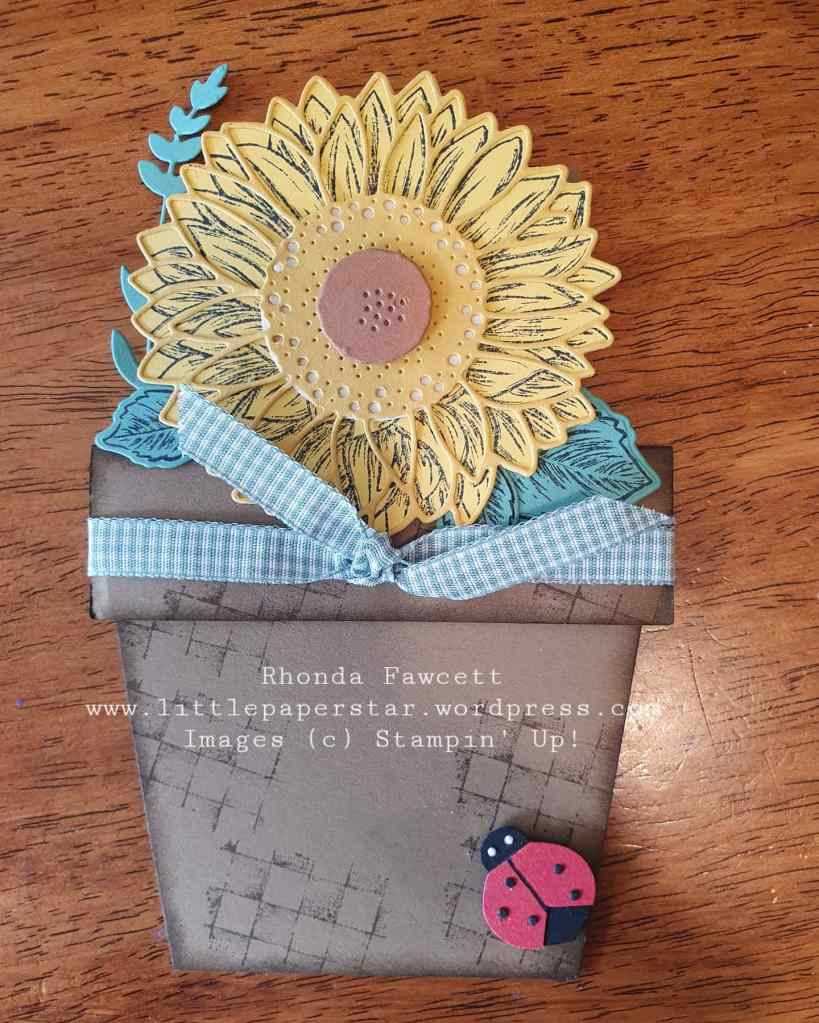
I used my card front as a background for these Sunflowers.

Here are my original pieces. First card doesn’t have much mixing of the colours. The second go I did, looks different as the ink colours have mixed together more. No two pieces will be the same and that’s part of the fun of it.
I hope I have inspired you to give it a try.


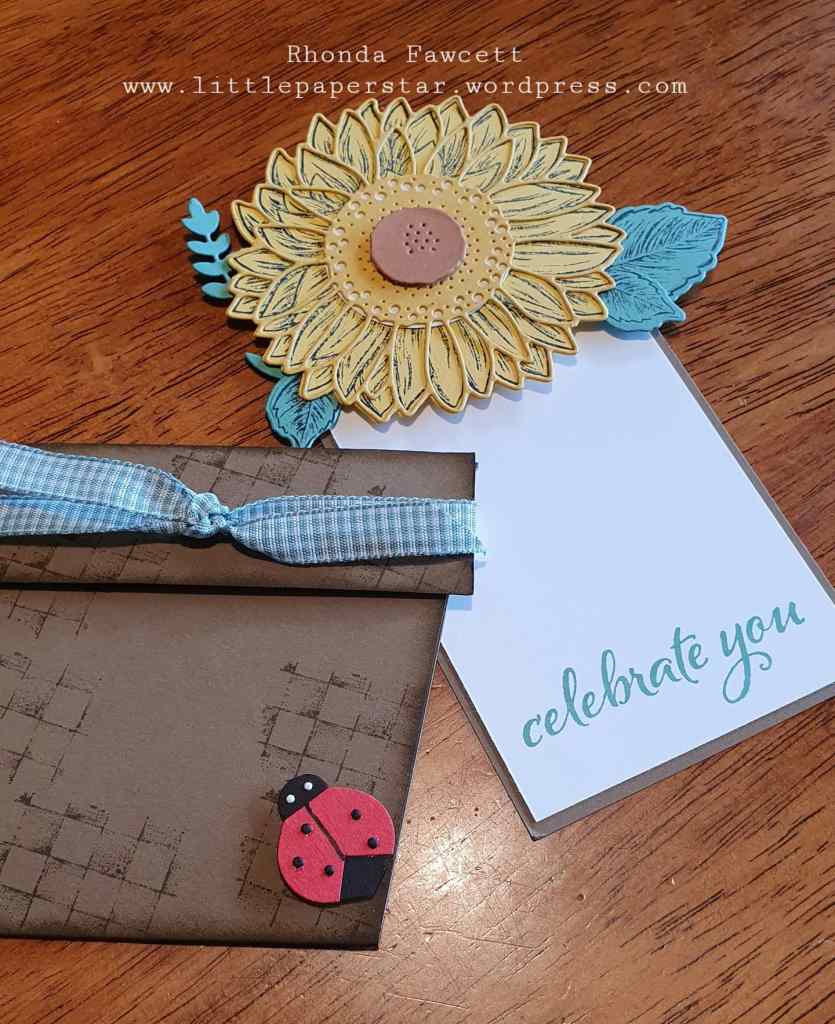
This was a card that I designed for a craft event last year. The products are all still available for you to buy and recreate this card with the exception of the punch art ladybug.
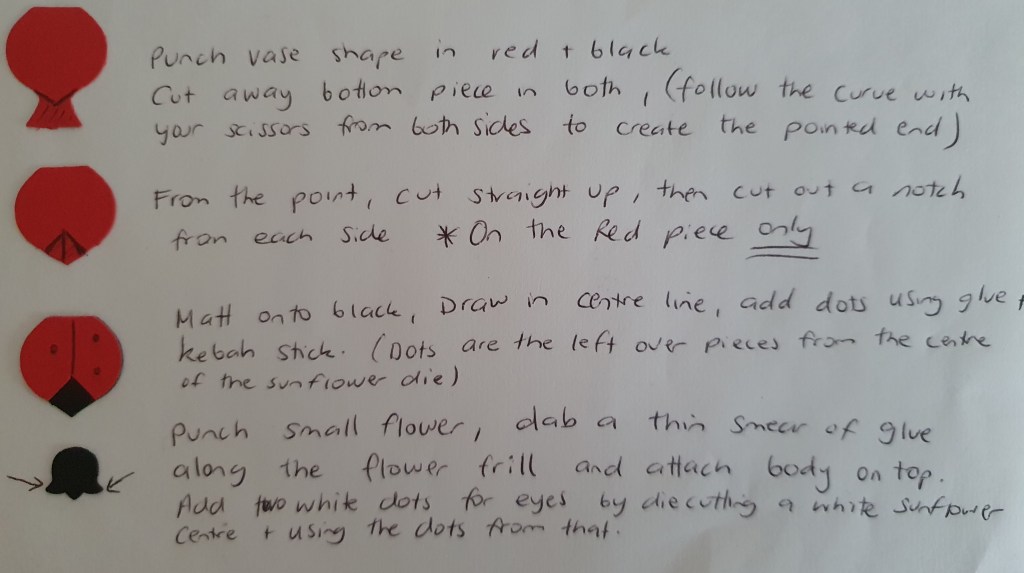
This was made with the now retired vase builder punch. Scroll to the bottom of the page to see the instructions.

Same Design. Two Different Colourways.

Products used above are Basic Black card base. Matted with Gray Granite card and a strip of In Good Taste DSP.
The sunflower is made with Bumblebee card and stamped in black ink. The diecut sunflower layer is Daffodil Delight and the flower centre is Cinnamon Cider. The leaves are stamped in black on Mossy Meadow card. Embellishments are linen thread and In Good Taste Wooden Elements.
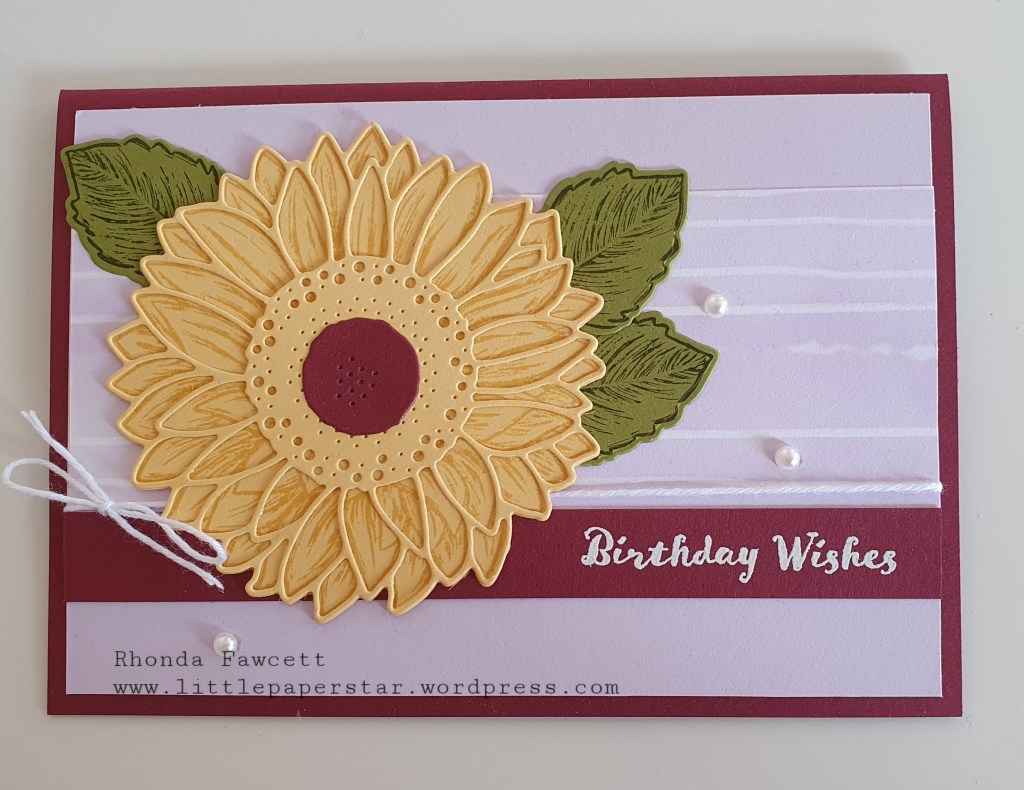
This second card has a card base in Merry Merlot, matted with Purple Posy card and a strip of Playing with Patterns DSP.
The sunflower is So Saffron card, stamped with So Saffron ink and topped with a So Saffron diecut flower. The flower centre is Merry Merlot. The leaves are Old Olive card stamped with Old Olive ink. I used some retired white bakers twine which I have heard will be available for us to order again soon. Yay!
I love getting feedback so please let me know which colour layout you like the best. Thanks.

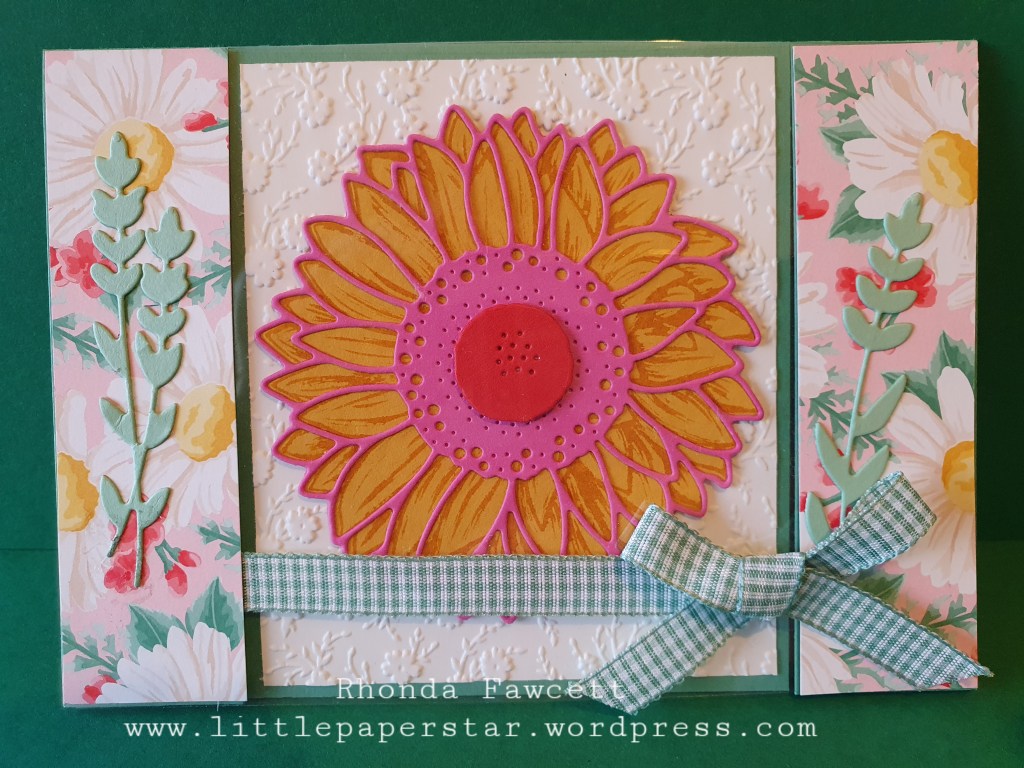
This colourful card features the Celebrate Sunflowers stamp set. It has two front openings. The first one to lift up or open up is the floral side panels with a clear window sheet between them. The second one to lift up is the centre sunflower piece.
To make this card, I started with an A5 piece of Just Jade card folded in half. I cut 3 cm in from each side to make the 2 side panels. Then I adhered a piece of window sheet on the front, attaching it to the side panels. The window sheet measured 14.5cm x 10.5cm. I added ribbon across the front and then covered the side panels with DSP measuring 10.5cm x 3cm.
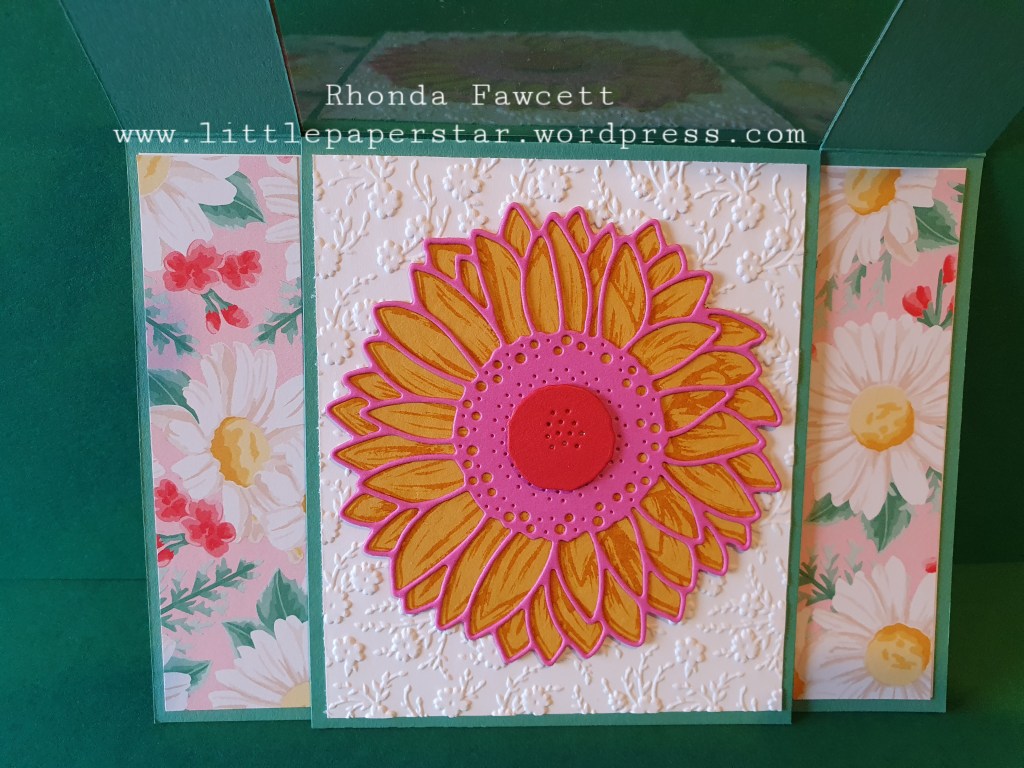
The second opening features a diecut sunflower on a white embossed card piece. The white card measures 10cm x 8.5cm and is embossed with the Ornate Floral embossing folder.
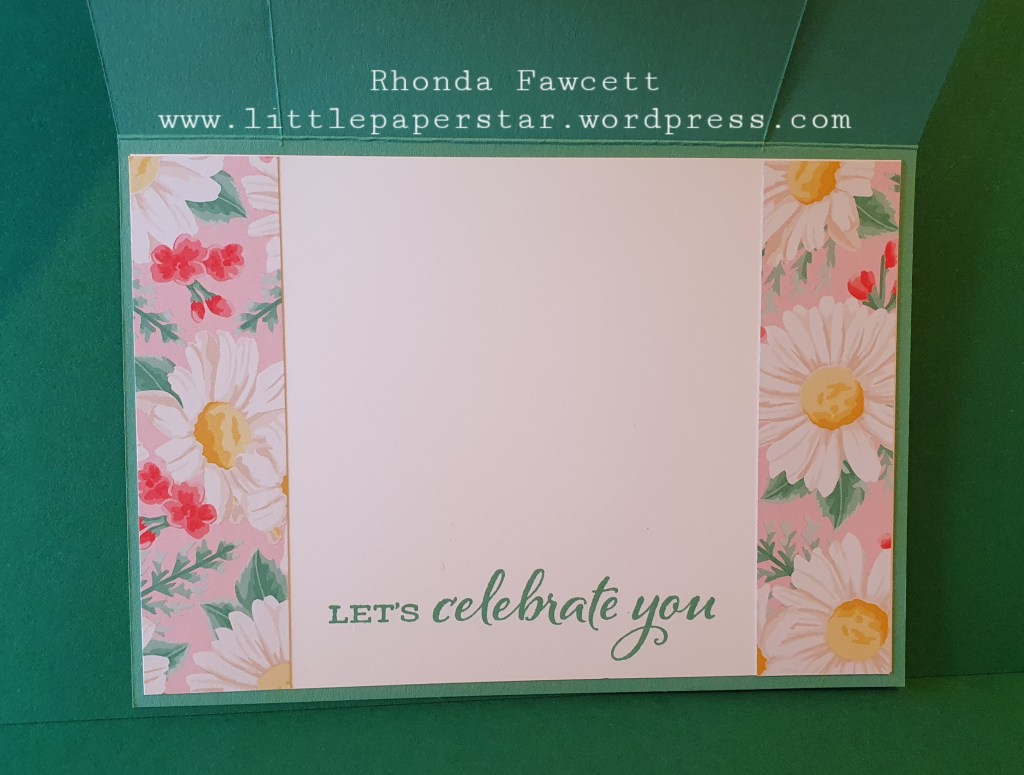
The inside of the card has a greeting stamped across the bottom and more DSP at either side. These strips of DSP measure 9.8cm x 2.7cm

