Country Home Pocket Card

Below are the written instructions (with metric measurements – to fit our NZ C6 size envelopes). If you don’t have the country home stamp set and you would like to buy one, you can purchase one through me. It costs NZ$46.20 (with shipping included)
Every purchase will get a kit with all the pieces needed to create this card.

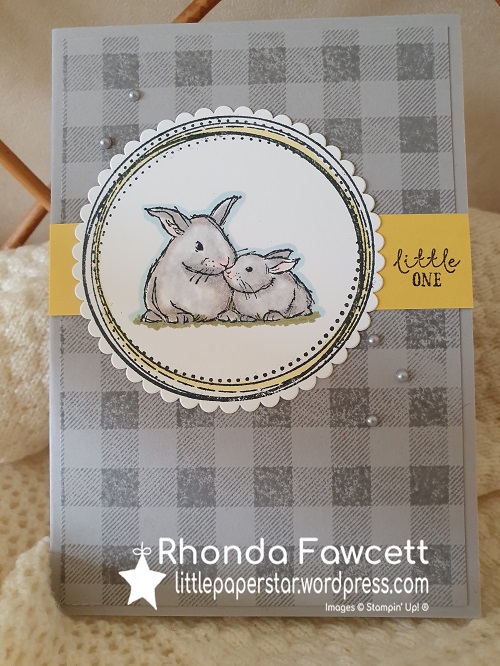
Stamps: Country Home, Special Celebrations, Buffalo Check
Ink Pads: Memento Black, Rocco Rose
Card/Paper: Crumb Cake, Rocco Rose, Very Vanilla

Blends: Assorted colours

Accessories: Puff Paint, Dimensionals, Rocco Rose Ribbon, Dauber, Designer Elements
Punches:
 Timeless Label, Circle Punch 1” or 1½”
Bigshot items: Tin Type embossing folder, Woodgrain embossing folder, Layering oval dies,

Other: Envelope punch board, Heat Gun

Instructions:
1. Cut a sheet of Crumb Cake card to 20 cm x 20 cm. Put in the envelope punch board at 8.5 cm. Punch and score all sides as you would for an envelope. Trim off one of the short ends of the “envelope”.
2. Taking one flap at a time, put into the Tin Type embossing folder and emboss the flap. It is easiest to just wind it in the bigshot until you come to the end of the folder and then rewind back out again, rather than going all the way through.

3. Make up the “envelope” pocket.
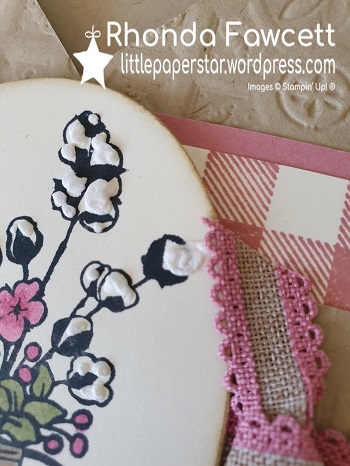
4. Cut Vanilla card to 7.7 cm x 10.5 cm and stamp with Buffalo Check stamp. Mount on Rocco Rose card (8.5 cm x 10.5 cm). Add a strip of crumb cake on top that has been embossed with the woodgrain folder. Adhere a piece of Rocco rose ribbon around all these pieces and attach this layered strip to the front of your pocket. (You add the knot later).

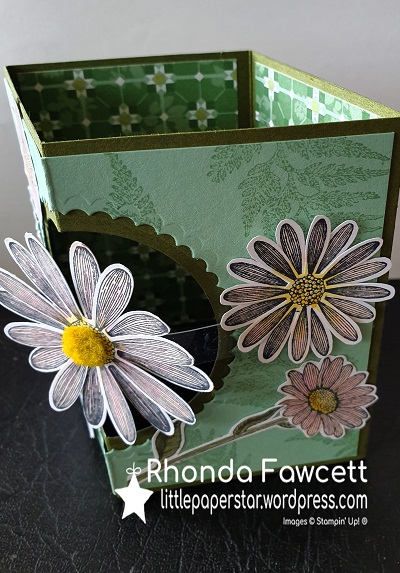
5. Stamp urn and flowers on vanilla card. Cut out with an oval die. Dauber edges. Colour image with blends. Add puff paint to the cotton flowers and heat to set with a heat gun.
Attach to front of card with dimensionals.
6. Tie a loose knot with another piece of Rocco Rose ribbon.  Add to card with some glue dots.
(You will need to play around with the ribbon, so it sits nicely and doesn’t have the wrong side showing).
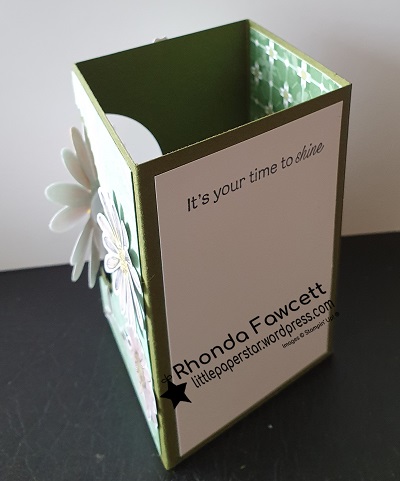
7. Make an insert by stamping a sentiment on a 14.3 cm x 9.8 cm piece of vanilla card. Matt onto a 14.8 cm x 10. 3 cm Rocco rose card. Adhere on timeless label shape for the insert “pull” and add a designer element embellishment to finish.
8. Punch a half circle in the back of your pocket at the top (see photo). This makes it easier to grab the insert to pull it out.

A close up of the puff paint

Contemporary Christmas cards and tags

I wanted to make a modern and minimalist Christmas Card. None of my current Christmas stamp sets were suitable so I had to look outside the box. This is what I came up with…
I ended up using the light beam from the High Tide stamp set as my Christmas tree!
I would love to know what you think about it.

The background is sponged lightly with Balmy Blue ink. The tree is stamped in Granny Apple Green ink. The pot is punched out in Gorgeous Grape card stock.
I made some tags using a stitched rectangle die cut as my base

6 x 6 Designer Series Paper

Are you like me and buy up loads of gorgeous paper and then don’t get around to using it all? Maybe you don’t want to cut into it just yet. Here is a quick video showing how to use your designer paper to make regular size greeting cards.
The best thing is that you get to see both sides of the pretty paper and it is a quick way to make a card.

Snow Globe Card

This card is surprisingly easy to make using the snow globe scene dies and shaker domes. The domes have adhesive both sides.
The first step is to die cut your hole for the globe on the top card, in my example it is the Balmy Blue card. Lay the Balmy Blue card on top of the navy base card and trace inside the die cut hole with a pencil. Now die cut some patterned paper with the globe die and glue the paper inside the pencil lines. Build up your snow globe scene on this patterned paper. Add sequins for the “snow”.
Peel off the adhesive from the front of your shaker dome and insert (from the back) into your Balmy Blue card. Add extra adhesive to the bottom of your Balmy Blue card. Peel off adhesive from the back of your shaker dome and adhere to Navy card.

Altered Tin

Looking for a quick and easy project? Try an altered tin!
I used an empty sweet tin and covered it with the pretty Magnolia Lane Designer Series Paper. I made a little flower using the Magnolia Memory dies to go on top. The flower has a tiny bit of Petal Pink sponging in the middle. Very simple but very elegant.

Floating Daisy Card

This is a fun fold card that uses half a sheet of A4 size card, cut in half length-ways.
It folds flat for posting and when it stands up the big daisy in the middle pops out and looks like it is floating.

There is room on the back of the card for you to write a message

Mosaic Mood Paper Fan

I brought a cheap paper fan from the coin save shop and pulled it apart carefully. I used the original fan as a template to cut out and score one from the pretty Mosaic Mood speciality paper.
My tip would be to use light weight paper, not this heavy paper that I used. It does not fold up tightly due to the heavy paper.
You need to be accurate with your score lines so it does require you to work slowly and patiently; but the end result is very pretty.

Triple Tier Slider Card

Here are instructions for making a triple tier slider card (in metric measurements).
This is my first ever video tutorial, so please be kind.
Video features Triple Tier Slider Card, using the Best Catch stamp set.

https://youtu.be/WBZJ3ROQSjE

TRIPLE TIER SLIDER CARD

Whisper White
Tier 1      29.6 cm x 11 cm (score at 9.9 cm and 19.8 cm)
Tier 2      26 cm x 8 cm (score at 8.6 cm and 17.4 cm)
Tier 3       7.8 cm square

Balmy Blue Mats
Tier 1      10.6 cm x 9.5 cm
Tier 2       8.2 cm x 5.5 cm
Tier 3       7.2 cm x 5 cm

White Mats
Tier 2       7.8 cm x 5.1 cm
Tier 3       6.8 cm x 4.6 cm

Sliding Mechanisms
1.3 cm x 8.5 cm
1.3 cm x 7 cm

Cut slits for sliding mechanisms
Tier 1
Cut in 2.5 cm in from each side of the third section
Start cutting at 1.5 cm and stop cutting at 7.6 cm

Tier 2
Cut in 2.5 cm in from each side of the third section
Start cutting at 1 cm and stop cutting at 6.3 cm

Step it up

I have chosen the Elephants stamp from the “wildly happy” stamp set to show you how you can take a basic card and step it up to suit the level of experience that your customers may have.
We will start with the Beginner Crafter in mind…
This basic card uses an A5 size, heavy white card base with a strip of soft sea-foam card for the sentiment and a scrap of smokey slate for the elephants. This is a good place to start for beginners as they won’t feel pressure to stamp perfectly the first time. They are stamping on to pieces of card that they will then adhere to the base card.
The only technique they will use is fussy cutting. The elephants are adhered to a square of DSP (Designer Series Paper). #simplestampin

Casual Crafter – Add Layers
For the casual crafter, I have taken the same card above and added a A5 base of soft sea foam card, so now the white becomes a mat. I have introduced both the use of a border punch and die cutting with a strip of old olive card and the leaves die-cut from the topical die set.

Avid Crafter – Add Dimension
Stepping it up again, this time I have introduced dimension by raising the elephants on dimensionals and by stamping two lots of the elephant images. The second image just has the heads of both elephants cut out and raised again over the first image (a simple paper tole technique – suggested by my fabulous downline, Janice McConnell).
Dimension is also added with the embossed white background and the pearl embellishments.

Wildly Happy

I love this cute animal stamp set for making baby cards. There is a Mumma Fox and baby, Mumma Elephant and baby, Mumma Panda and baby and the one I used for this card – Mumma rabbit and baby. Plus 5 sentiments to go with the images!
I kept away from the traditional baby colours of blue and pink and went with a soft grey instead. I think it works… What do you think?