Sharing my love of all things paper-craft: Card making, Scrapbooking, Gift Boxes, Invitations, Party Favours, Craft Supplies and more. (Formally Stampin'Fantastic)
I love the cute animals in this stamp set. When I first got my set, I thought one of the stamps was a monkey or a bear… turns out that it was neither. It was a lion. However because the animals involve 2 step stamping, I.e. stamp the bodies and heads separately, you can do a lot with them.
To make the mouse, I stamped the lion’s body and head in basic grey ink. I cut off the lion’s ears. Then I stamped the koala’s head so that I could use the ears only for my mouse. The face is the lion’s face with whiskers added using a fine tip marker.
The cheese is made using the present stamp. It was stamped twice with image lined up to make one big present, then die cut using the party hat die to make a wedge of swiss cheese.
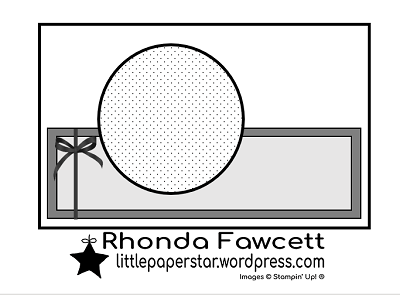
Do you ever get in a funk and want to create but have no inspiration? Use a sketch to get started. Here is a sketch I drew up and then created three cards from.
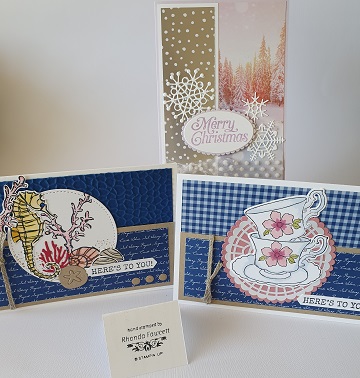
Here are the cards:
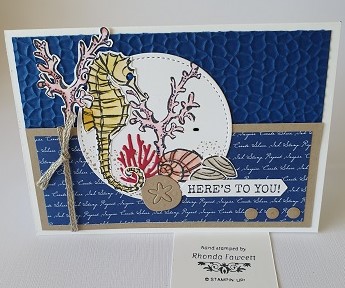
Tea Together stamp set with words from Seaside Notions stamp set
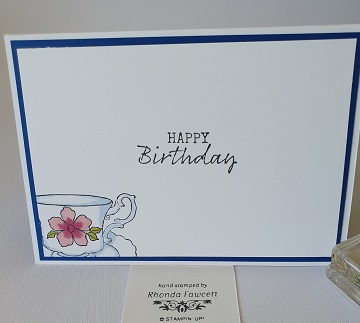
Inside of card Almost the same as the previous card but I have used just the Seaside Notions stamp set For this card, I rotated the sketch 90 degrees anticlockwise.
I would love to see you creations using my sketch. Please let me know what you come up with.
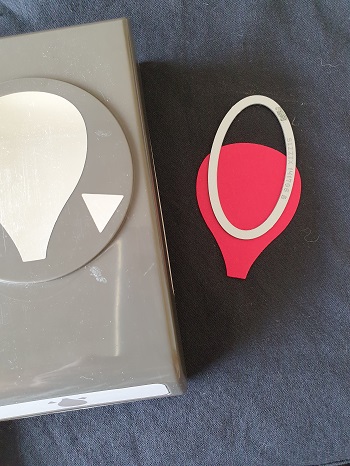
I was asked recently to make a card for a nurse. I had a look for ideas on pinterest and there were quite a few nurse cards, all very similar to mine that you can see below. It is a very simple card to make and my one uses the layering ovals dies from Stampin’ Up! It also uses a variety of small circle punches and the new Hot Air Balloon punch. The stitching detail on this card is made using the straight stitch die from the Nested Labels die set. The little heart is from the dog punch. The pocket is a strip of card with the corners rounded using the envelope punch board. I lightly dauber-ed all the blue edges using Balmy Blue ink to add definition.
Punch balloon shape first, then die cut with an oval as shown. All the grey pieces of the stethoscope are made using the curved edges that you get when you cut frames using two oval dies. Use the single straight line die to create stitching detail on this fun card.
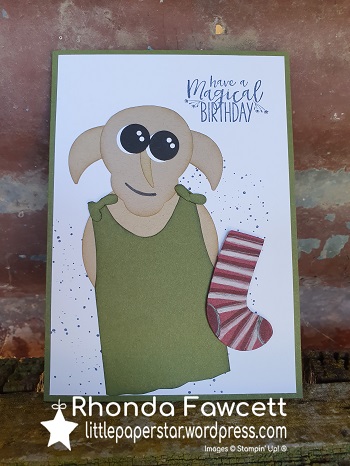
Punch Art made using current Stampin’ Up! punches for a birthday card for my niece. The punch art guide is shown below. I used the Pretty Label punch to do the neckline of the shirt and then trimmed away the bumps to make a full curve. I trimmed curves at the sides for armholes and cut a slightly wavy line along the bottom of the shirt as well. The punched and handcut pieces were all sponged daubered with matching ink. Face, body etc is Crumb Cake, Shirt is Mossy Meadow. The stamp set used was “Magical Mermaid”.
I like this Dobby better, however it does feature a retired sentiment from the “In the Stars” stamp set
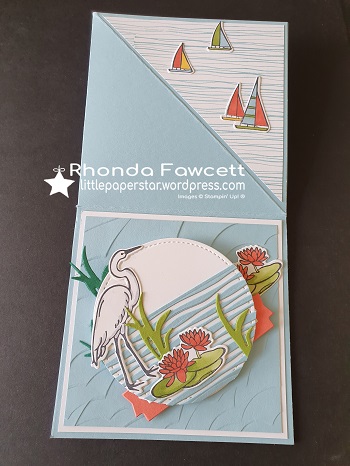
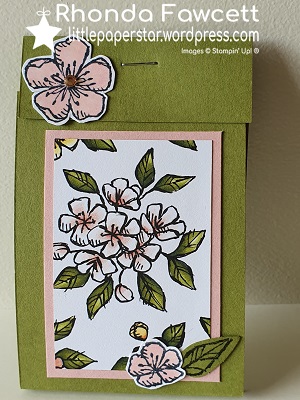
This card uses the Lilypad Lake stamp set and matching dies. The mechanism for folding is pretty easy to make but the colouring and die cutting of all the little pieces is quite fussy.
The best thing about this card is how it folds down to post, yet when open it stands beautifully on it’s own to make a lovely scene.
To fold down, first you have to fold flat the stand up easel with the bird picture, then lay out as a square and finally fold up into the four quarters to fit in an envelope for posting.
Please feel free to email me for more information on making this card. I am giving away instructions for those in New Zealand who want to buy the stamp set from me.
I needed a Blushing Bride Blend pen to colour in these little flowers on a small treat holder and as yet, Stampin’ Up! does not make the Blushing Bride colour. But no worries, as the name suggests, these pens blend together perfectly. I used Light Flirty Flamingo and Dark Petal Pink. The result is a beautiful Blushing Bride! Check out the other mix I did last year
Small treat holder for a table gift. Email me for the instructions.
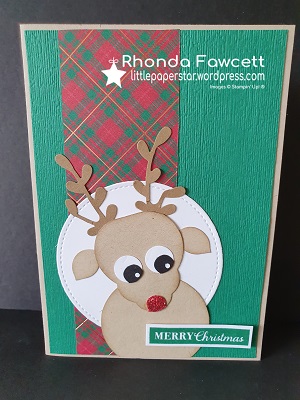
I have been making a lot of punch art cards lately. This one was fun to make. I could have used any punches in my stash, I have a lot, but I deliberatively chose to just use current Stampin’ Up! punches. They are listed here:
Pretty label punch for the face. Leaf punch for the ears. Sprig punch for the antlers. 1/2″ circle punch for the white of the eyes. Vase builder punch (small tulip) for the black pupils and nose. Cut off the jagged frill Decorative ribbon border for the small dot of white to highlight the eyes. Large circle punch for the body, either 2″ or 2 1/4″ – I can’t remember now. I used Crumb Cake card and dauber-ed all the edges. The antlers were punched from Soft Suede card. The sentiment is from the Christmas Gleaming Stamp Set.
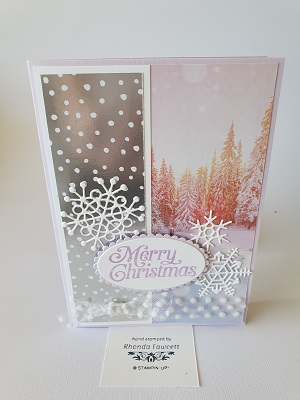
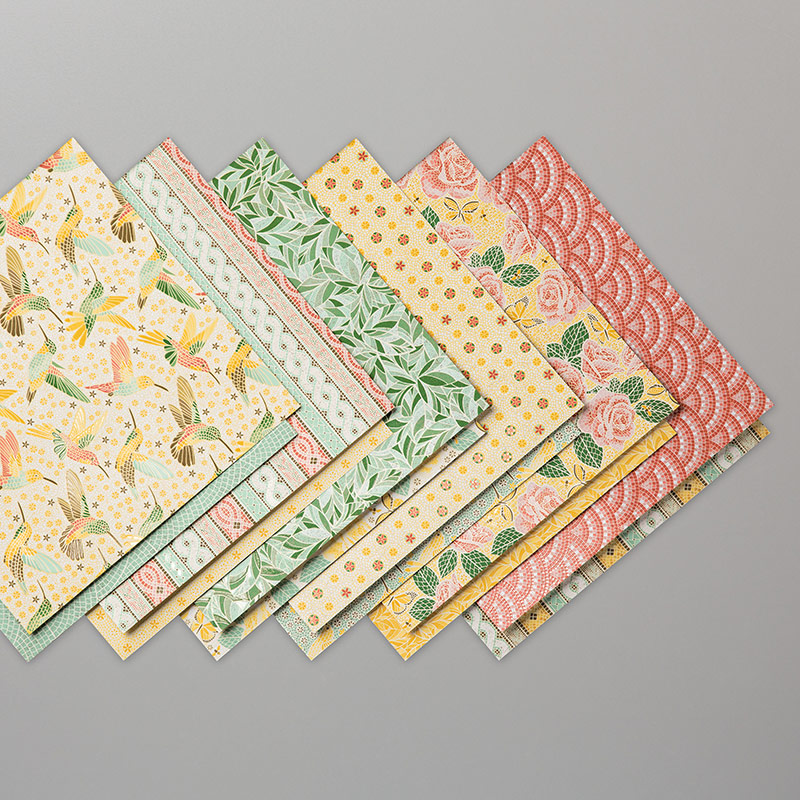
This card is fairly easy to make for a beginner stamper. It involves a bit of fussy cutting, a little stamping and a little die cutting. It is mostly made using the lovely Mosaic Mood Speciality Paper. There are 12 double sided sheets. One side features lovely raised glossy patterns. The other side is plainer but still very pretty. I used Mint Macaroon card as a base. Very Vanilla card to stamp my greeting. The greeting is from the Painted Glass stamp set. To create the stitching under the greeting, I used the straight die from the Nested Labels dies.
Stamps: Sailing Home, High Tide Ink: Memento Black, Night of Navy, Soft Suede, Balmy Blue Blends: Balmy Blue light and dark, Smoky Slate light and dark, Crumb cake light and dark, Soft suede light, Real Red light, So Saffron dark
Card/Paper: Balmy Blue, Whisper White, Early Espresso, Crumb Cake, Soft Suede, Mossy Meadow, Pretty Peacock Come Sail Away DSP Big Shot and Dies: Layering Circles, Smooth Sailing Punches: 1½” Circle
Embellishments: Sail Away Trinkets, Navy and Sahara Sand Bakers Twine, Metallic Pearls Other: Sponge roller, post it notes
Instructions: 1. Use a saucer or a bowl to trace and cut a large circle from a piece of A5 sized Balmy Blue card. 2. Fold circle in half, burnish well. Add DSP to one half of circle only.
3. Cut a 2⅞” circle from balmy blue card and stamp half the circle with water stamp from high tide stamp set. Then sponge over the stamped portion with balmy blue ink. Stamp birds on top right-hand side of circle, then attach circle to centre of the base card.
4. Stamp lighthouse and anchor in memento ink. Colour with blends and die cut out. 5. Stamp compass in soft suede ink and punch out.
6. Stamp small sailboat, (colour with blends) and sentiment in navy ink. Die cut both out.
7. Die cut extra shapes as seen in photo. 8. Arrange all pieces on the front of your card. Attach sentiment with dimensionals. Attach trinket and twine with glue dots. Add a pearl to the centre of the compass. 9. Stamp a large sailboat inside your card and on your envelope to complete.