Sharing my love of all things paper-craft: Card making, Scrapbooking, Gift Boxes, Invitations, Party Favours, Craft Supplies and more. (Formally Stampin'Fantastic)
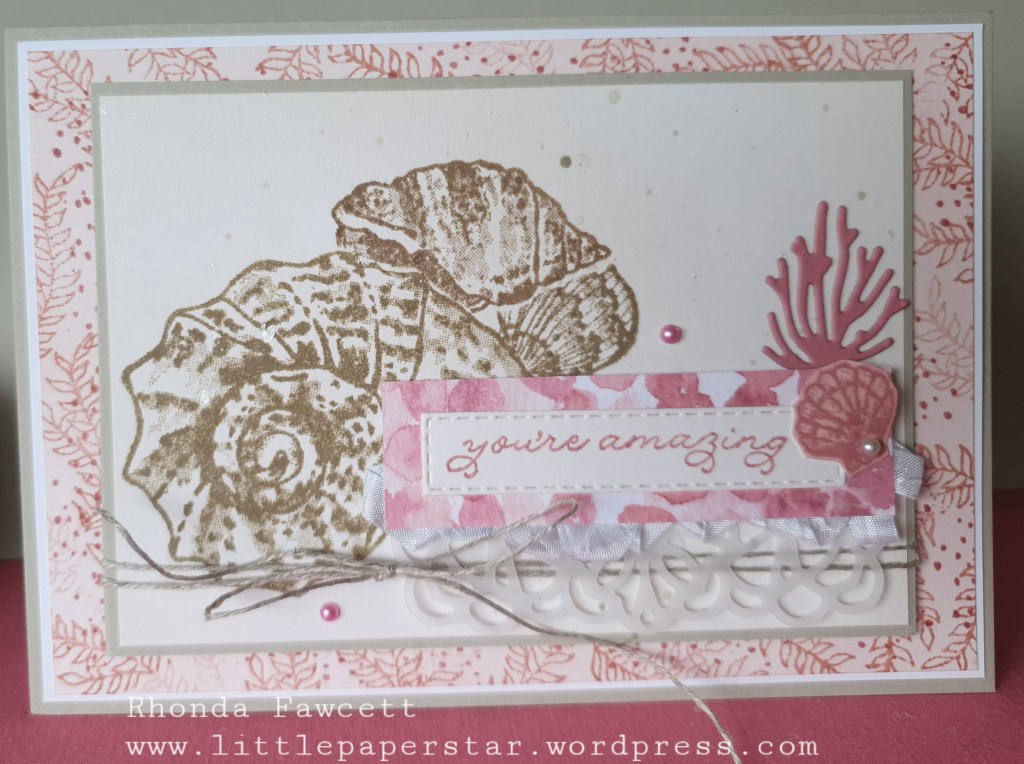
This card is totally not the colours that I would normally do for a beach type card but it was inspired by one taught to us, last weekend at our Stampin’ Up! demonstrator camp.
The card I got my inspiration from had a Sahara Sand hydrangea on it and was taught by Jacque Williams.
It’s a lovely soft card don’t you think? I love all the layers. The soft blending of pink around the edges and the white ribbon and vellum doily. This card has so many elements to it and yet it doesn’t look overdone.
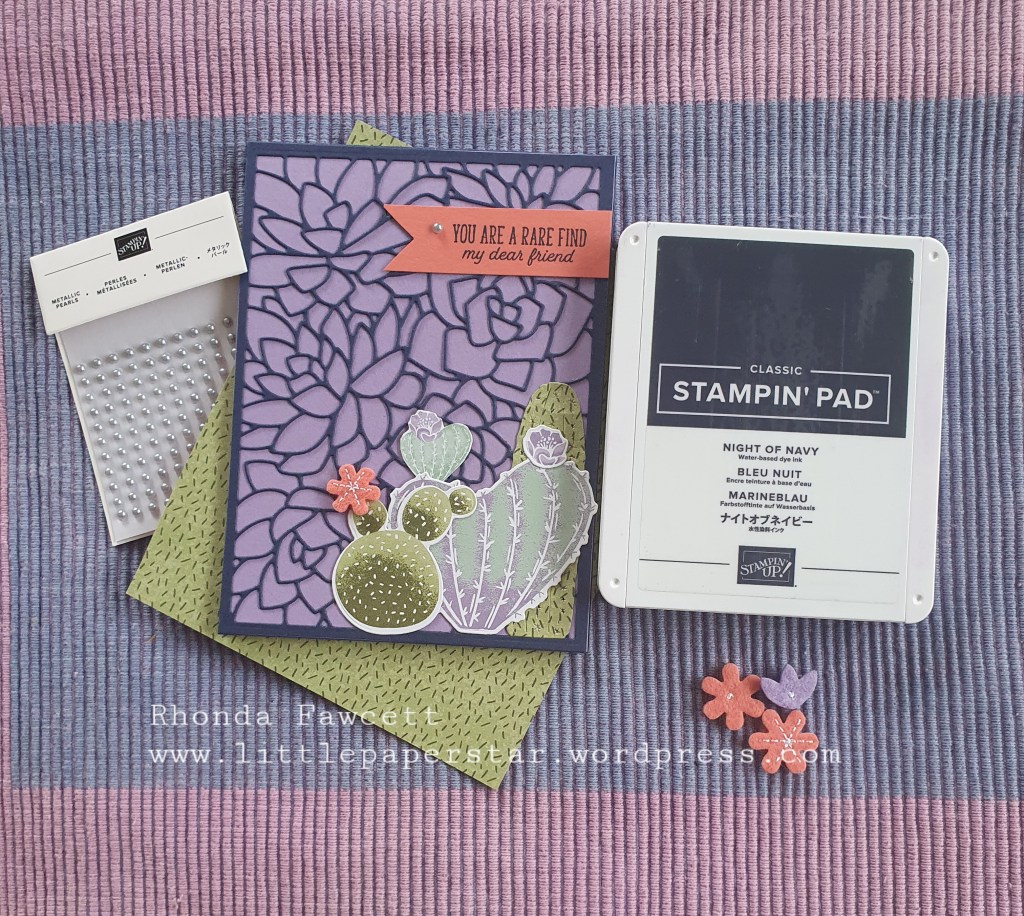
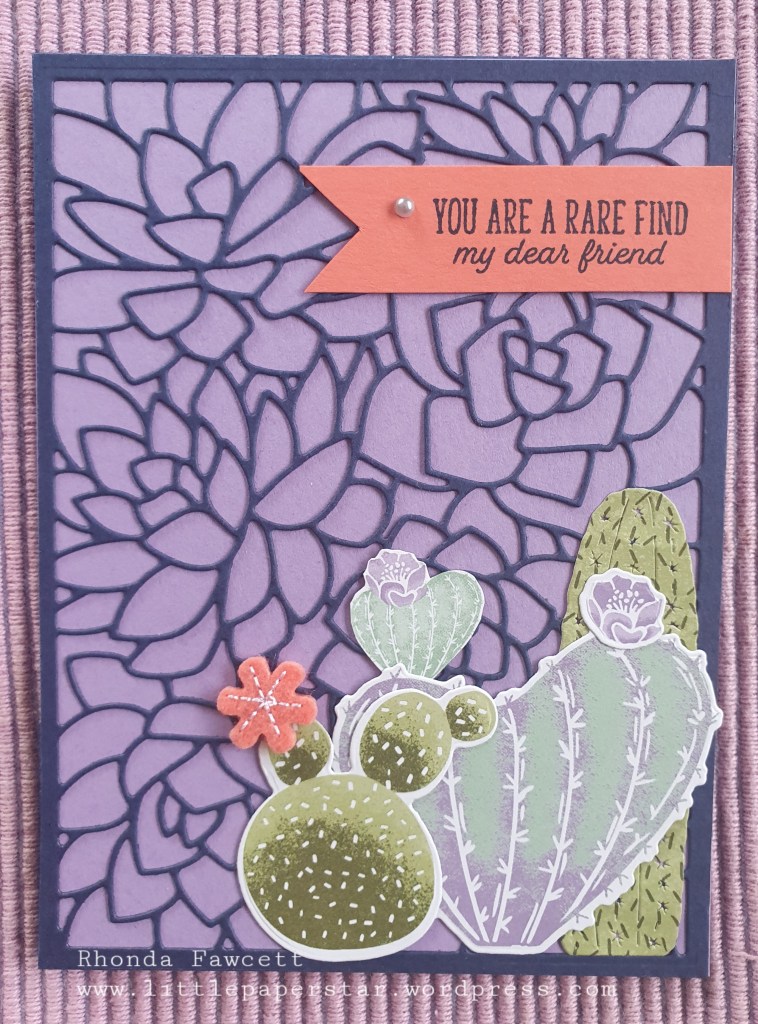
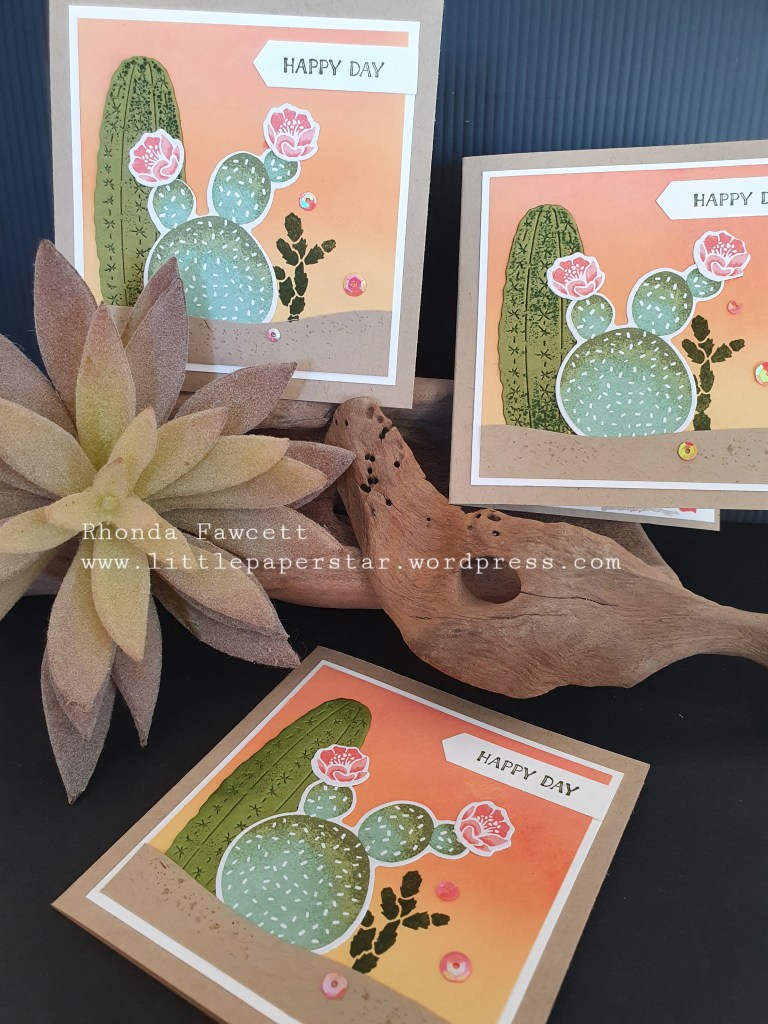
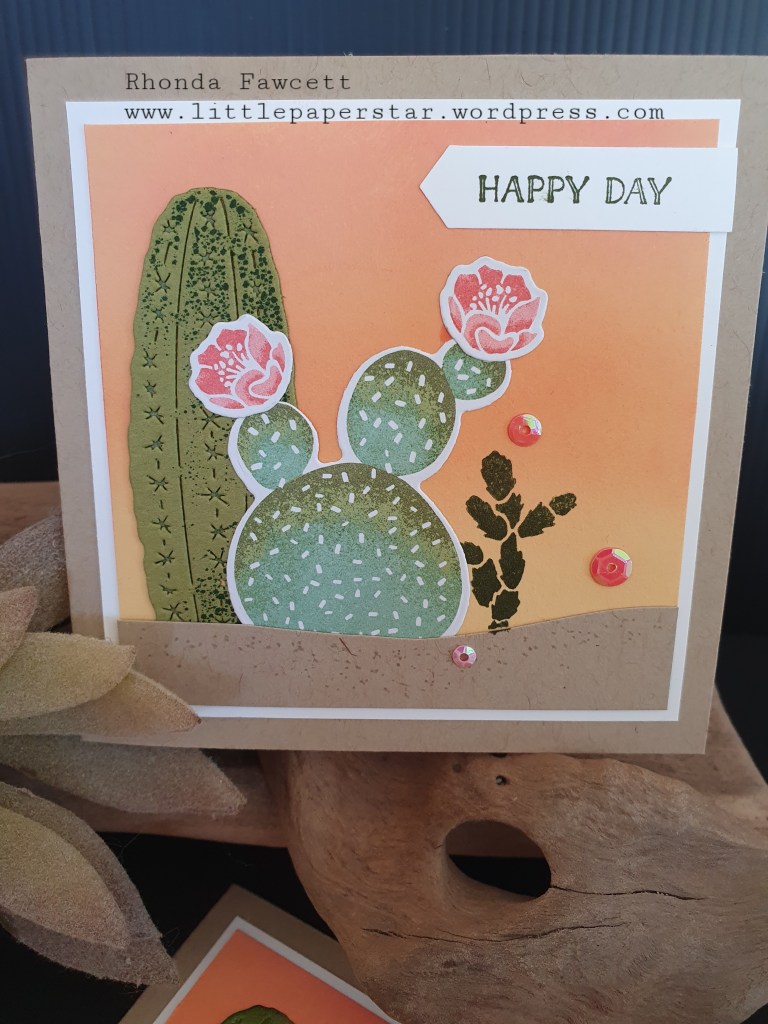
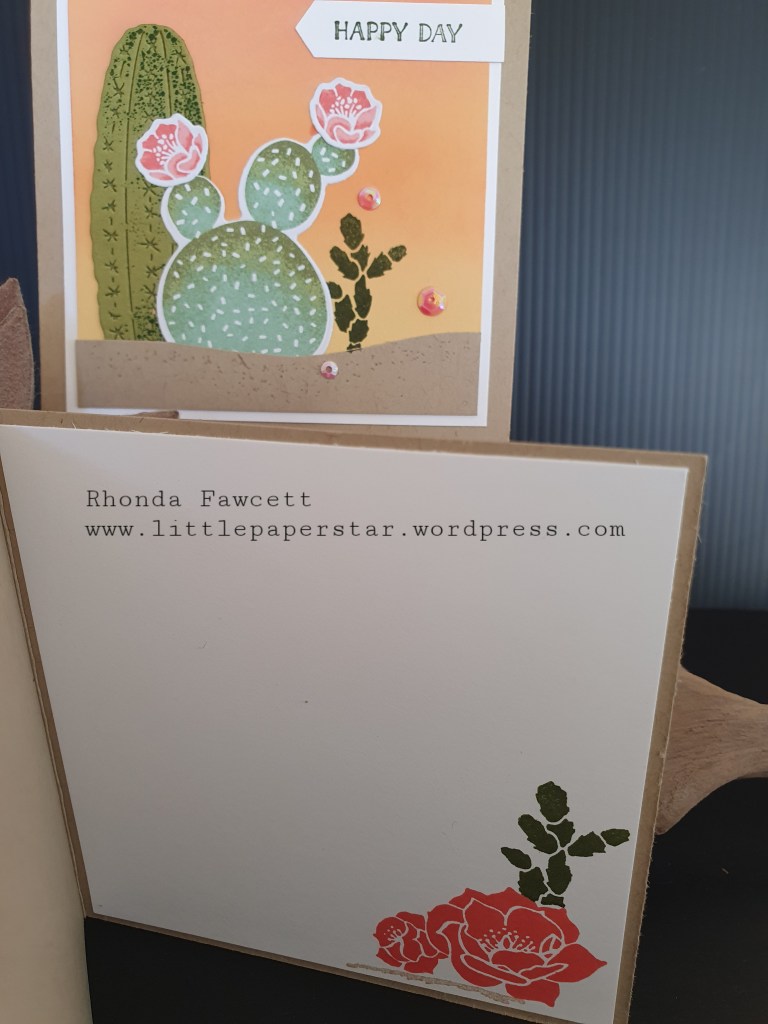
I decided to do something a bit different with my background on this card. I used the die from the Simply Succulents bundle and a bold colour choice with night of navy cardstock.
By pairing this with a subtle colour (Highland Heather), it creates a striking look, don’t you think?
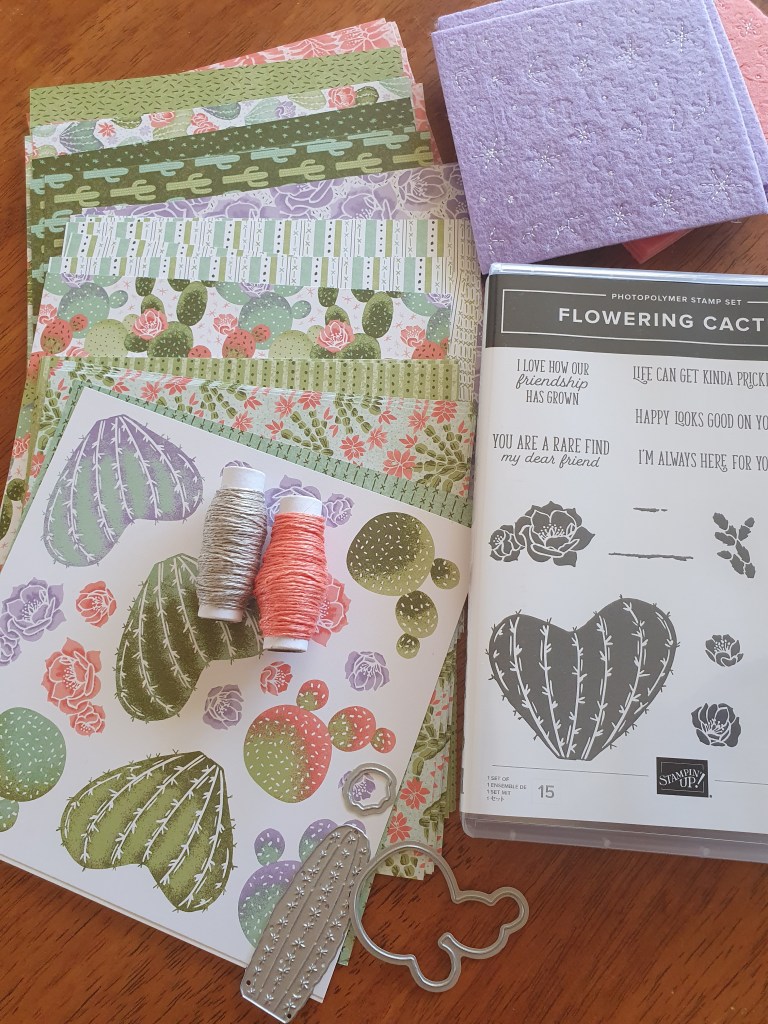
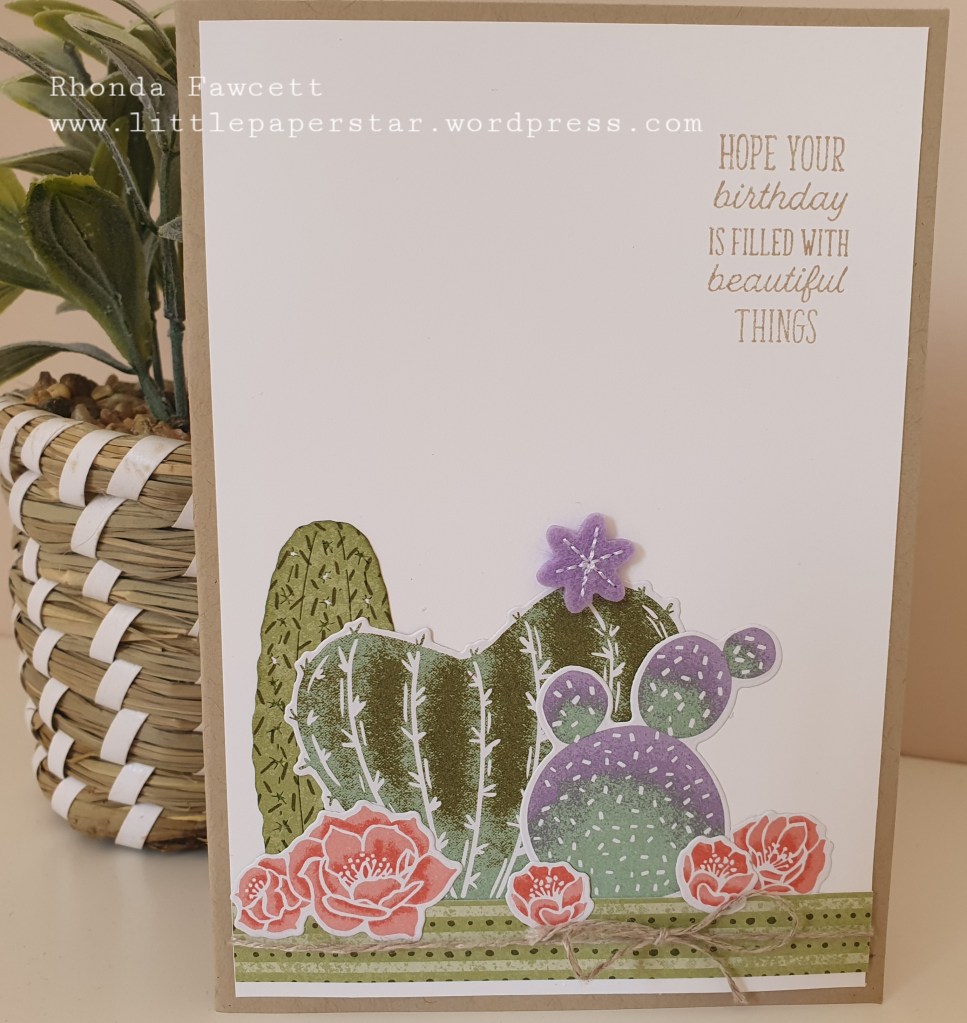
The cactus images on this card are all cut from the DSP that comes in the Flowering Cactus bundle. The cute little felt flowers are also part of the same bundle.
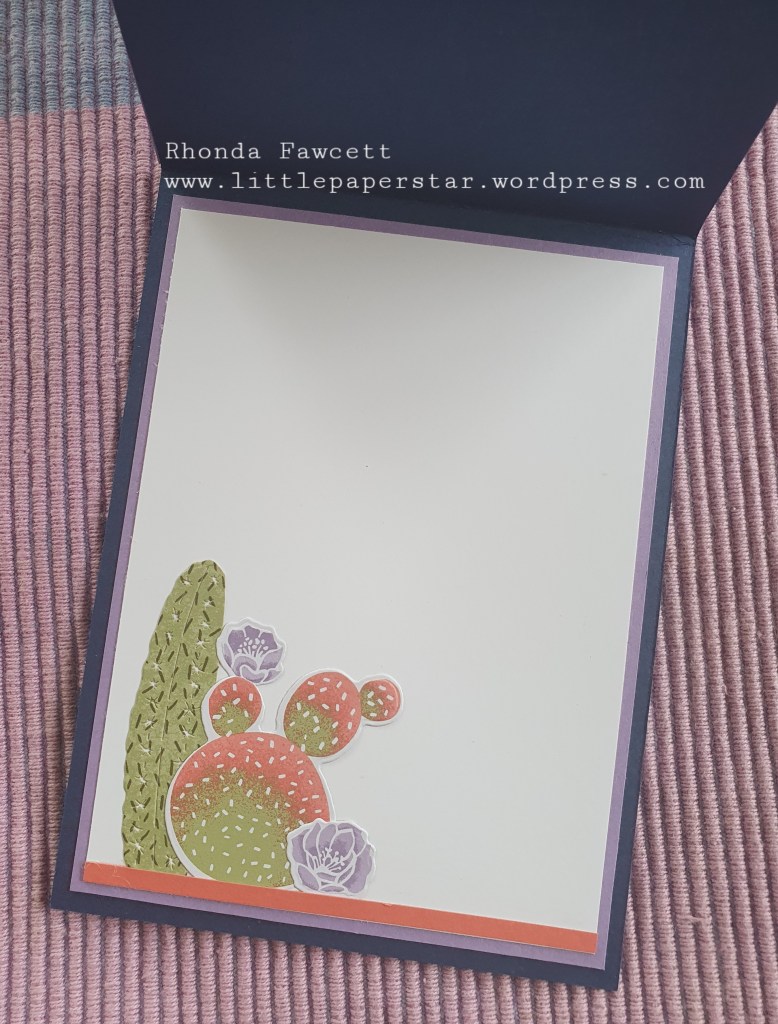
I have left the inside of the card empty of a sentiment as I am not sure yet whether I will use it for a word of encouragement or a thank you or even for a birthday. Regardless of what it ends up as, it can still be made to look pretty!
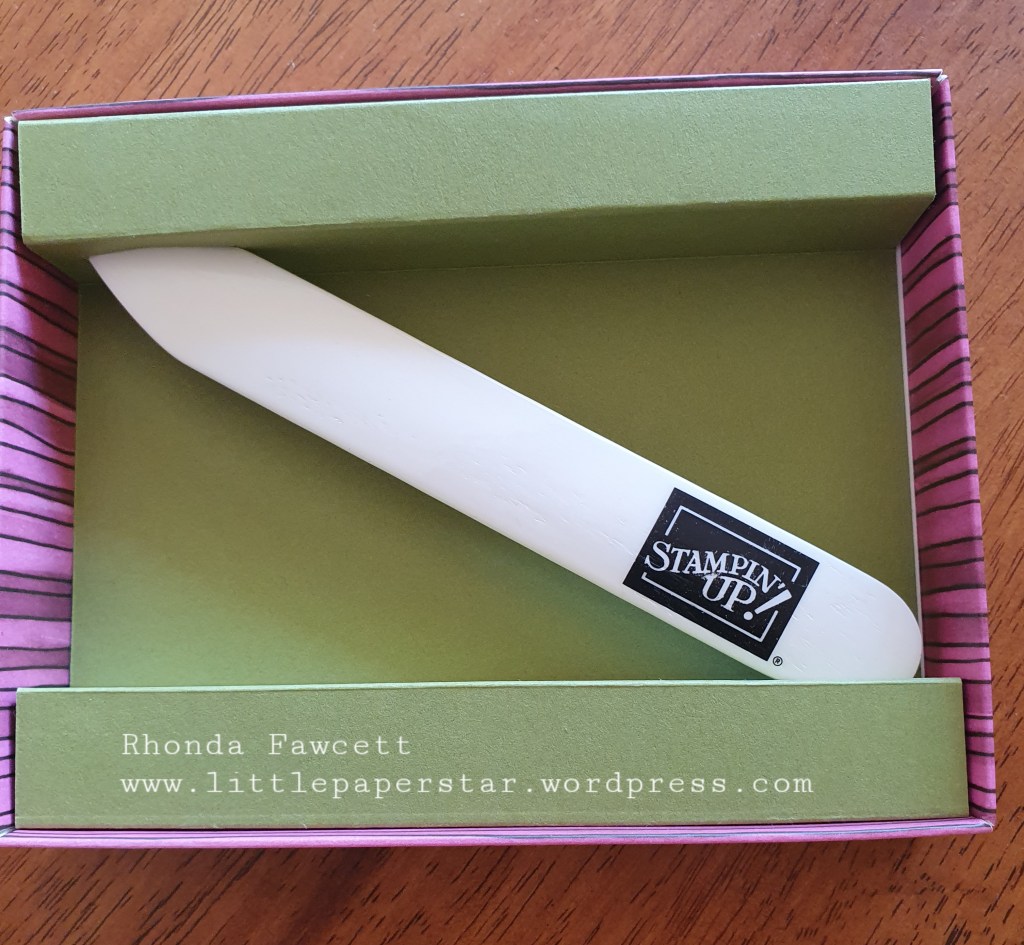
This gorgeous gift box was originally purchased full of embellishments (Share what you love embellishment kit), but it was much too pretty to throw away when i had finished with it and I loved how it had Stampin” Up!’s statement of the heart written on the lid. So I made a liner for it to hold a bone folder that I had printed with the recipient’s name as a gift.
Statement of the heart
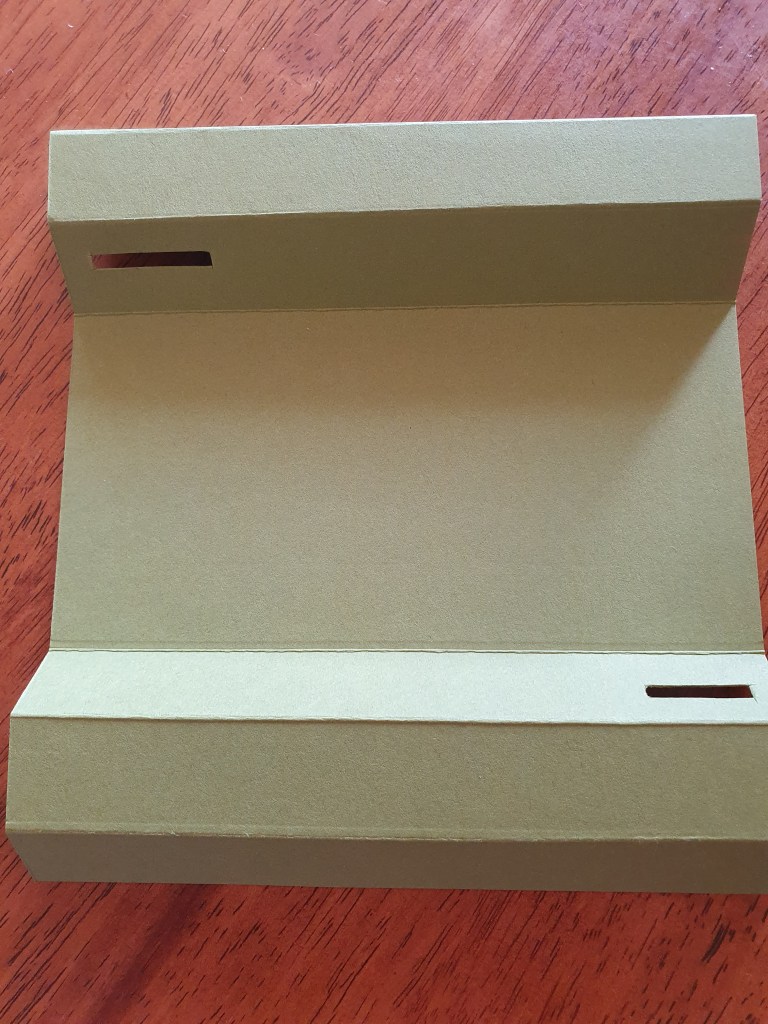
To make the liner, I used Old Olive card cut to 19.2 cm x 14.3 cm (or 7 1/2″ x 5 5/8″). It is scored in landscape position at 2, 4 and 6 cm. (3/4″, 1 1/2″, 2 1/4″). Turn 180 degrees, still in landscape and score from the other end the same. 2, 4 and 6 cm. Fold each end into a mountain, mountain and valley so that it makes the insert as shown.
Make suits to hold bone folders with a craft knife. 1/2 cm in from each end. Make one slit 2 cm long and the other 2.5 cm long.
Stampin’ Up! has this amazing bundle out now with papers, twine, stamps, dies and felt embellishments. I am so in love with it. It costs NZ$147 but is totally good value for money when you see what it includes. Also because Sale-a-bration is now on, if you purchase this bundle you will also get a free Sale-a-bration product of your choice.
The images on these papers can be die cut to make quick and simple cards like this one below.
For these little note cards, I Cased the catalogue and got my inspiration to make a softly sponged background.
I have a soft blending brush to give away to someone who leaves a comment on this post. I will choose a person to send this to, at the close of the sale-a-bration period. Please let me know what your thoughts are on the Flowering Cactus bundle.
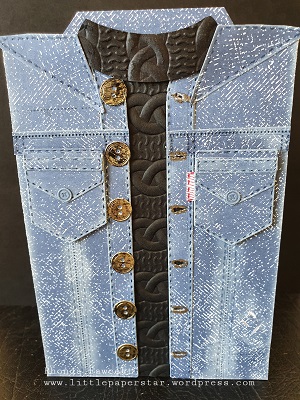
I had some 6 x 6 in colour paper on my desk and I thought the Misty Moonlight sheet of paper looked like denim, which gave me the idea to try and make a denim jacket with the new suit and tie dies.
I also used the All dressed up dies to get more stitching and bigger buttons and some extra stitching from the nested label dies. To accentuate the stitching, I sponged over it in places with craft white ink, which I felt added a distressed look to the denim. I used a craft knife to cut button slits and coloured around the edges of the button holes with a gold marker. The buttons are gold foil card that has had a Staz On black ink pad dragged over the gold foil before I die cut the button, for a more aged look.
The black pullover is made using the retired cable knit embossing folder. I die cut 4 pockets and used the bottom of 2 pockets to make a pocket fold for the top of the pockets. The little red tab at the side is a stamped piece of the stripped tie.
Here is a look for inside the card. I have made it for my son’s birthday. He is a father of three little kids and I think he does an awesome job.
If you liked this post, please check out the rest of my website. It is fairly new and it has not had many visitors yet, so I would love some comments and shares. Thank you.
Our new mini catalogue is coming out in the New Year. We demonstrators are very lucky to get a copy before everyone else. And not only that but we get to purchase some of the products earlier too.
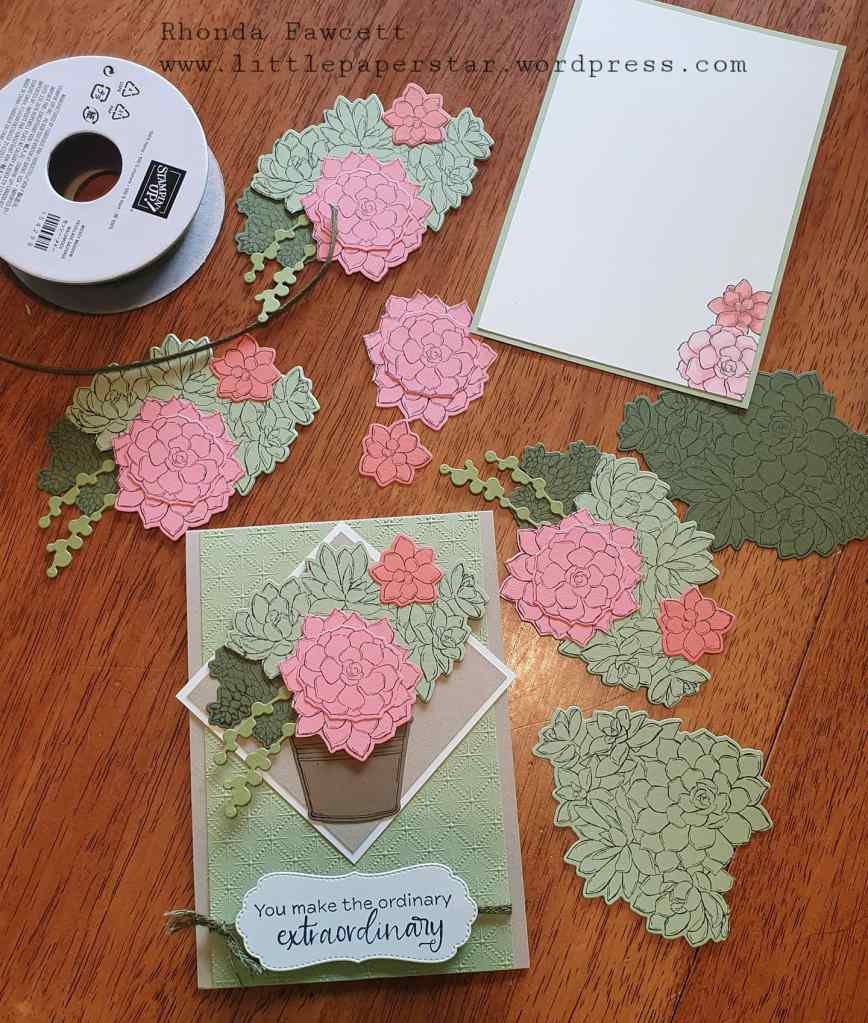
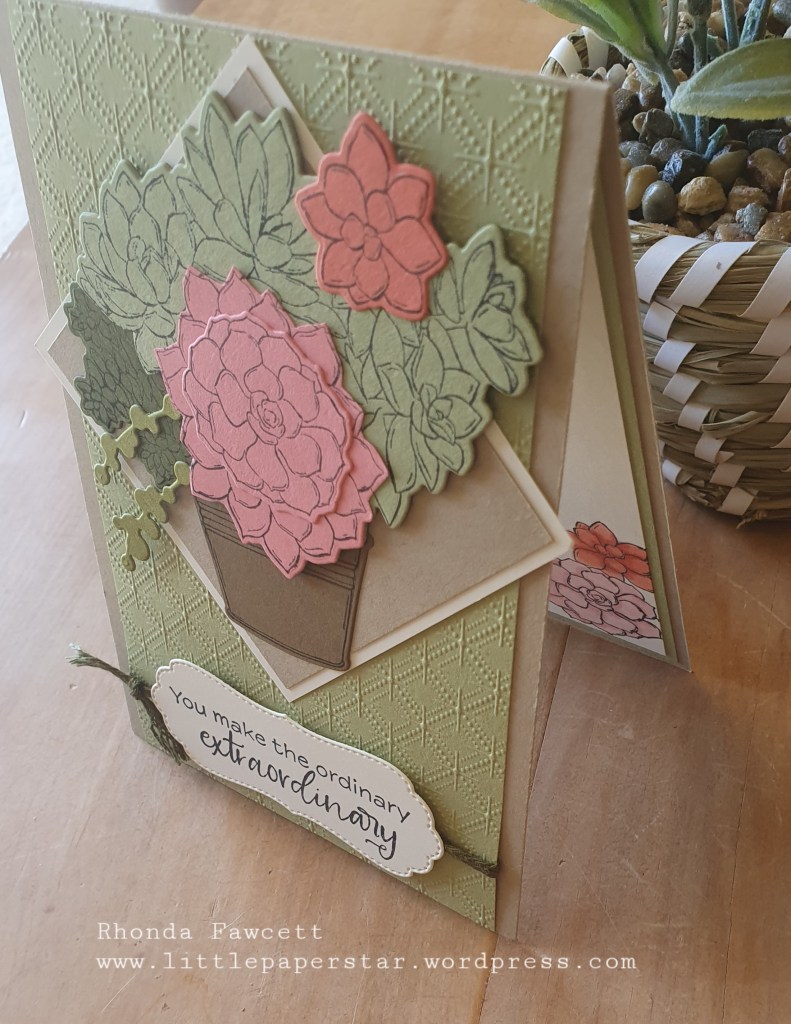
I got my hands on the Simplu Succulents bundle and made this card for my team swap.
New Mossy Meadow braided linen trimColours used- Crumb Cake, Pear Pizzazz, Soft Suede, Calypso Coral, Flirty Flamingo, Mossy Meadow and Very Vanilla
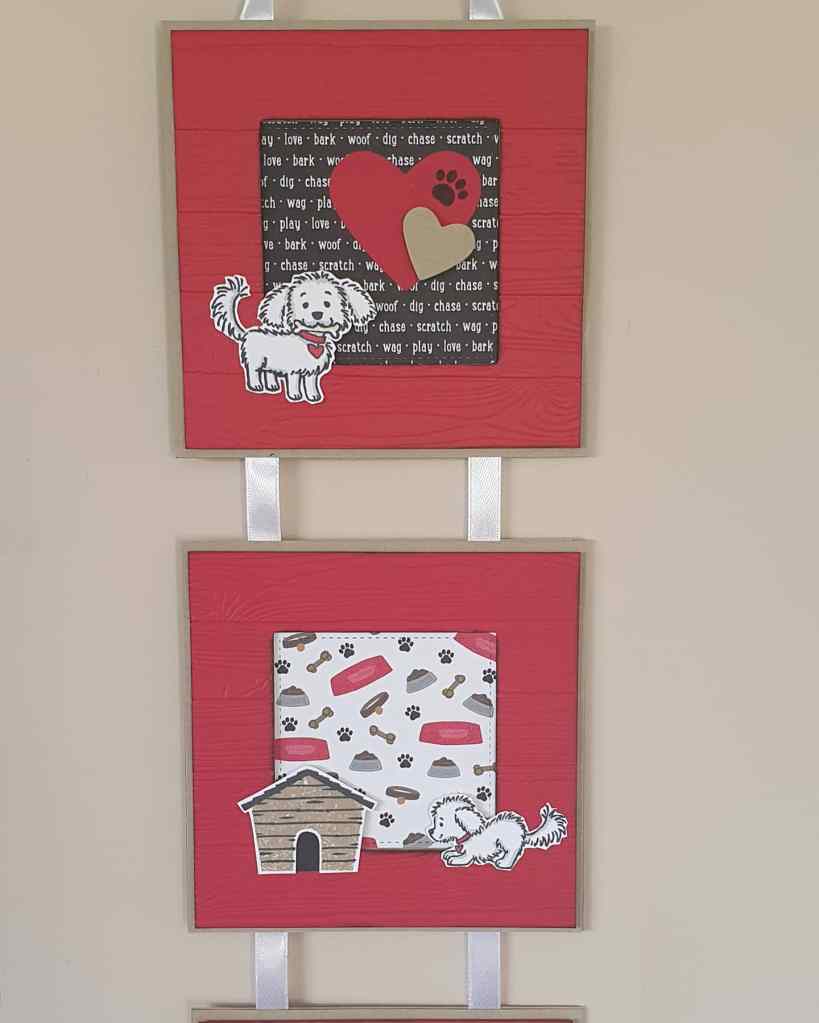
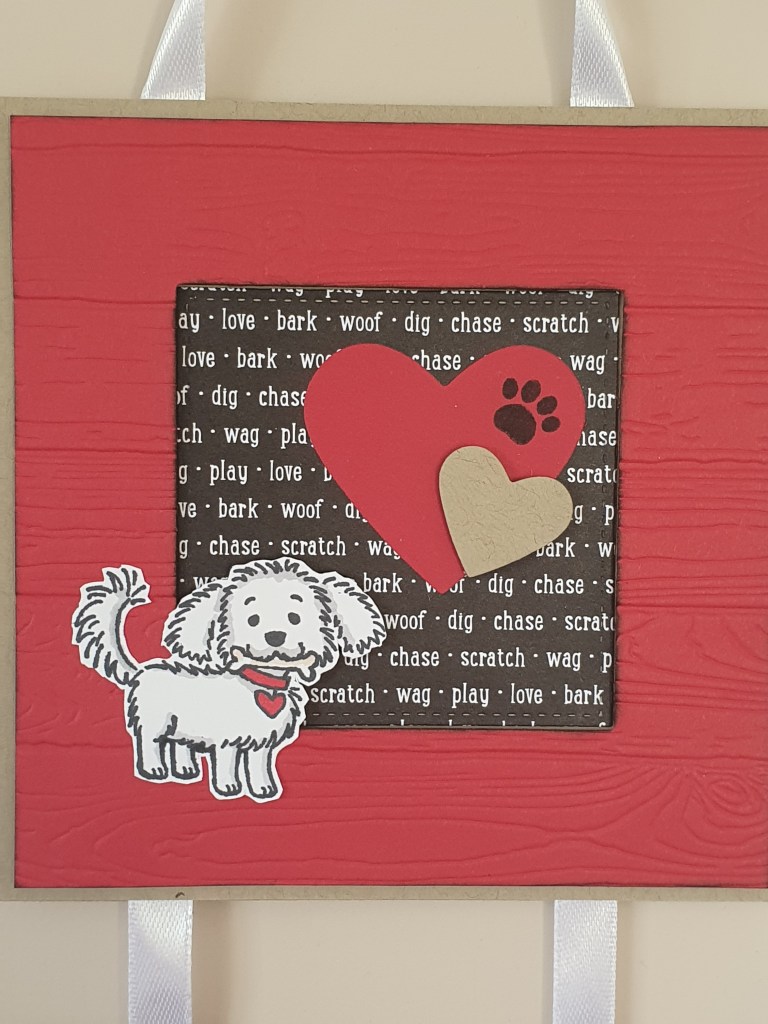
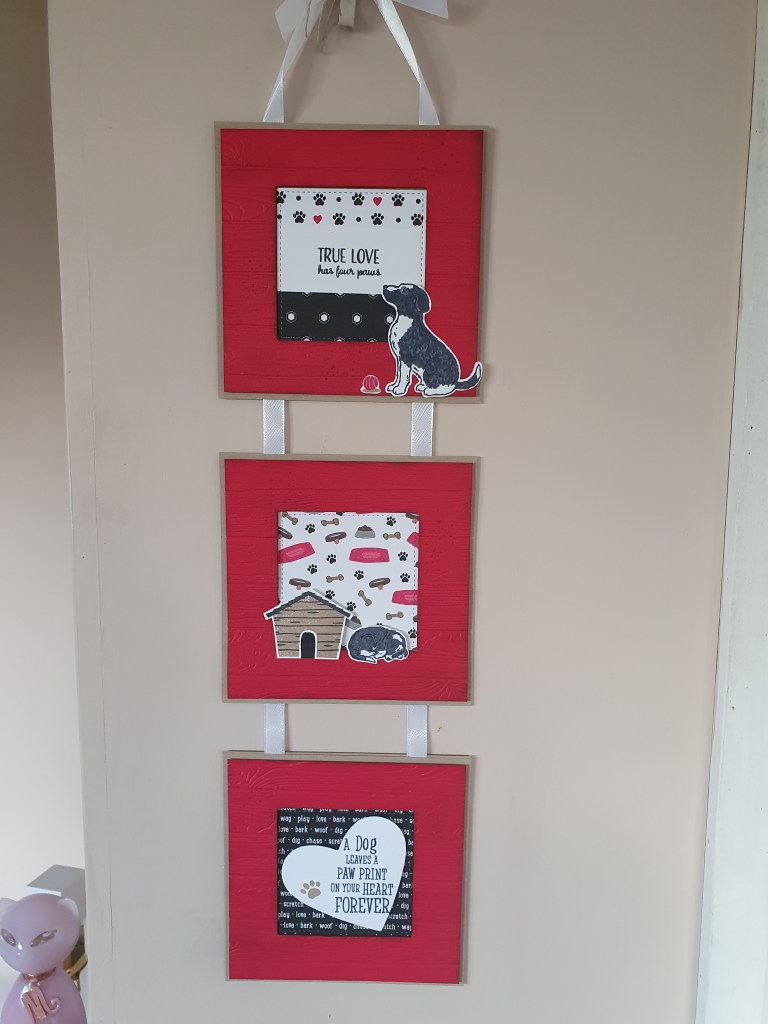
This tri fold card features the Beautiful Autumn stamp set and coordinating papers, wooden elements and the dog punch.
It has a peak a boo window through which you can see the Chocolate Labrador. When you open the card, you get to see the dog completely as well as our beautiful gold flecked paper.
This unique fold card is my give away prize this month. All you have to do to go into the draw is to leave a comment with who you know that would like a Chocolate Labrador card.
This card is more rustic, with muted greys and browns.
Products used above are Basic Black card base. Matted with Gray Granite card and a strip of In Good Taste DSP.
The sunflower is made with Bumblebee card and stamped in black ink. The diecut sunflower layer is Daffodil Delight and the flower centre is Cinnamon Cider. The leaves are stamped in black on Mossy Meadow card. Embellishments are linen thread and In Good Taste Wooden Elements.
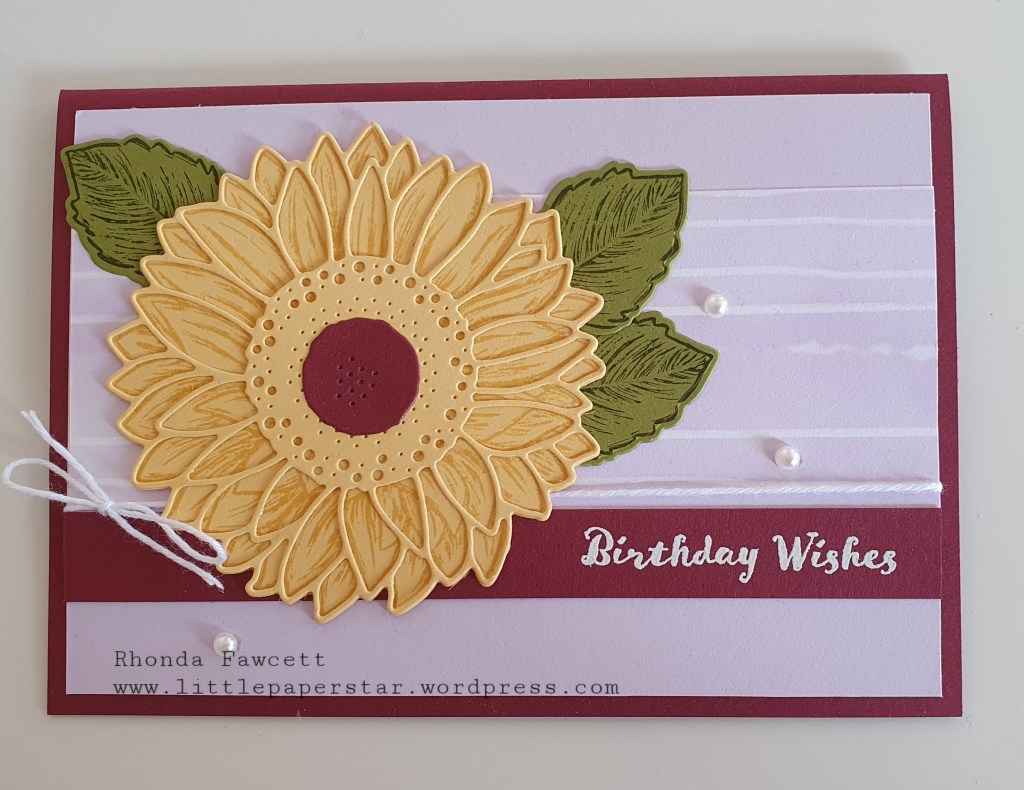
This card is more feminine with softer, brighter colours and pearl embellishments.
This second card has a card base in Merry Merlot, matted with Purple Posy card and a strip of Playing with Patterns DSP.
The sunflower is So Saffron card, stamped with So Saffron ink and topped with a So Saffron diecut flower. The flower centre is Merry Merlot. The leaves are Old Olive card stamped with Old Olive ink. I used some retired white bakers twine which I have heard will be available for us to order again soon. Yay!
I love getting feedback so please let me know which colour layout you like the best. Thanks.
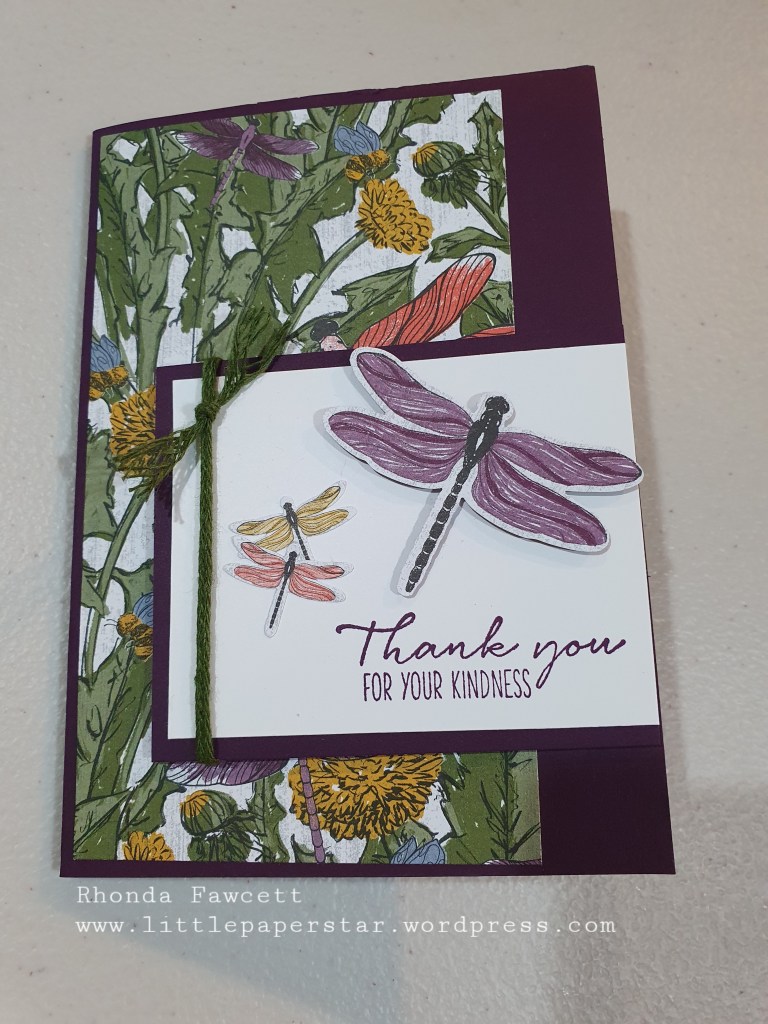
Us Stampin! Up! demonstrators who attended the recent On Stage event were blessed to be able to purchase the Dragonfly Garden bundle. (It won’t be available for everyone else until the New Year). This is one of the many perks of being a demonstrator.
Anyway… here is a card I made using some products from the bundle. The designer series paper is so nice and detailed, I decided to make it the main feature. The big dragonfly is stamped and punched out with the dragonfly punch. A piece of linen ribbon tied around finishes it off. This is another thing I love about Stampin! Up!; the colour coordination. The ribbon is in Mossy Meadow, the same as the card.
Isn’t this sheet of DSP pretty? You could use it as it is or you could punch the printed dragonflies out and use them on separate projects.