An oldie but a goodie. This is the Spotlight technique where you choose a portion of the stamped image to spotlight and just colour in that portion.


An oldie but a goodie. This is the Spotlight technique where you choose a portion of the stamped image to spotlight and just colour in that portion.

The “Hues of Happiness” bundle makes me happy. I love this pretty paper. It has so many flower images that you can either fussy or die-cut. The dies coordinate with the stamp and with the paper. So good!
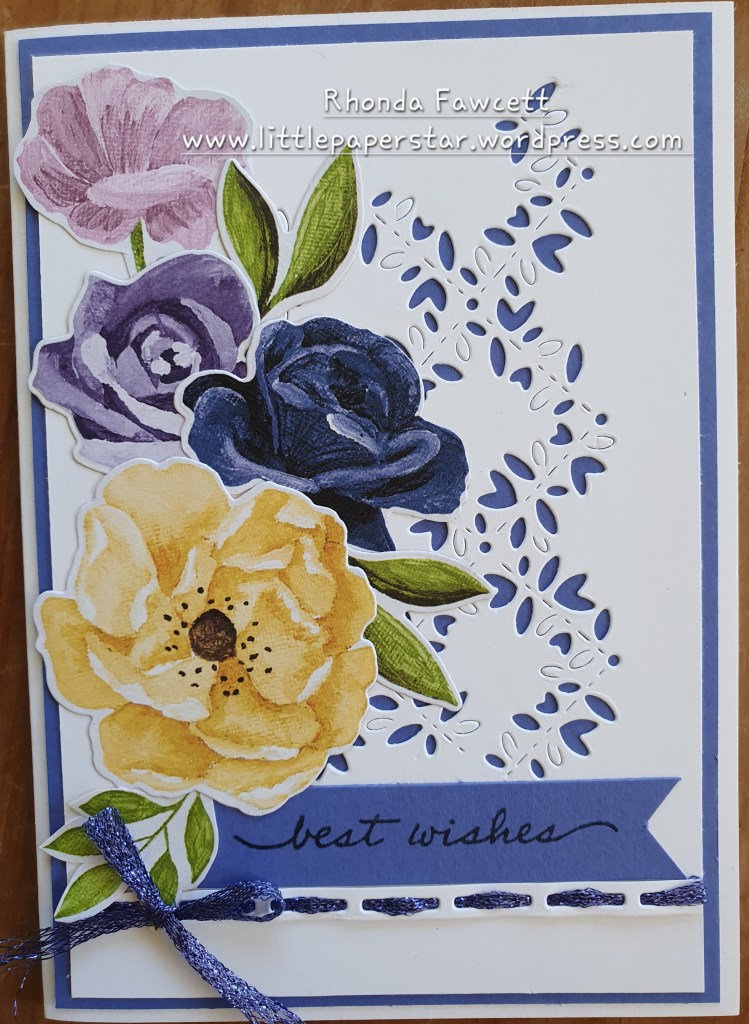
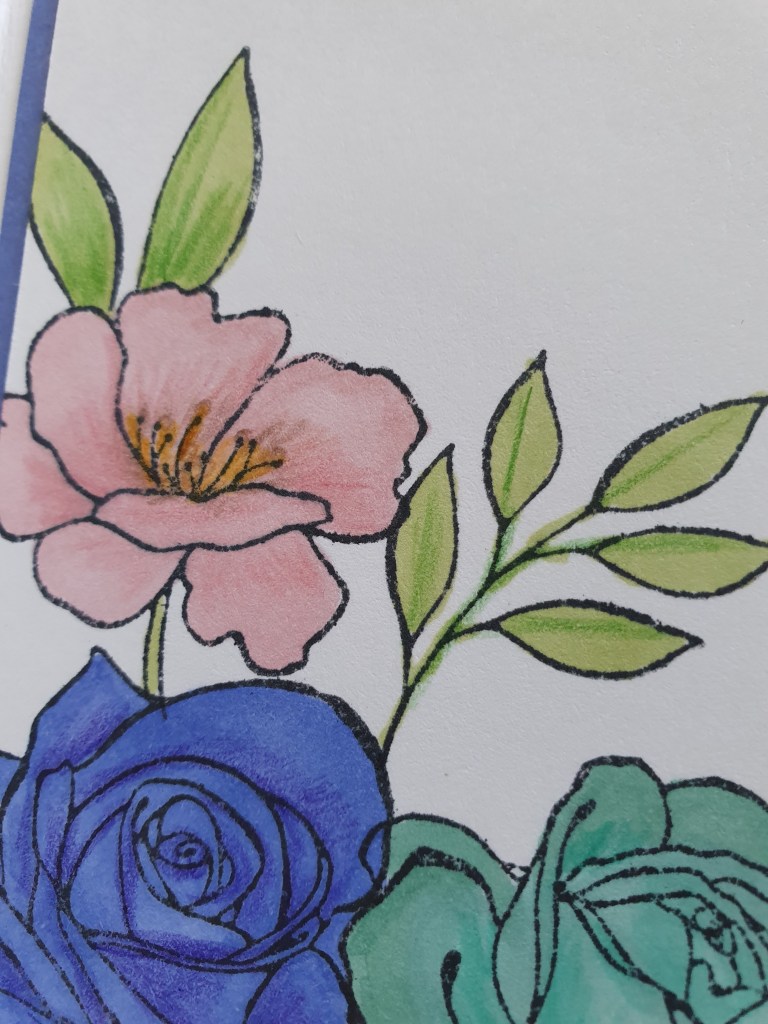
So far I have used the paper to make more than 35 cards with average of 4 flowers on each card and I still have more flowers left to use. This is a recent class project. We stamped flowers inside the card to match those on the outside and coloured them with Blends and watercolor pencils.

The pencils added a subtle shading and worked well on top of the Blends. We just used the watercolor pencils dry. We didn’t add any water.

I enjoyed making this card at our recent stamp camp, taught by Alicia Yap. It used the technique called Pointillism, or in layman’s terms Dot Art Drawing or Dot Art Colouring.
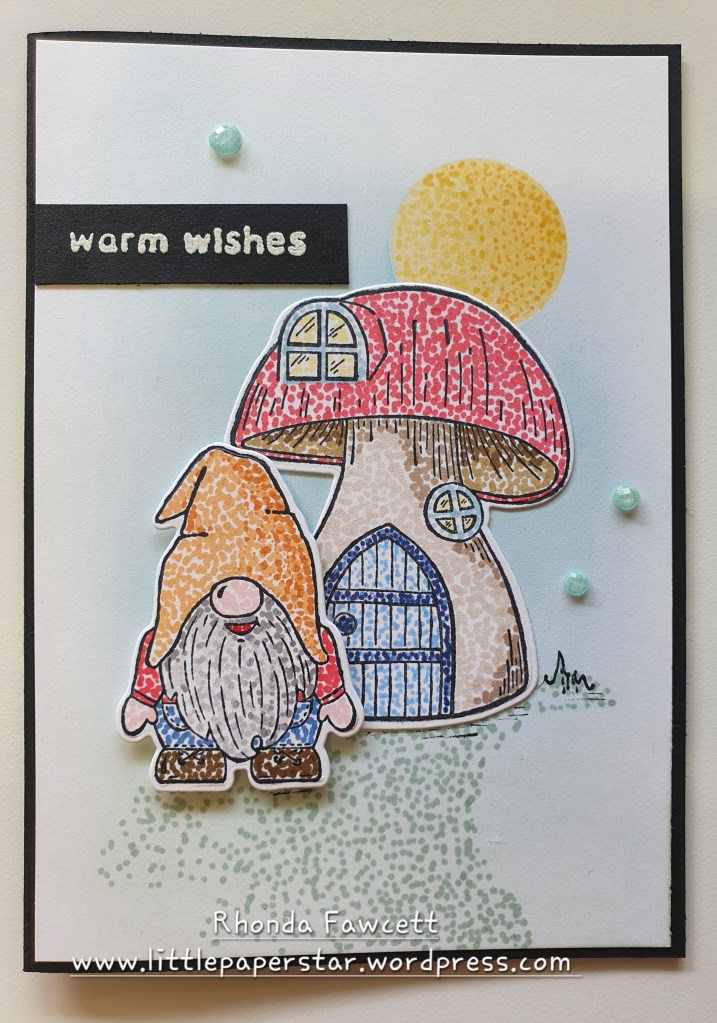
It takes a while to colour this way by adding dots instead of solid colour but the result is soft and interesting.

I used the same technique inside my card.

Doing this technique brought up some special memories for me as my cousin used to do a lot of amazing art using Pointillism. Sadly he passed away when he was only 21.
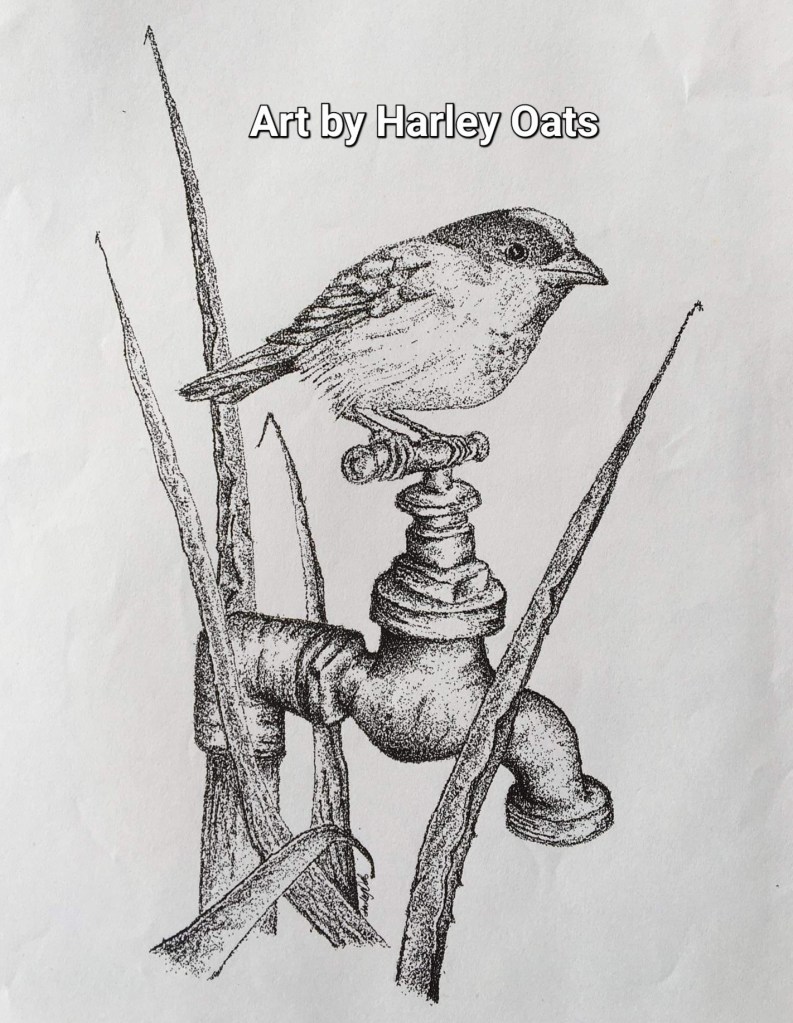
Here is one of his drawings…
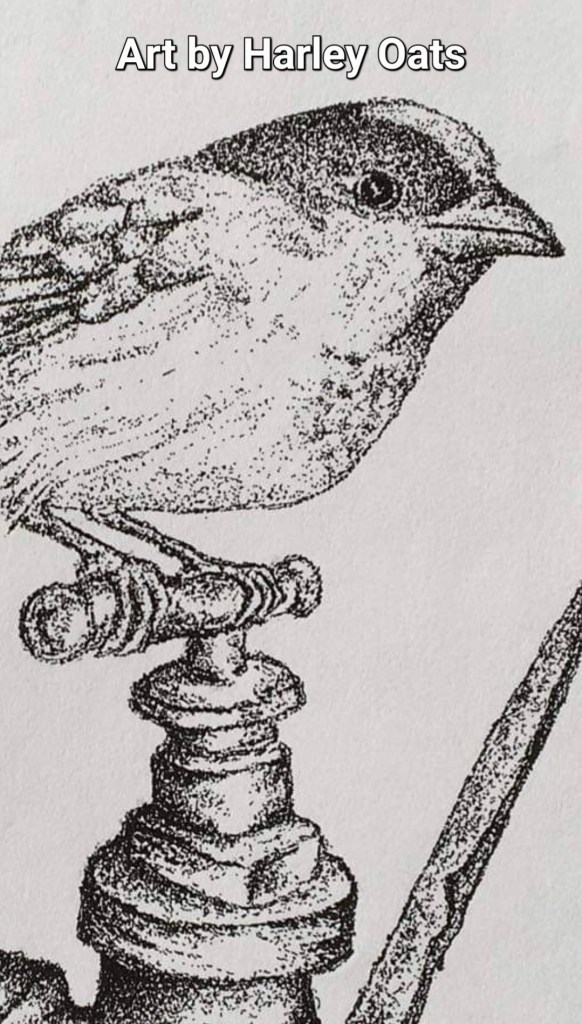
A close up to see more of the dot art.

This is a fun and slightly messy technique to create interesting backgrounds for card.
Start with a thin layer of shaving foam. I used the cheapest I could find and I spread it out on a large piece of tin foil. Use three different colour re inkers from Stampin’ Up! and drop in several drops of each colour. Use a tooth pick to swirl the colours. Don’t mix too much. Then lay your basic white card piece into the foam. Lift it off and scrap away the excess foam with a plastic knife. Pat the card dry on a paper towel and set aside to dry completely. (It doesn’t take long, maybe 10 minutes). Then repeat.
Each time you drop the card into the shaving foam, you will get a different pattern or result. Sometimes the colours become very muddy as the excess foam that has been scrapped back in has mixed all up together. You can always add fresh drops of ink when this happens and keep going. One lot of shaving foam spread out on tinfoil will make many card fronts.
I used my card front as a background for these Sunflowers.

Here are my original pieces. First card doesn’t have much mixing of the colours. The second go I did, looks different as the ink colours have mixed together more. No two pieces will be the same and that’s part of the fun of it.
I hope I have inspired you to give it a try.


Here is a card that I taught recently. It is made using a sheet of A4 white card, cut in half lengthwise and scored at 14.4 and 28.8 cm. The small section left over beomes a tab to attach a coloured card to. I also attached a coloured Balmy Blue card to base.

This is a fun card that opens up with plenty of space for writing. Great for everyone at work to add their own message or just if you have a lot to share with someone special. You can then decorate the front however you want. I used the Simply Succulents stamps and dies and the printed layering vellum design paper.

For this second card using the Adventurous Journey stamp set, I wanted to use the big rowboat image. 🚣♀️ Because the boat itself is very plain, I wanted to make a feature of the background. I used the shaving foam technique to do it.
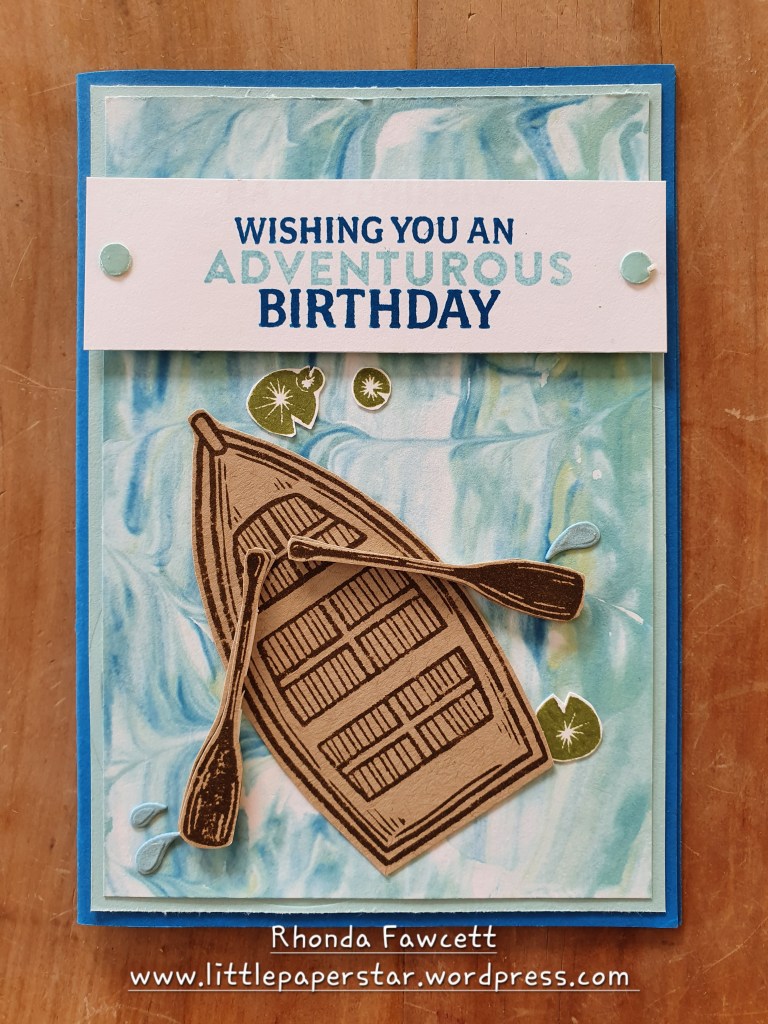
To do this technique, squirt some shaving foam onto a piece of tinfoil. Use a knife to smooth it into a flat area slightly larger than your piece of card that you want to “marble “. Drop in ink. About 4 drops of each colour. I used Pacific Point, Balmy Blue and Soft Seafoam. Swirl lightly with a toothpick to mix the colours. Press in your card.
Lift card out of foam. Scrap off excess foam and smooth excess back into the rest of the foam to reuse a second time. Pat card dry on a paper towel.

Image 1. was my first result. Image 2. was my second and Image 3 was my third. You get a different result every time you mix and smooth out your foam. After about 4 goes, you could add some more drops of ink to keep doing this technique. Rinse the foam off and throw tinfoil away once you have finished. It is a little messy but it is super fun.

This was a fun card to make by layering up the pieces to make the kayaker stand put even more.
I stamped the kayak on Calypso Coral card first and cut out. Then I stamped the kayaker on thick white card and coloured him with Blends and mounted him on top of the kayak. Finally I stamped the hat in Old Olive card and mounted it on top with a dimensional.

For a bit of shine, I added Wink of Stella to the whirlpools and fine tip glue to my three punched dots. I used a regular office hole punch to create my dots from Old Olive card.

This was a fairly simple card layout, made by using a strip of Balmy Blue card across the page. The impact it has is all due to the big bold images of the Adventurous Journey stamp set.

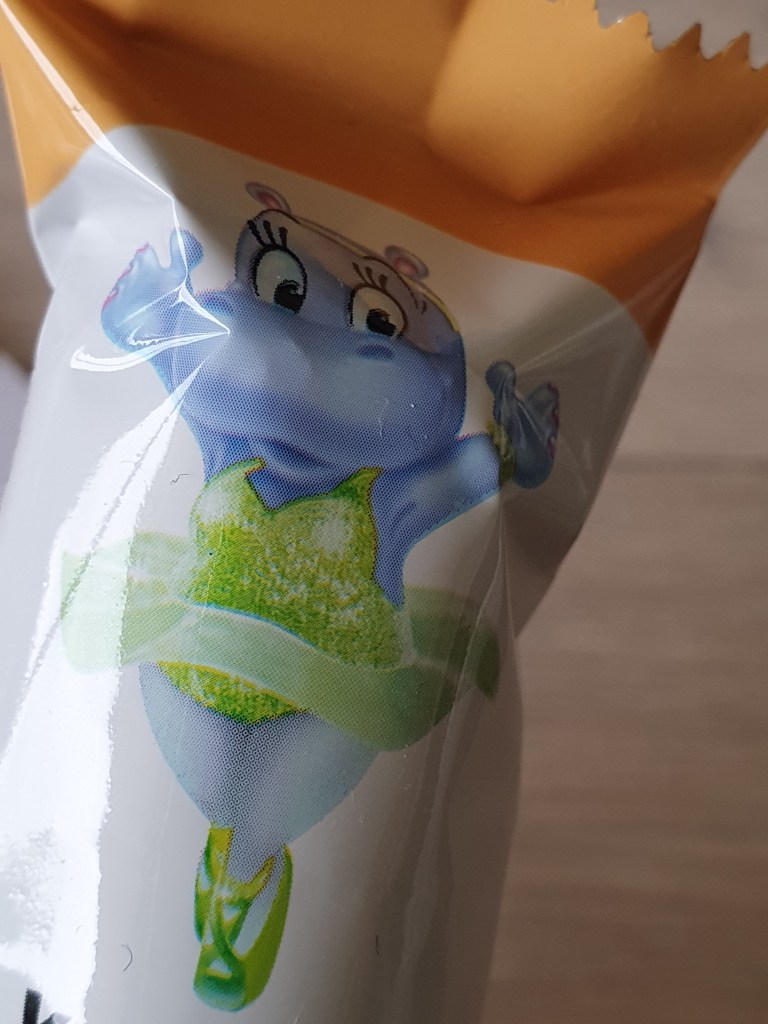
I found these little hippo chocolates and just had to buy them to create a tag to match.

I used Parakeet Party Blends and a retired light seaside spray blend to colour in the hippo. I added a vellum frill and drew her eyelashes a little longer.
She is pretty cute!


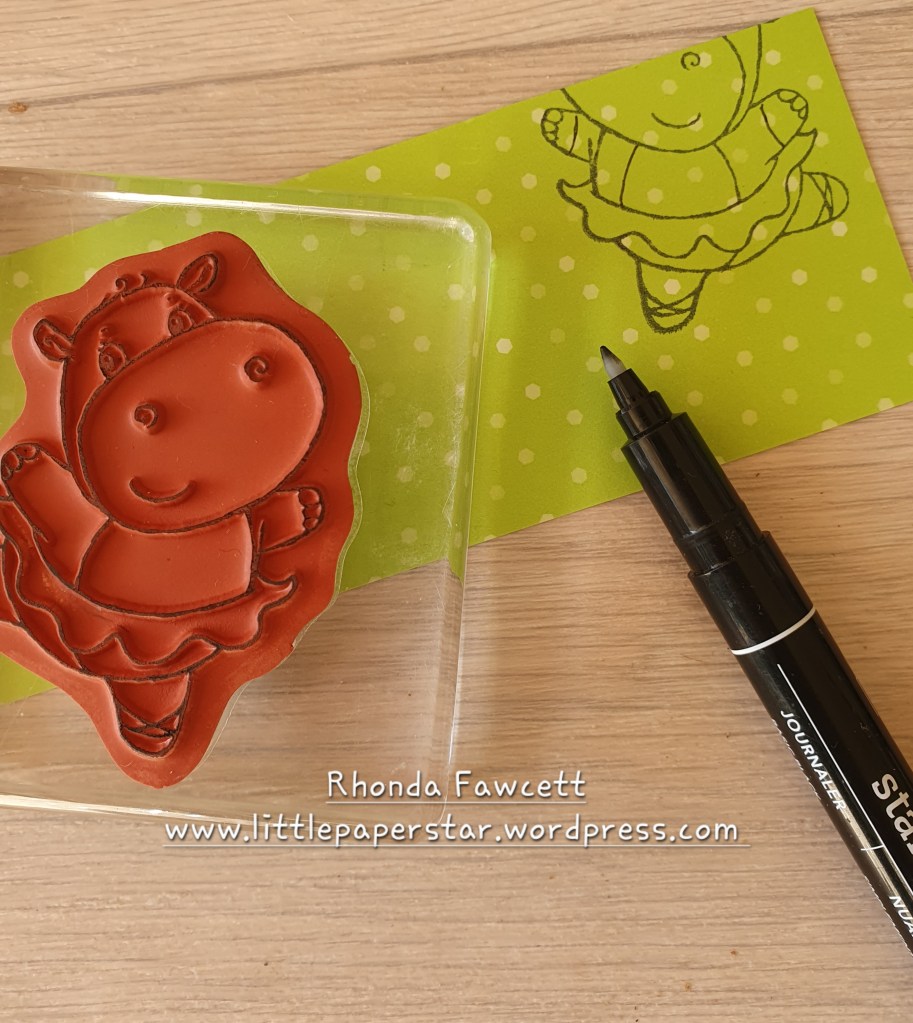
I am having so much fun playing with the “Hippest Hippos” stamp set. I used the paper piecing technique to create this poka dot swim suit for this little hippo.
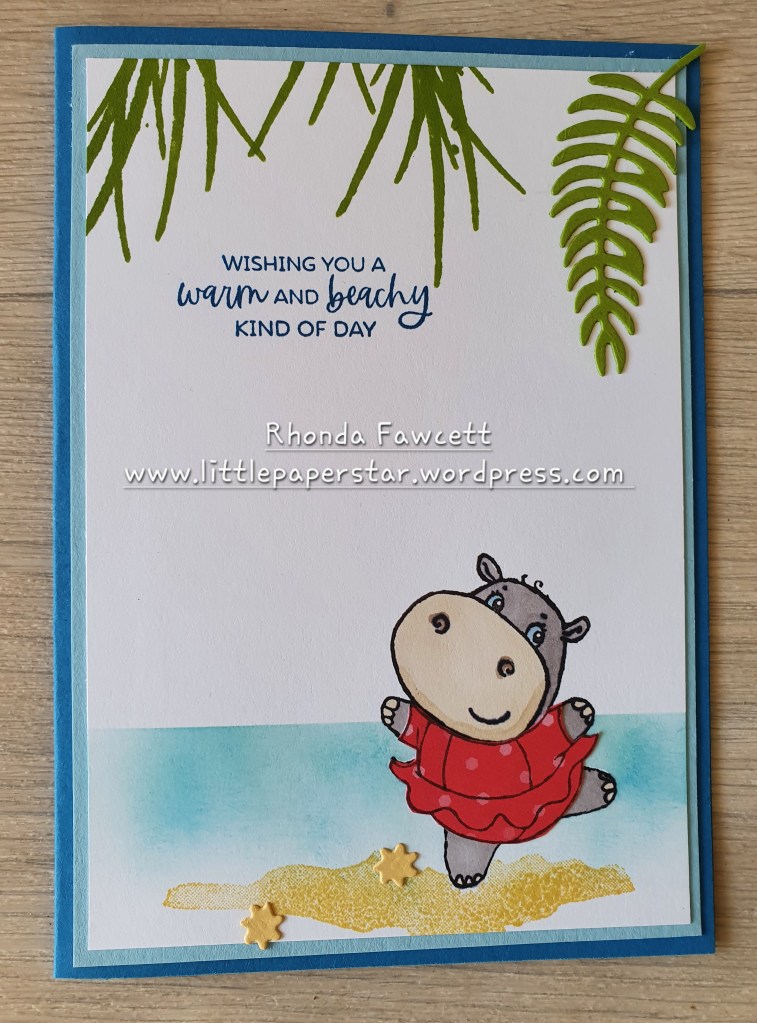
I used the Oceanfront stamp set to create sand and palm leaves. The sentiment is from the Paradise Palms stamp set. The little starfish dies are a free SAB (sale-a-bration) item with a qualifying purchase. It is part of the Hippo dies which contain 19 dies and not only cut out the hippo stamps but also have interesting shapes like sunglasses, water drops, snorkels, boat etc.
To make the swimsuit I stamped the hippo again on in colour paper and used a marker to draw in the sleeves and a extra panel down the tummy. I then fussy cut the swum suit out and glued it on top of the original stamped image on the card front.

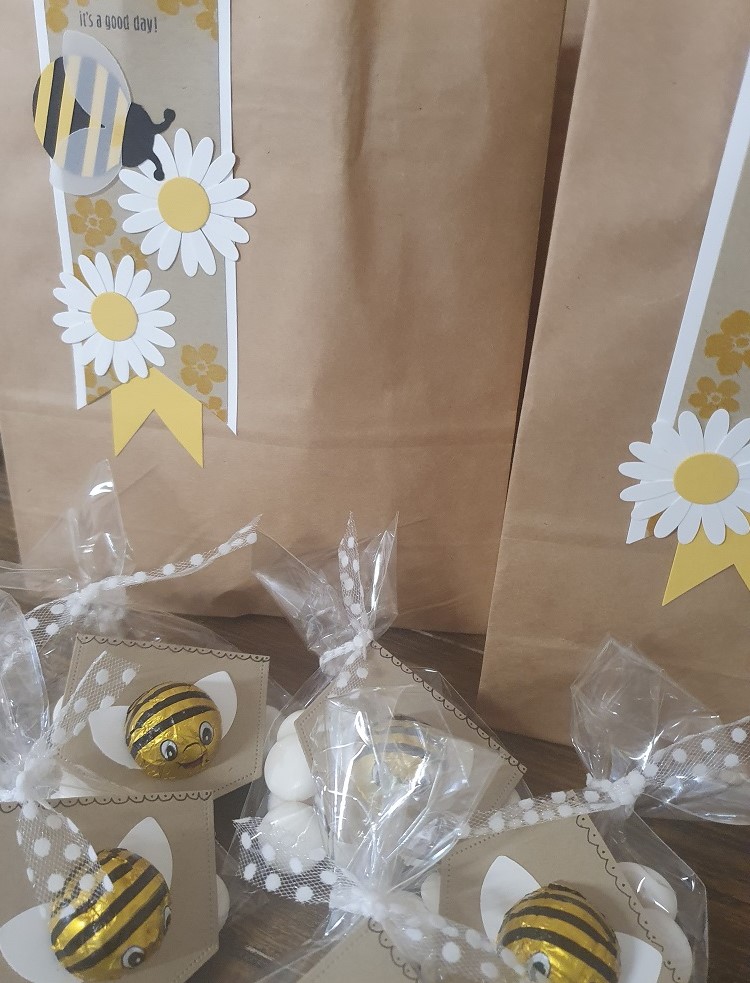
I used the ladybug punch and the daisy punch to create these gift bag tags for the people attending my Auckland cardmaking event.
I was excited to discover some little bee chocolates and thought they would make a good addition to go inside the bags.