Sharing my love of all things paper-craft: Card making, Scrapbooking, Gift Boxes, Invitations, Party Favours, Craft Supplies and more. (Formally Stampin'Fantastic)
I made this card to showcase another way of using our Stampin’ Up’s Blends. This panel on the side is made using a strip of window sheet coloured with Blends, then spritzed with alcohol.
It is a fun technique. It’s easy to do. The longest part is waiting for the alcohol to evaporate so that the ink is properly dry. I ended up using a heat gun to speed up the process which is a good ideas because it spreads the ink around more and creates the marbled look you see on my card.
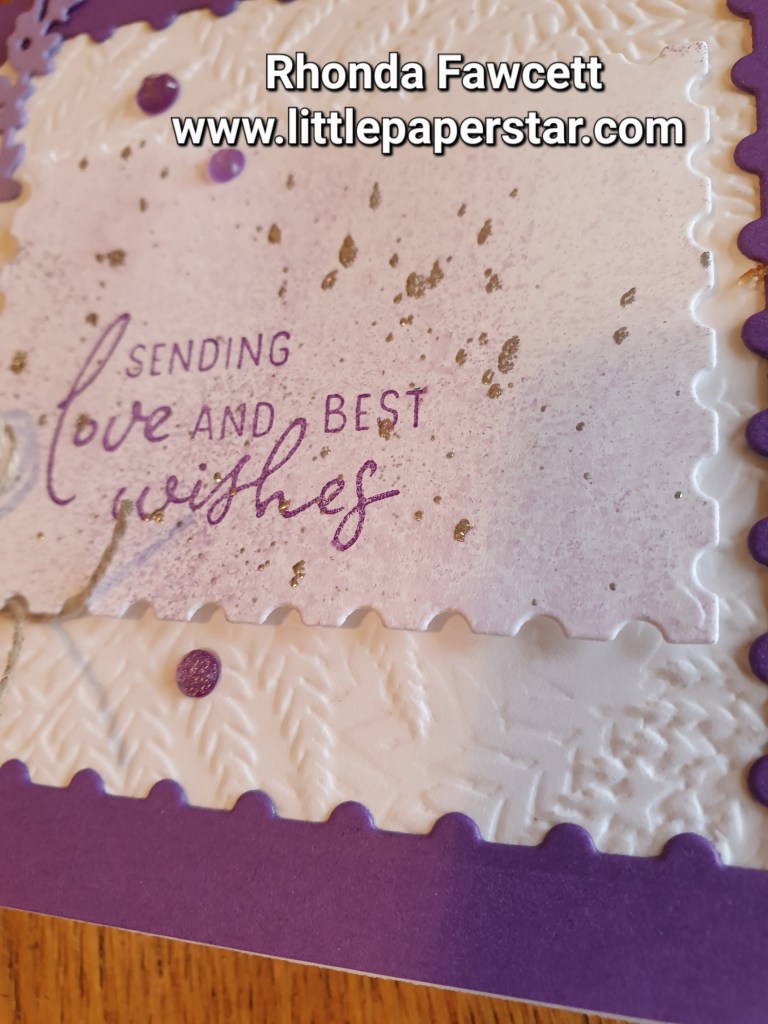
This was just one of the cool cards that I made at an event yesterday. All the dies, including the label and frame, are from the Perennial Lavender suite of products.
We did a cool technique on the front to splatter on some flecks of silver.
The inside of the card is also a wow but that is for another time!
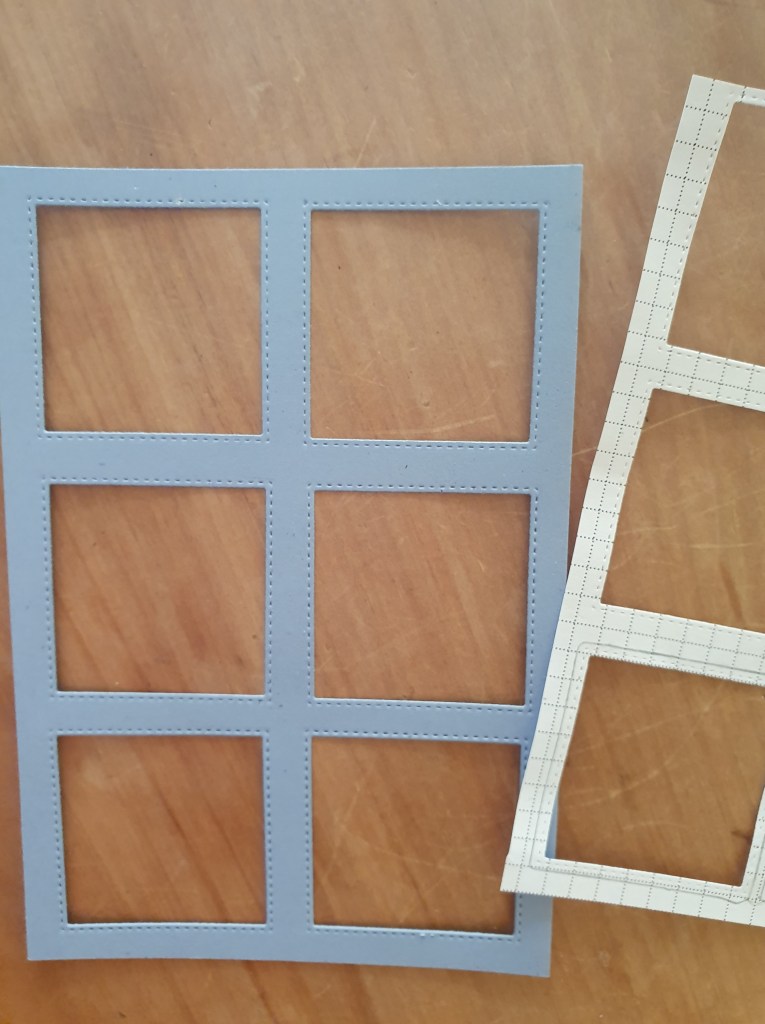
I wanted to use some scraps of this very pretty paper (it’s a freebie when you spend NZ $110 on Stampin’ Up! products. This Sale-a-bration freebie ends on 29th of February). Anyway I was playing with my Stylish Shapes dies and noticed that they all have double stitching. This means the shape you die cut out plus the negative where you cut the shape from, both have stitching lines. I really wanted to showcase both sets of stitching lines and so I came up with this “window frame” card.
I had a bit of trouble initially keeping the squares even, so I made a template from grid paper first which really helped.
I glued the window frame to a thick white card base. I die cut some squares of Designer series paper (DSP), to go inside each window. Then I added a sentiment from the sending smiles stamp set. This was also die cut using a die from the stylish shapes die set and placed on dimensionals. Finally I added some neutral sequins to finish.
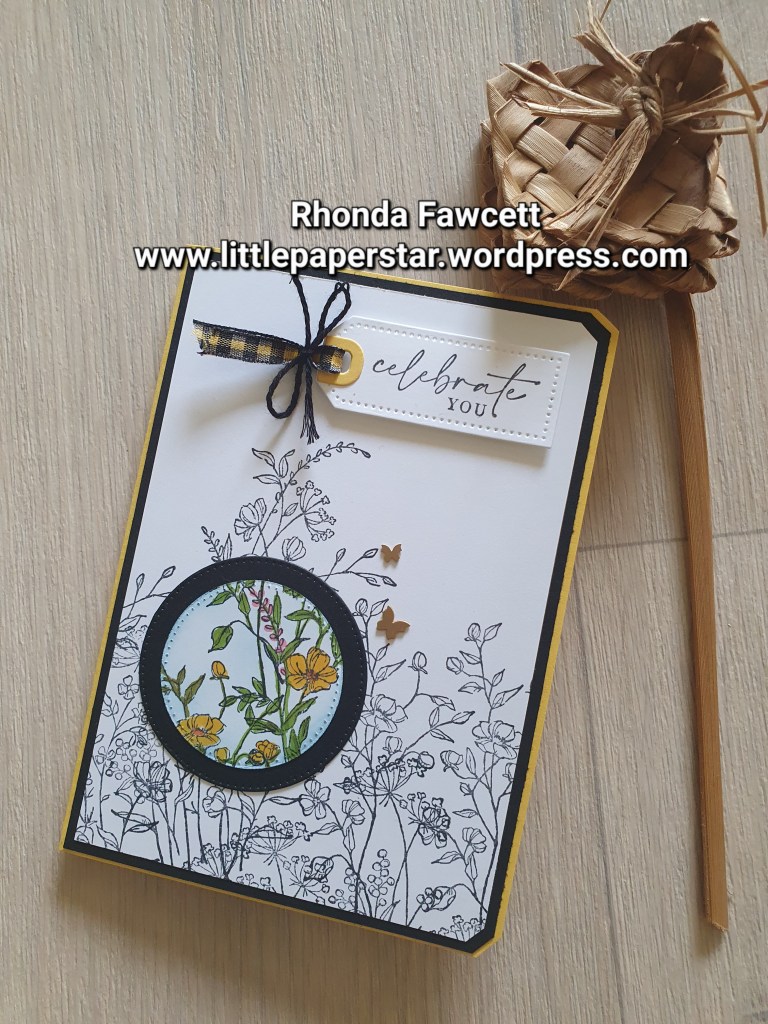
I have been revisiting some old techniques and decided to make a card using the Spotlight technique.
This card uses the Dainty Delight stamp set, the tailor made tags dies and the stylish shapes dies.
I stamped a mix of flower stamps on my white card, then die cut a circle out of the middle. I coloured the circle with Blends and also added a bit of blue with a blending brush. I matted the circle on a larger one diecut from black card. Finally I glued it back in place to cover the hole it originally came from. By leaving the rest of the card in black and white, this brings the spotlight to just the coloured circle piece. I think it is quite effective despite being a simple card to make.
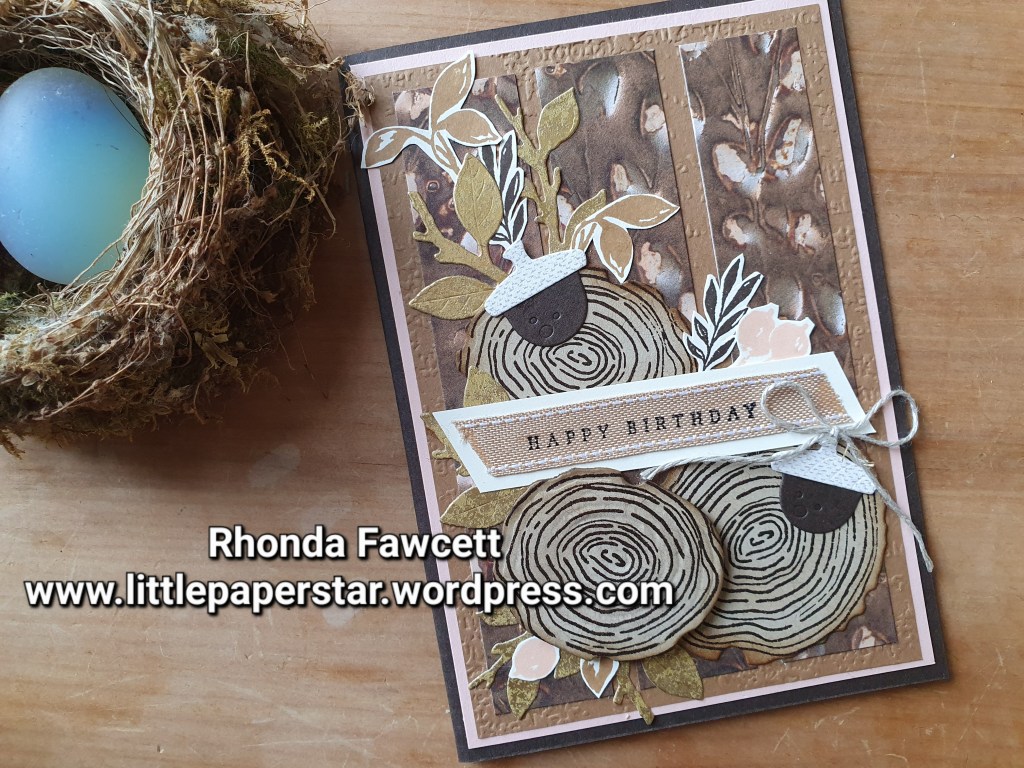
All the layers and textures on this card combine to give it a deep richness.
I used Early Espresso as my card base, then matted it on Petal Pink card 14.4 x 10 cm. I next added a 13.9 x 9.5 cm layer of Pecan Pie which I embossed with the timeworn type embossing folder.
Now it was time to decorate… I added distressed gold card diecut leaves. A few stamped leaves and stamped tree rings, and some diecut acorns. One of the tree rings, I mounted on a foam adhesive sheet and coloured the white foam with a blend pen so it gives the appearance of a wooden shape. I also used the small ball embossing tip on my Take your Pick tool to draw in deep grooves in between the stamped ring lines. This all added more texture. I sponged the edges of my tree rings with Crumb Cake ink.
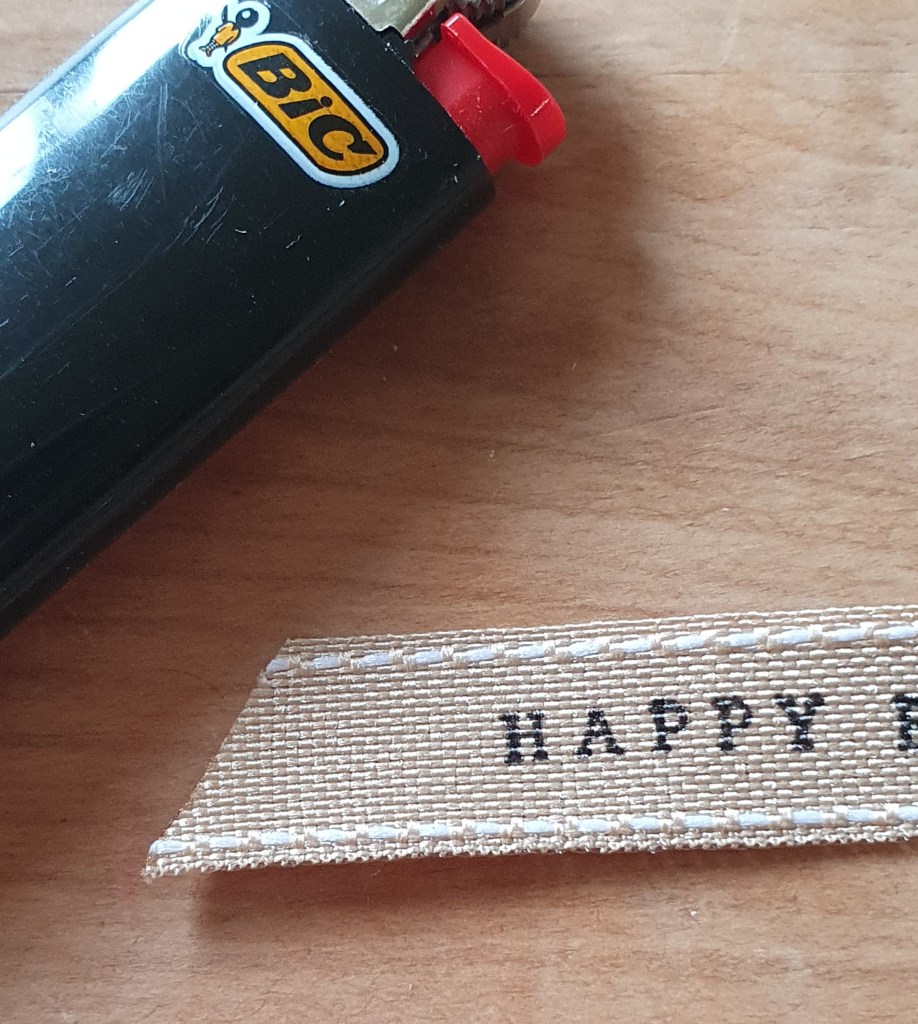
I stamped my sentiment on Ribbon using Black Staz on ink. I think the Saddle brown Staz on would have worked even better. The ribbon looked lost on the brown background so I mounted it on to a piece of Very Vanilla card.
You may notice the burlap ribbon (this comes in a combo pack with real red), frays on the edges. In my sample, I used a thin smear of tombow glue to seal the edges but it did stain the ribbon, so when I taught this in class, I held a flame by the edges of the ribbon and this melted and sealed of the ends nicely.
I used 2.5 cm strips of Earthen Elegance DSP to give a rich background for the tree rings and foliage. It came together well and would be suitable for a male or female birthday or thank you, or a sympathy card if you changed out the words.
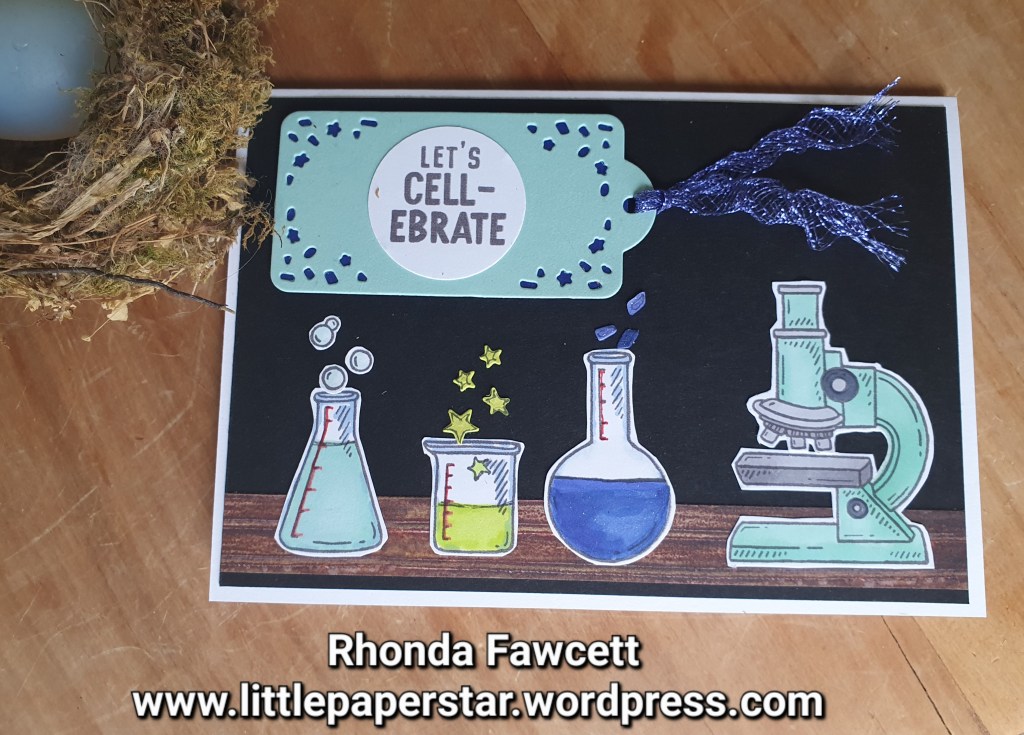
Here is a fun birthday card for the science geek in your life. It’s made with “It’s a science” stamp set which has a few science images such a seen in my card below, plus atoms, clipboard and molecule strands. The words in this set are great for birthdays, anniversaries and valentines.
The images would also be good for scrapbooking if you wanted to do some school themed pages.
I used basic gray ink to stamp my images and coloured them with Gray, Pool Party, Starry Sky and Lemon Lime Twist Blends. The wood bench top is a strip of DSP from the Earthen Elegance paper pack. The tag and stars are from the Beautiful Balloons dies. The ribbon is Orchid Oasis metallic woven ribbon. If you gently pull the edges apart. It gives a nice open weave and a curve to it. I love this ribbon because it has a subtle sparkle to it
I brushed Wink of Stella over the chemistry beakers which add some more sparkle. It’s not easy to capture in a photo but I promise you, it looks great in real life!
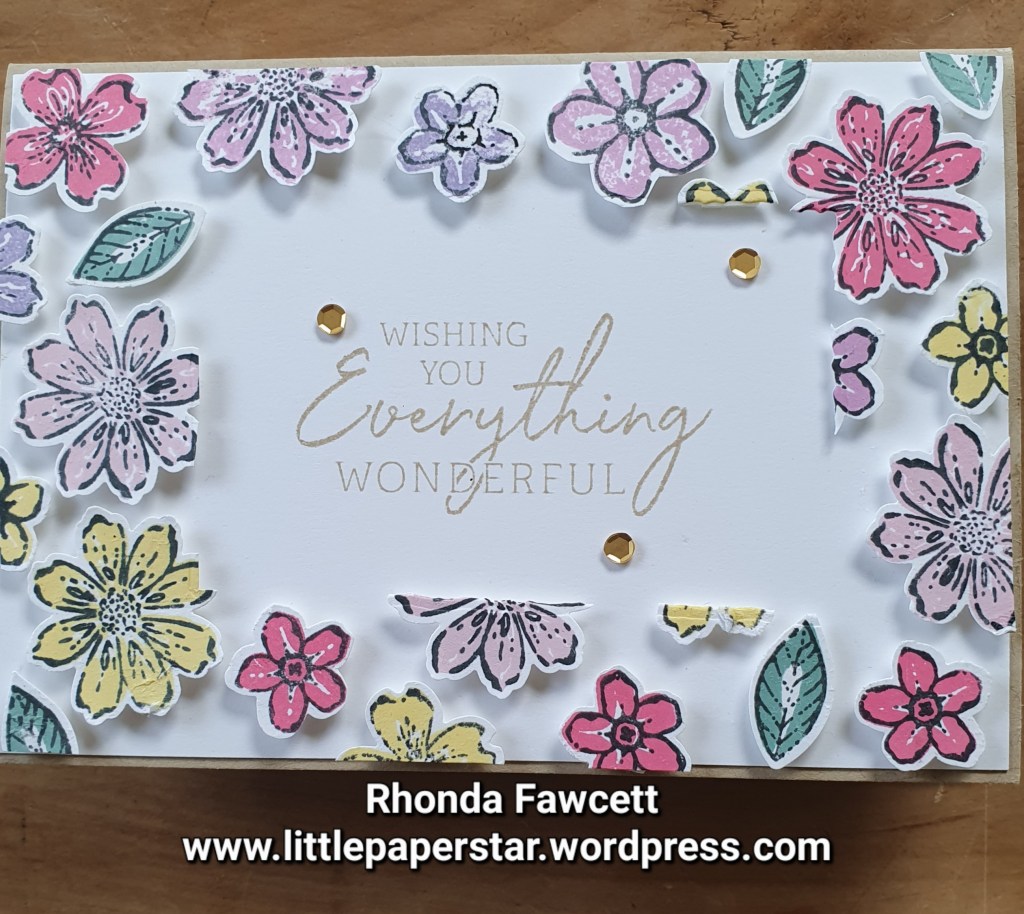
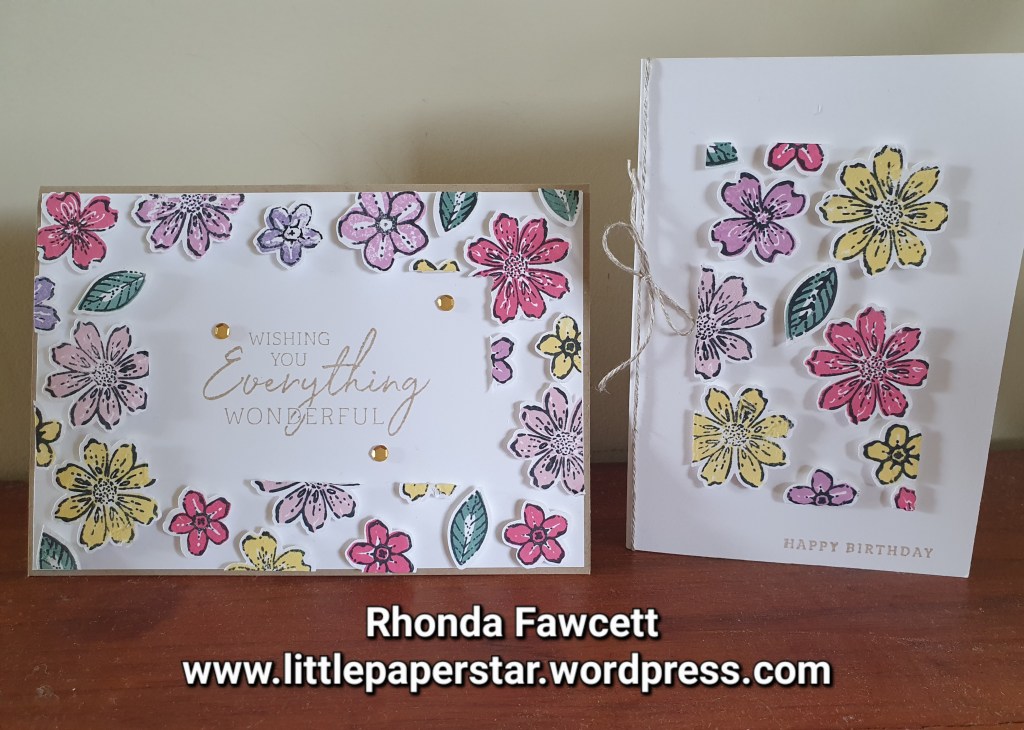
This week I have been making Floating Frame cards. To make these cards you lay out lots of little stamped and punched images like these flowers from the Petal Park bundle. I used Press and Seal cling wrap from GLAD ®️.It holds all the pieces in place while you cut out the frame. Then you need to adhere foam dimensionals to the back of each piece before adhering to your card.
Keep reading for step by step instructions on how to do this technique.
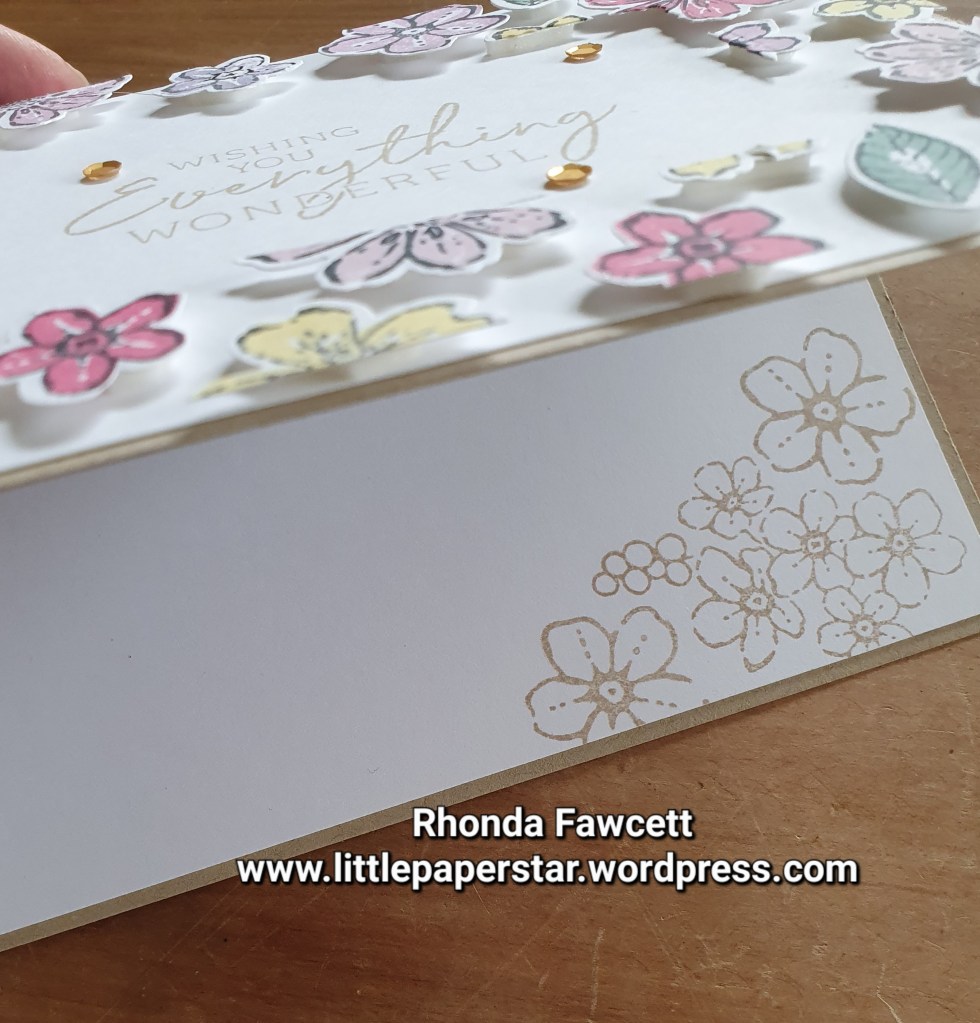
I kept the inside of my card fairly plain. That way i coukd use it for a variety of occasions.
This technique creates two cards, one with the frame and the other using the rectangle that you removed to make the frame.
I used one of the small notecards and envelopes for the centre floating panel. It was the perfect size.
INSTRUCTIONS
Cut, punch or diecut all the pieces you want for your card and lay them on top of a 14.9 x 10 cm white card base. Do not adhere, just lay in place. Then cover with some Press ‘n Seal cling film from GLAD ®️. Sticky side down. This will hold everything in position while you cut out the centre rectangle. I used the deckled rectangle dies from Stampin’ Up!
Remove the centre rectangle and trim the cling film to edge of card. Including any pieces hanging over the edge of the card.
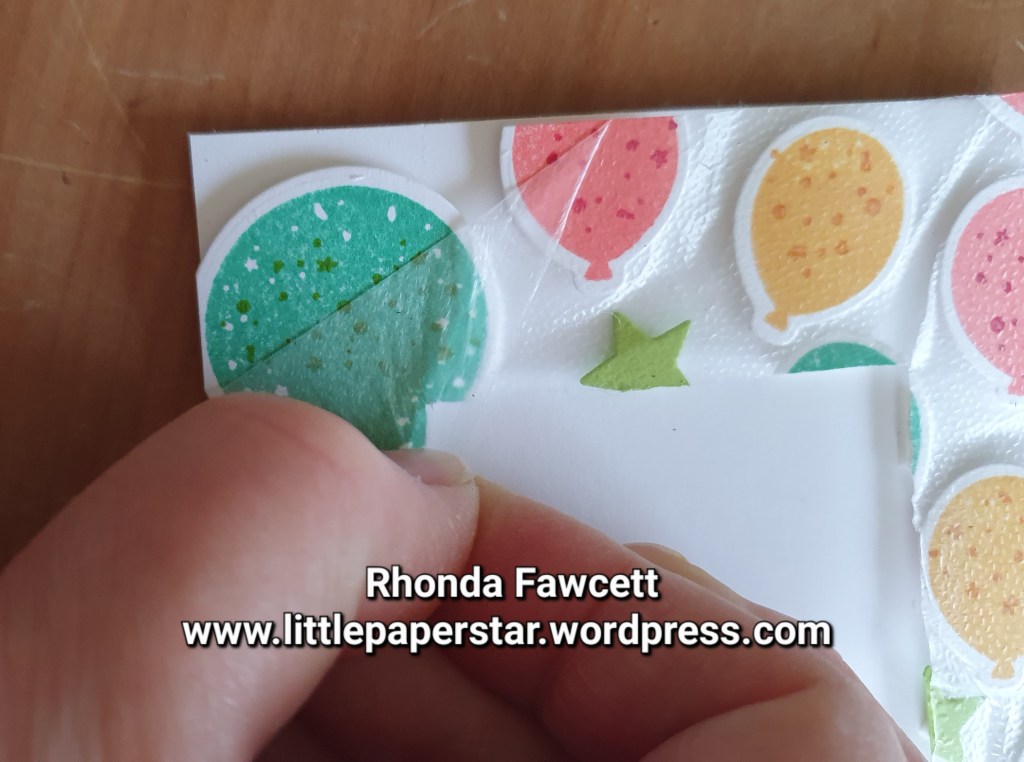
Turn over. If there are pieces that are too small to put foam dimensionals on, like the ones pointed to, in above photo, remove them. They will peel off with a bit of help. You can shift any pieces if you notice gaps, or add more in, like I did. (See next photo). The important thing is not to have any pieces overlapping.
Now add dimensionals. Cut some dimensionals in half or use the edge of the foam to get the right size for all the pieces.
Peel off all the backing from the dimensionals. This is a bit fiddly as everything is sticky.
Then adhere frame on to another piece of 14.9 x 10 cm piece of white card. I started in one corner and then tried to line up the other corners as I adhered it all in place.
Make sure all the pieces are stuck down, the slowly and carefully peel off the cling film. If you are not slow, it will rip and lift off some colour from your stamped images. If this happens, go back afterwards with a blender pen and draw in some more colour.
Throw away cling film. Stamp in the centre of your frame.
Don’t forget to stamp inside your card as well.
Repeat the process with the rectangle that you removed at the beginning. Adhere dimensionals to the back of all the pieces on the rectangle shape. Then adhere to a small gift card base. Peel off cling film. Add a sentiment and stamp a couple of small balloons inside.
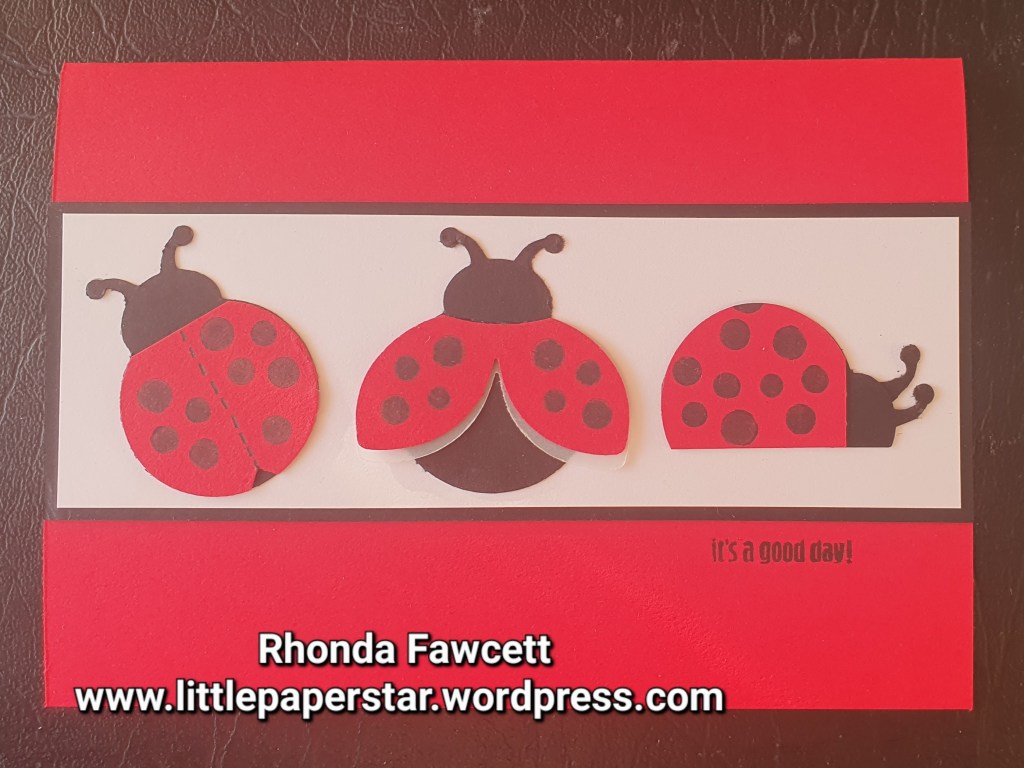
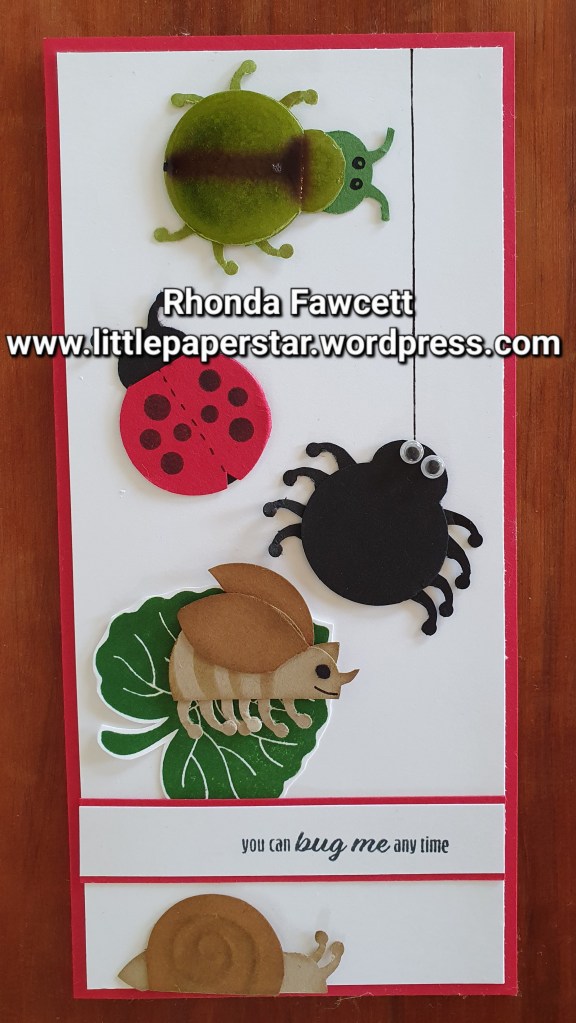
I was playing with the ladybug punch last week and I wanted to create some different styles of ladybugs so I made this card.
For the first bug, I punched two bodies, one in black and one in Real Red. I cut the head of the red one and drew a line on it, stamped some dots and attached it on top of the black one. For the third ladybug I punched two bodies as before but this time, I cut a straight line off the side of both bodies. I attached the antenna that I had cut off beside the other one. This ladybug reminded me of a snail, which got me playing to see what other bugs I could make.
The snail was made the same way as the third ladybug. I just added a small portion of a wing tip for the end of the snail. The shell was embossed using the embossing tip of my Take Your Tip tool and then rubbed over with a dauber using Pecan Pie ink to highlight the swirl.
The butterfly started of as a Crumb Cake body that I cut a portion off each side. I then punched out two lots of wings. The butterfly body was still too short so I added an extra double punched wing tip to add more length. Where the extra piece joins the body is where the wings meet to cover the join.
The back side of these critters looks rather messy but I am showing you to give you an idea of how I add the extra legs etc.
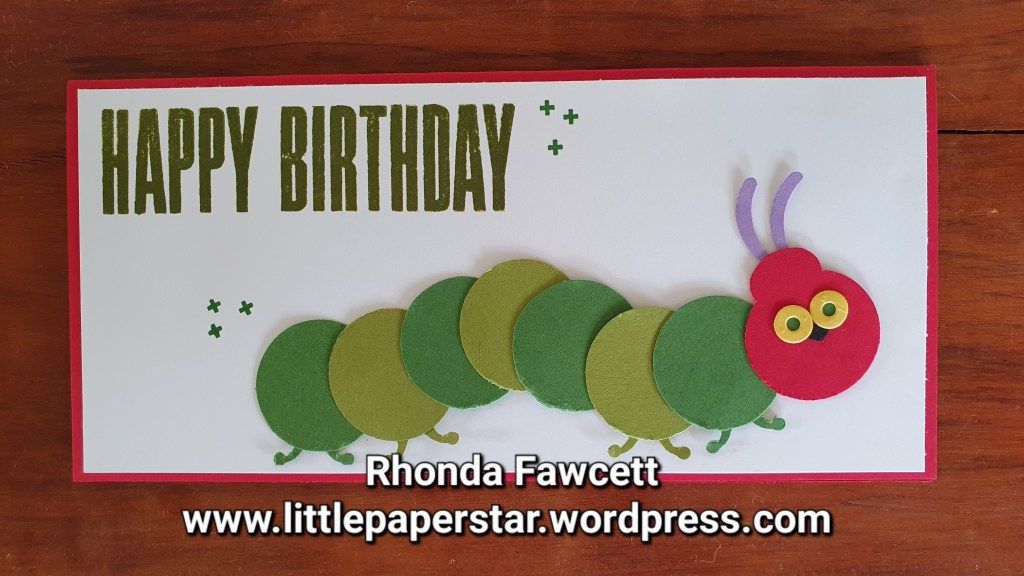
You can’t have a butterfly without a caterpillar right? So I decided to make that next. But the punch didn’t really lend itself to a caterpillar shape. I Googled caterpillar images and found the classic children’s story book character, hungry, hungry caterpillar and so made that instead.
Next I decided to put all my critters on a card. I used google glue on eyes for the spider. I made a rhino beetle and a shiny green beetle. The green beetle was made by punching one body from Old Olive and one head from Garden Green. I drew a line on the olive body then covered the body in a layer of Fine Tip Glue. The glue made the ink from the marker pen run but I actually liked the final effect so I wouldn’t change it. The eyes are drawn on with a Stampin’ Write marker.
I think the sentiment works perfectly for this card. I am going to give it to my grandson for his birthday.
I was excited to get my hands on this new card and sticker pack. It’s the only item in the catalogue that has come down in price. I love the bright and happy colours. They would work well for any party celebration photos. I used them for an Easter egg hunt layout.
If you live in New Zealand and want a pack of the cards and stickers. Send me a message or order from my online store rhondafawcett.stampinup.net
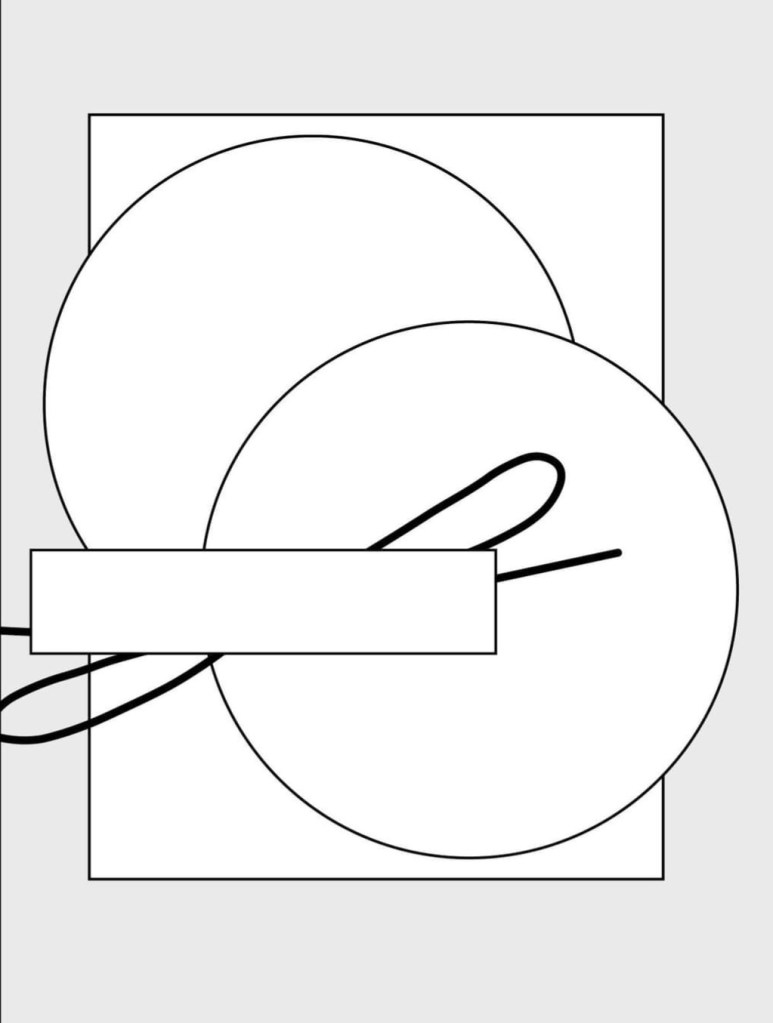
Stampin’ Up! has a challenge for May #creatingconnectionssimple The challenge is to create a card using this sketch below. I love using sketches as I find them helpful when you get into a creative slump.
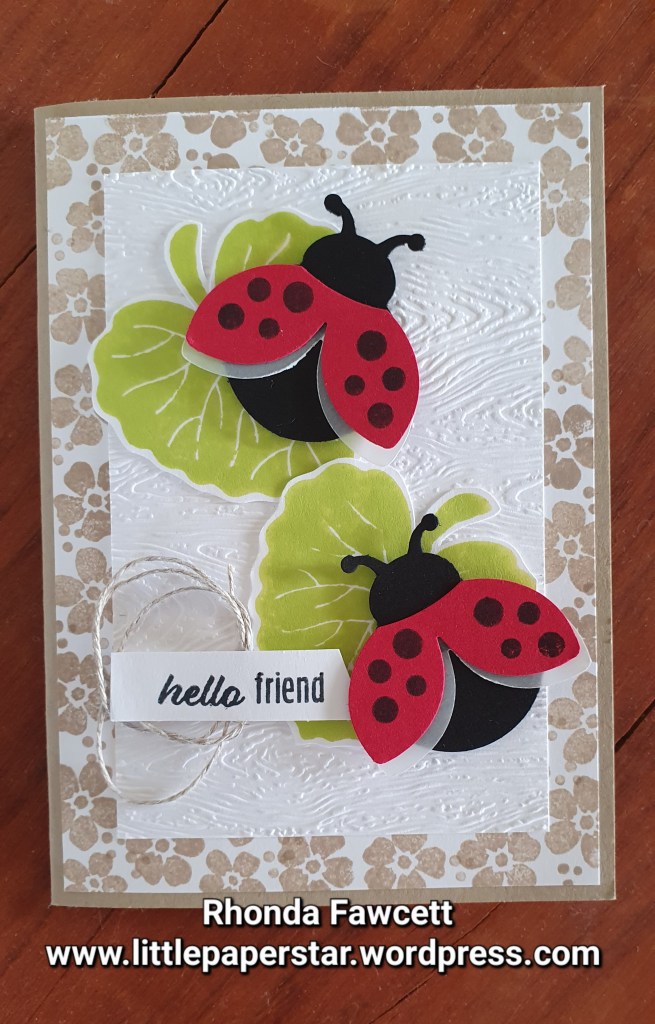
Here is my interpretation. Inside of two circles, I used two leaves with ladybugs on.
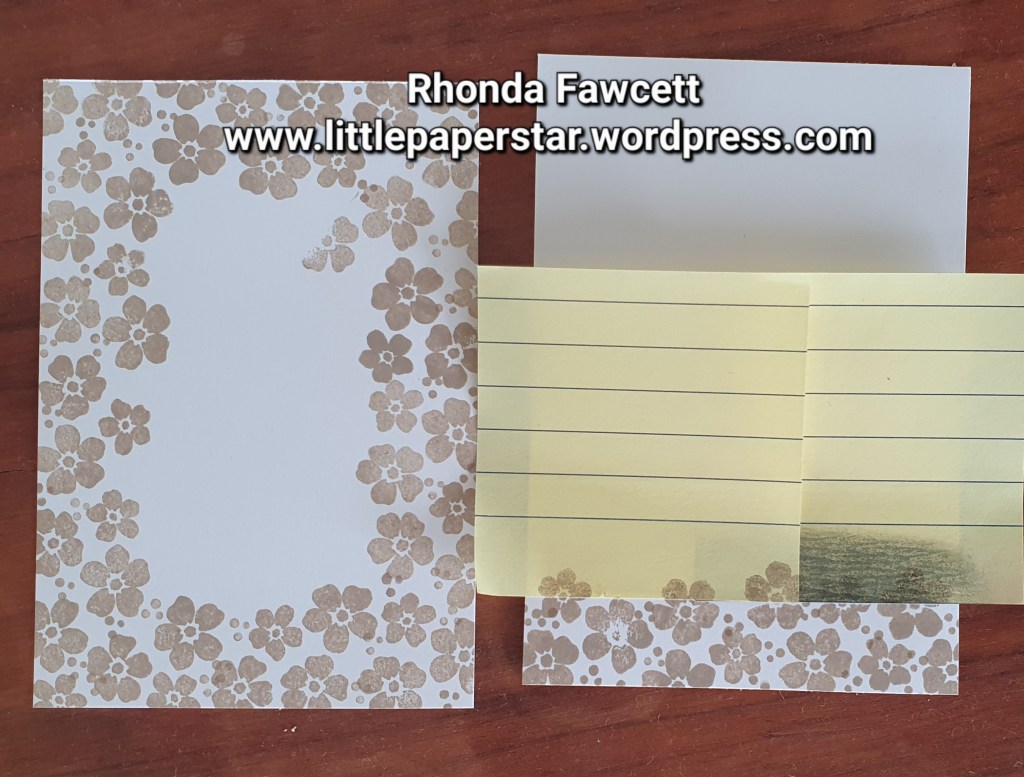
I didn’t have any suitable Designer series paper to use on the background so I made my own using Crumb Cake ink. I also stamped a border for inside my card. I used sticky notes to get a straight line across the bottom.
Here is the inside.
All the stamps used are from the Hello Ladybug stamp set. The ladybugs are punched out with the coordinating punch.