
Double Point Fold Card
Image


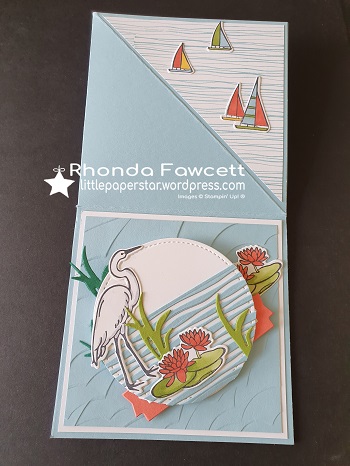
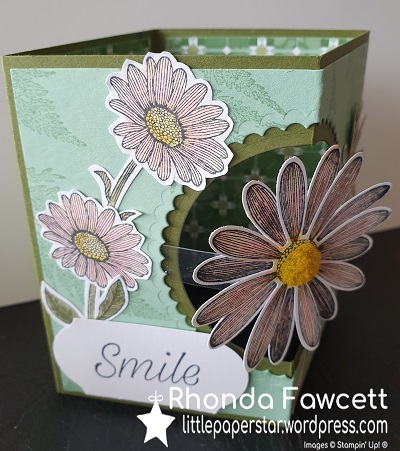
This card uses the Lilypad Lake stamp set and matching dies. The mechanism for folding is pretty easy to make but the colouring and die cutting of all the little pieces is quite fussy.
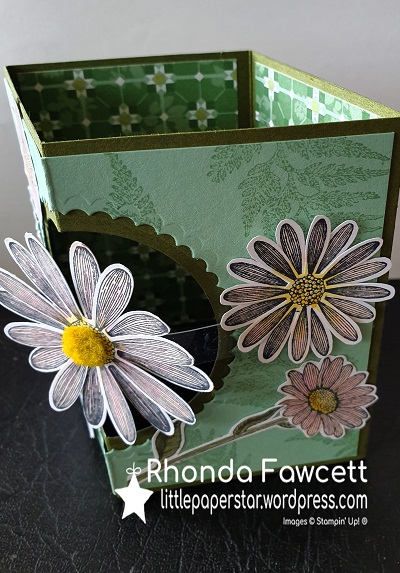
The best thing about this card is how it folds down to post, yet when open it stands beautifully on it’s own to make a lovely scene.

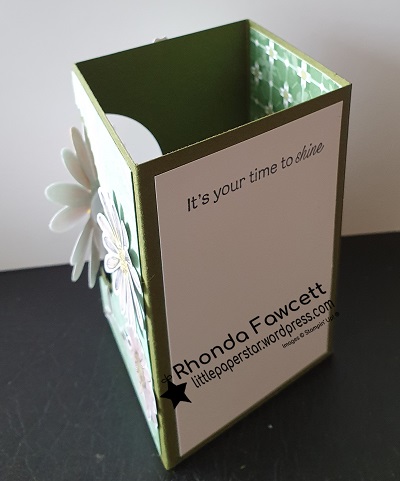
To fold down, first you have to fold flat the stand up easel with the bird picture, then lay out as a square and finally fold up into the four quarters to fit in an envelope for posting.
Please feel free to email me for more information on making this card. I am giving away instructions for those in New Zealand who want to buy the stamp set from me.


Stamps: Sailing Home, High Tide
Ink: Memento Black, Night of Navy, Soft Suede, Balmy Blue
Blends: Balmy Blue light and dark, Smoky Slate light and dark, Crumb cake light and dark, Soft suede light, Real Red light, So Saffron dark
Card/Paper: Balmy Blue, Whisper White, Early Espresso, Crumb Cake, Soft Suede, Mossy Meadow, Pretty Peacock
Come Sail Away DSP
Big Shot and Dies: Layering Circles, Smooth Sailing
Punches: 1½” Circle
Embellishments: Sail Away Trinkets, Navy and Sahara Sand Bakers Twine, Metallic Pearls
Other: Sponge roller, post it notes
Instructions:
1. Use a saucer or a bowl to trace and cut a large circle from a piece of A5 sized Balmy Blue card.
2. Fold circle in half, burnish well. Add DSP to one half of circle only.
3. Cut a 2⅞” circle from balmy blue card and stamp half the circle with water stamp from high tide stamp set. Then sponge over the stamped portion with balmy blue ink. Stamp birds on top right-hand side of circle, then attach circle to centre of the base card.
4. Stamp lighthouse and anchor in memento ink. Colour with blends and die cut out.
5. Stamp compass in soft suede ink and punch out.
6. Stamp small sailboat, (colour with blends) and sentiment in navy ink. Die cut both out.
7. Die cut extra shapes as seen in photo.
8. Arrange all pieces on the front of your card. Attach sentiment with dimensionals. Attach trinket and twine with glue dots. Add a pearl to the centre of the compass.
9. Stamp a large sailboat inside your card and on your envelope to complete.

Below are the written instructions (with metric measurements – to fit our NZ C6 size envelopes). If you don’t have the country home stamp set and you would like to buy one, you can purchase one through me. It costs NZ$46.20 (with shipping included)
Every purchase will get a kit with all the pieces needed to create this card.

Stamps: Country Home, Special Celebrations, Buffalo Check
Ink Pads: Memento Black, Rocco Rose
Card/Paper: Crumb Cake, Rocco Rose, Very Vanilla
Blends: Assorted colours
Accessories: Puff Paint, Dimensionals, Rocco Rose Ribbon, Dauber, Designer Elements
Punches: Timeless Label, Circle Punch 1” or 1½”
Bigshot items: Tin Type embossing folder, Woodgrain embossing folder, Layering oval dies,
Other: Envelope punch board, Heat Gun
Instructions:
1. Cut a sheet of Crumb Cake card to 20 cm x 20 cm. Put in the envelope punch board at 8.5 cm. Punch and score all sides as you would for an envelope. Trim off one of the short ends of the “envelope”.
2. Taking one flap at a time, put into the Tin Type embossing folder and emboss the flap. It is easiest to just wind it in the bigshot until you come to the end of the folder and then rewind back out again, rather than going all the way through.
3. Make up the “envelope” pocket.
4. Cut Vanilla card to 7.7 cm x 10.5 cm and stamp with Buffalo Check stamp. Mount on Rocco Rose card (8.5 cm x 10.5 cm). Add a strip of crumb cake on top that has been embossed with the woodgrain folder. Adhere a piece of Rocco rose ribbon around all these pieces and attach this layered strip to the front of your pocket. (You add the knot later).
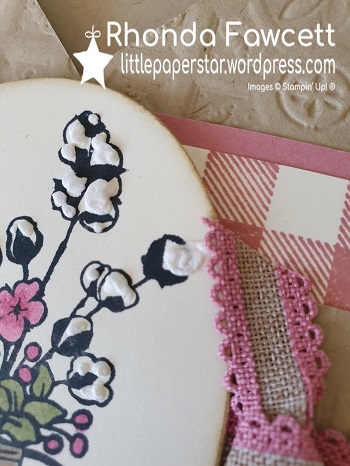
5. Stamp urn and flowers on vanilla card. Cut out with an oval die. Dauber edges. Colour image with blends. Add puff paint to the cotton flowers and heat to set with a heat gun.
Attach to front of card with dimensionals.
6. Tie a loose knot with another piece of Rocco Rose ribbon. Add to card with some glue dots.
(You will need to play around with the ribbon, so it sits nicely and doesn’t have the wrong side showing).
7. Make an insert by stamping a sentiment on a 14.3 cm x 9.8 cm piece of vanilla card. Matt onto a 14.8 cm x 10. 3 cm Rocco rose card. Adhere on timeless label shape for the insert “pull” and add a designer element embellishment to finish.
8. Punch a half circle in the back of your pocket at the top (see photo). This makes it easier to grab the insert to pull it out.


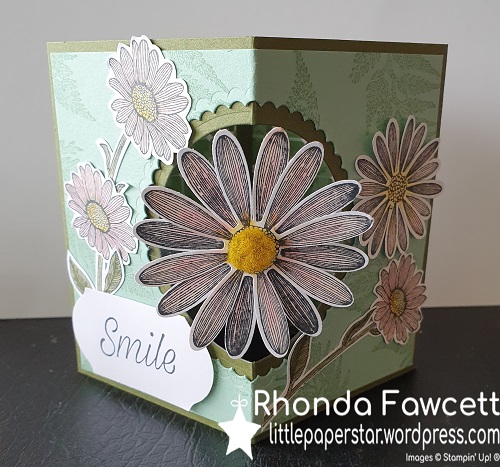
This is a fun fold card that uses half a sheet of A4 size card, cut in half length-ways.
It folds flat for posting and when it stands up the big daisy in the middle pops out and looks like it is floating.

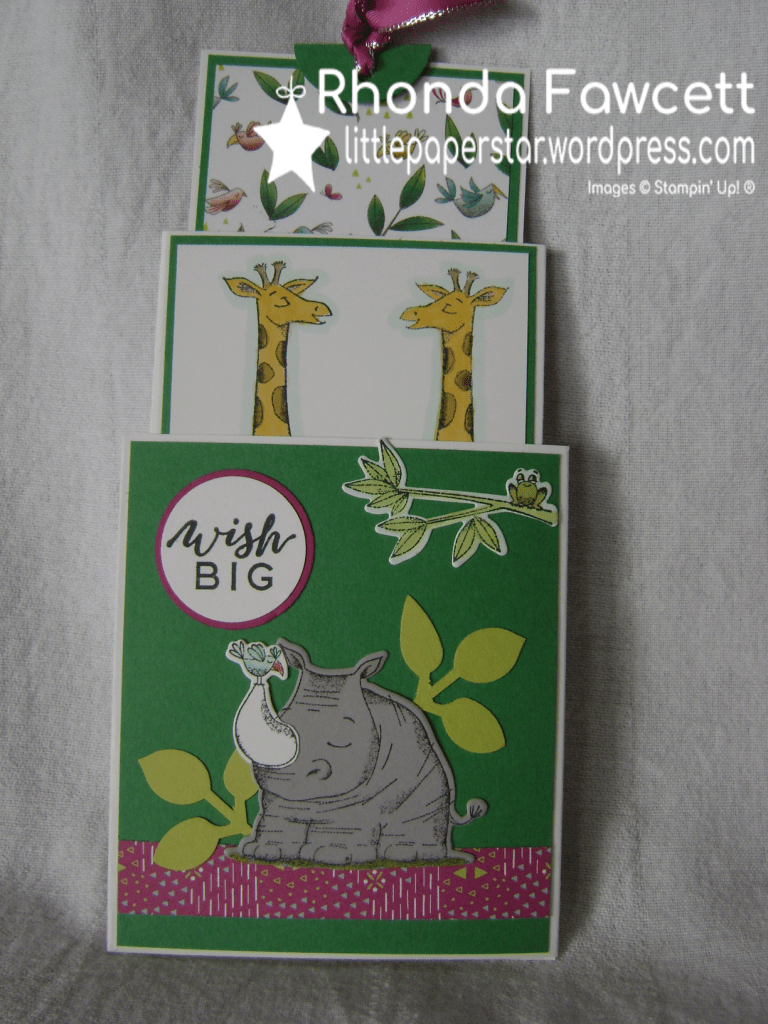
Here are instructions for making a triple tier slider card (in metric measurements).
This is my first ever video tutorial, so please be kind.
Video features Triple Tier Slider Card, using the Best Catch stamp set.
TRIPLE TIER SLIDER CARD
Whisper White
Tier 1 29.6 cm x 11 cm (score at 9.9 cm and 19.8 cm)
Tier 2 26 cm x 8 cm (score at 8.6 cm and 17.4 cm)
Tier 3 7.8 cm square
Balmy Blue Mats
Tier 1 10.6 cm x 9.5 cm
Tier 2 8.2 cm x 5.5 cm
Tier 3 7.2 cm x 5 cm
White
Mats
Tier 2 7.8 cm x 5.1 cm
Tier 3 6.8 cm x 4.6 cm
Sliding
Mechanisms
1.3 cm x 8.5 cm
1.3 cm x 7 cm
Cut slits for sliding mechanisms
Tier 1
Cut in 2.5 cm in from each side of the third section
Start cutting at 1.5 cm and stop cutting at 7.6 cm
Tier 2
Cut in 2.5 cm in from each side of the third section
Start cutting at 1 cm and stop cutting at 6.3 cm

