Here is a quick tutorial on how to make a small Twisted Easel Card. https://youtu.be/rreTa8CraUc?si=FMeqV7kKJrE-QbwF
Twisted Easel Card
Reply

Here is a quick tutorial on how to make a small Twisted Easel Card. https://youtu.be/rreTa8CraUc?si=FMeqV7kKJrE-QbwF
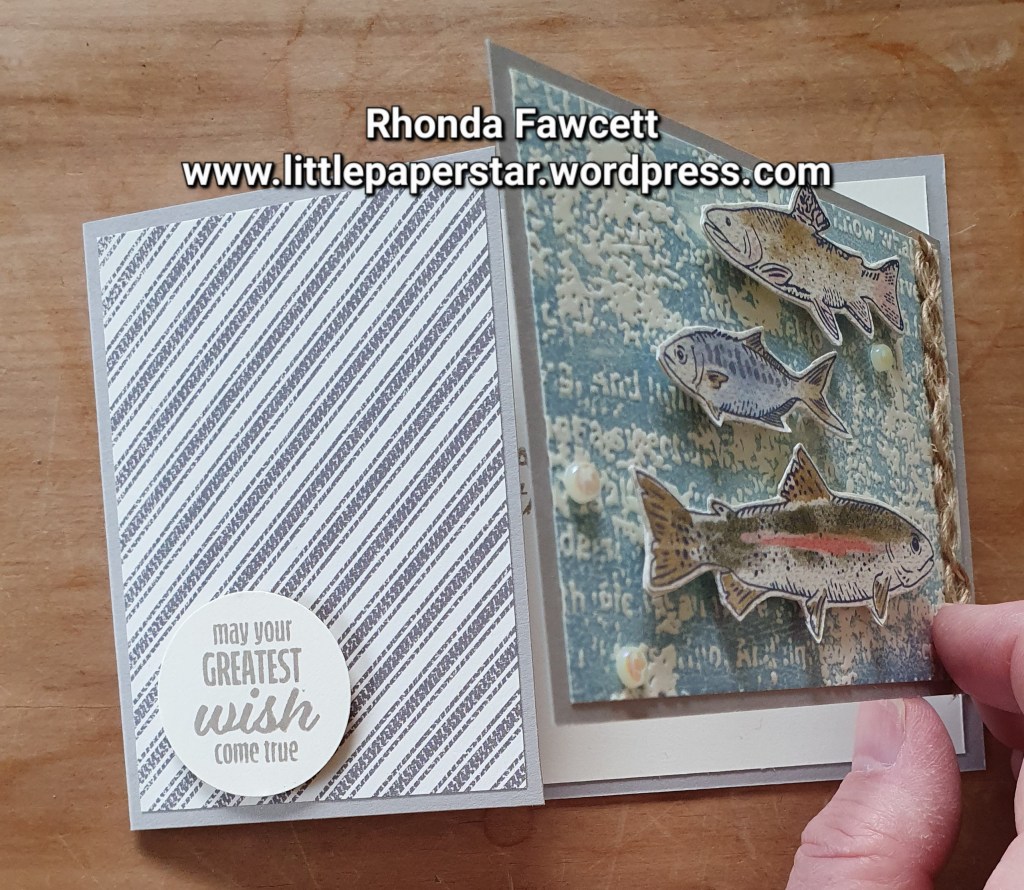
This is called a Joyfold card. It was one made for a recent class. We used Let’s go Fishing designer series paper (DSP).
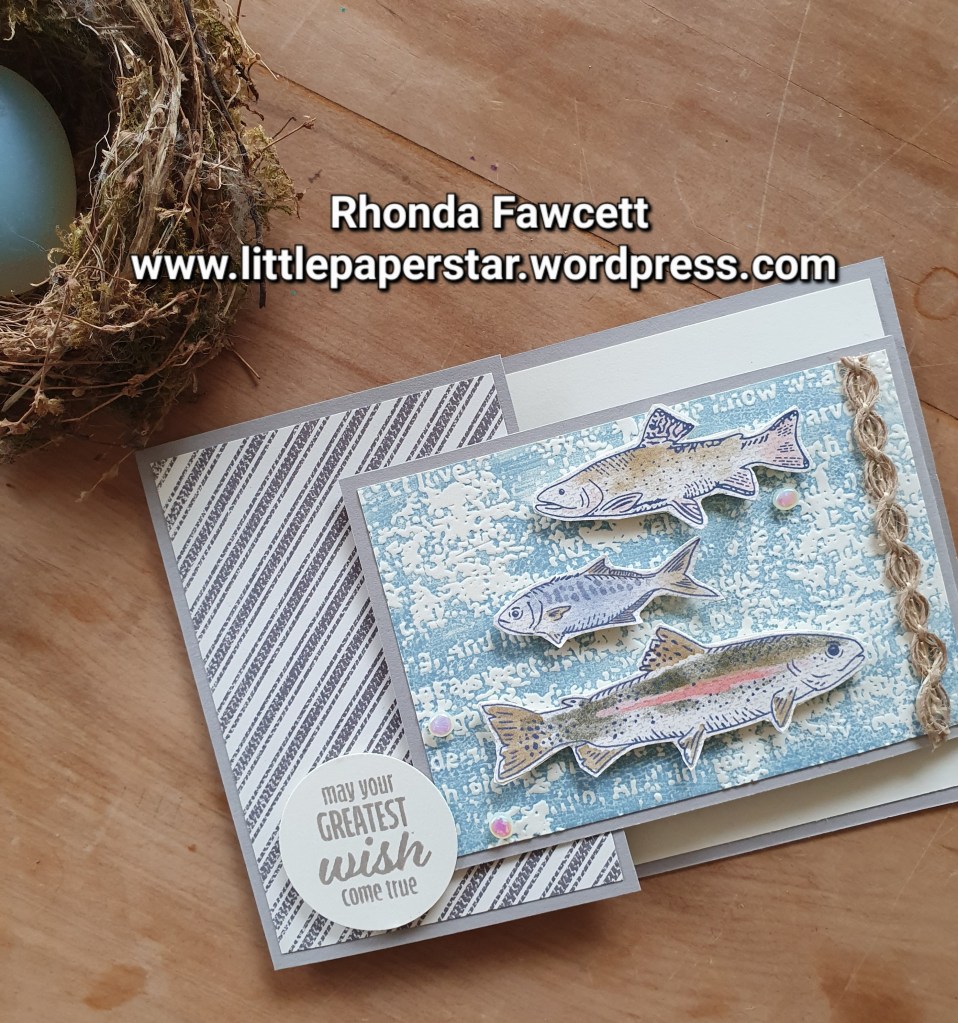
The paper has great fish images which we fussy cut out to use as our focal point. We placed them on a dry embossed background made by swiping the embossing folder with Boho blue ink before rolling it through the Stamp and Cut Emboss machine.
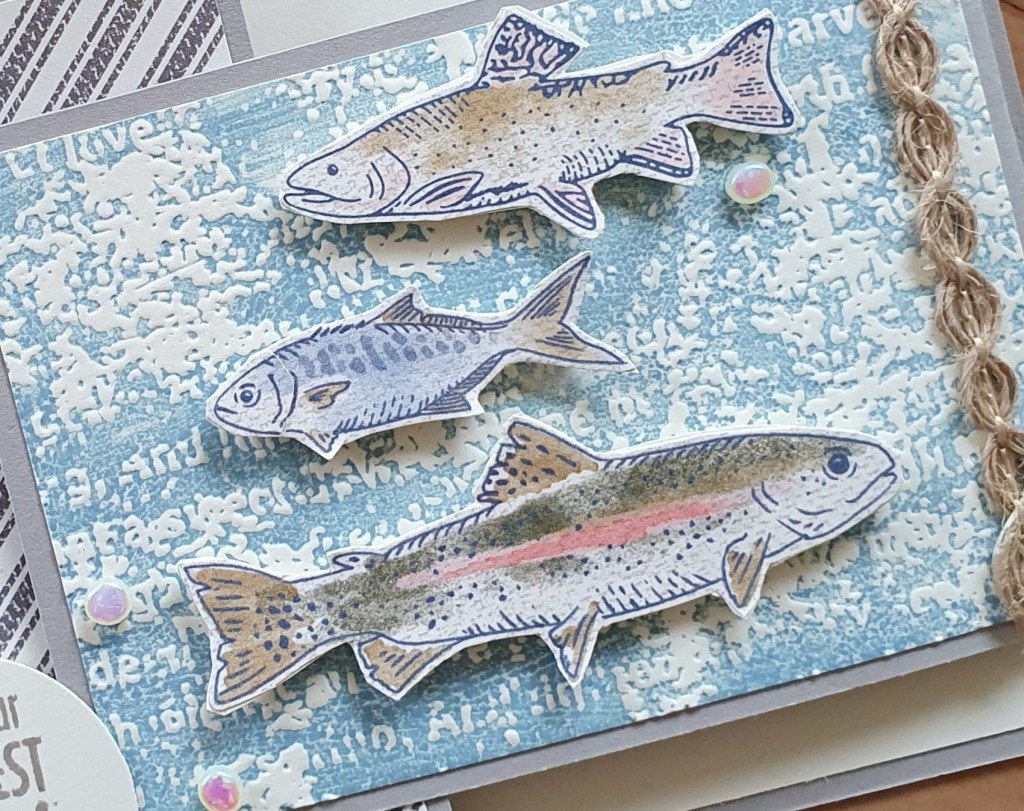
This is a great technique to use with embossing folders as it really highlights the textures.
The joyfold card is tucked under the sentiment circle at the left hand side to close. When it opens you have plenty of space to write inside.

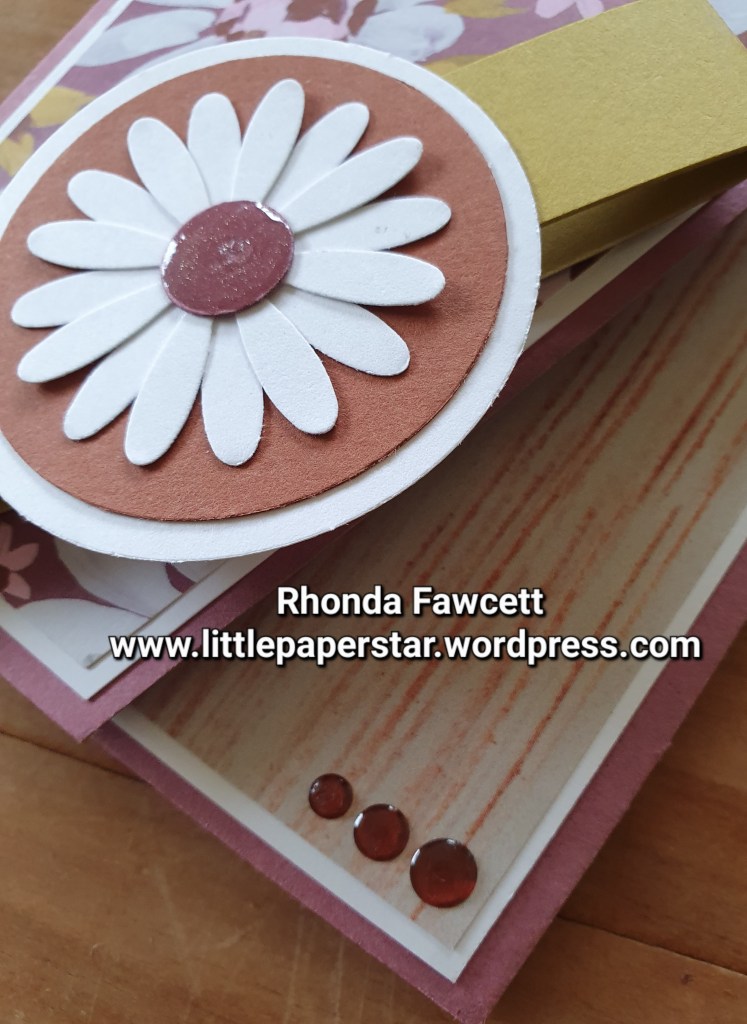
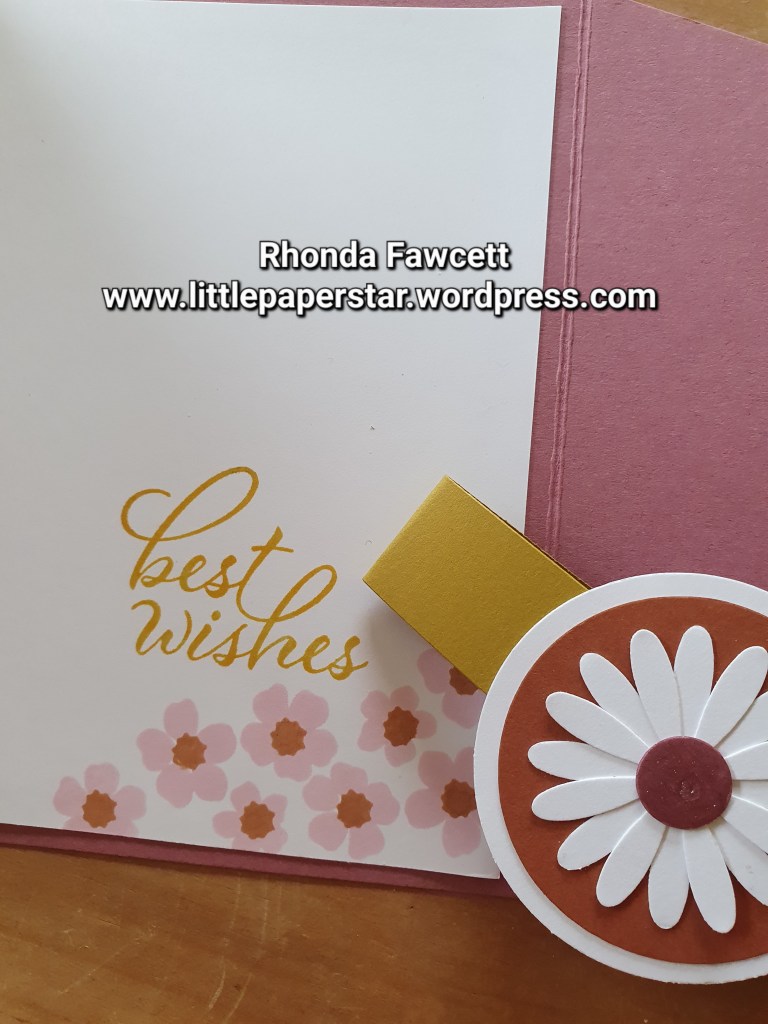
I made this cute gatefold using some of the new Incolours and the Fresh as a Daisy designer series paper (DSP).
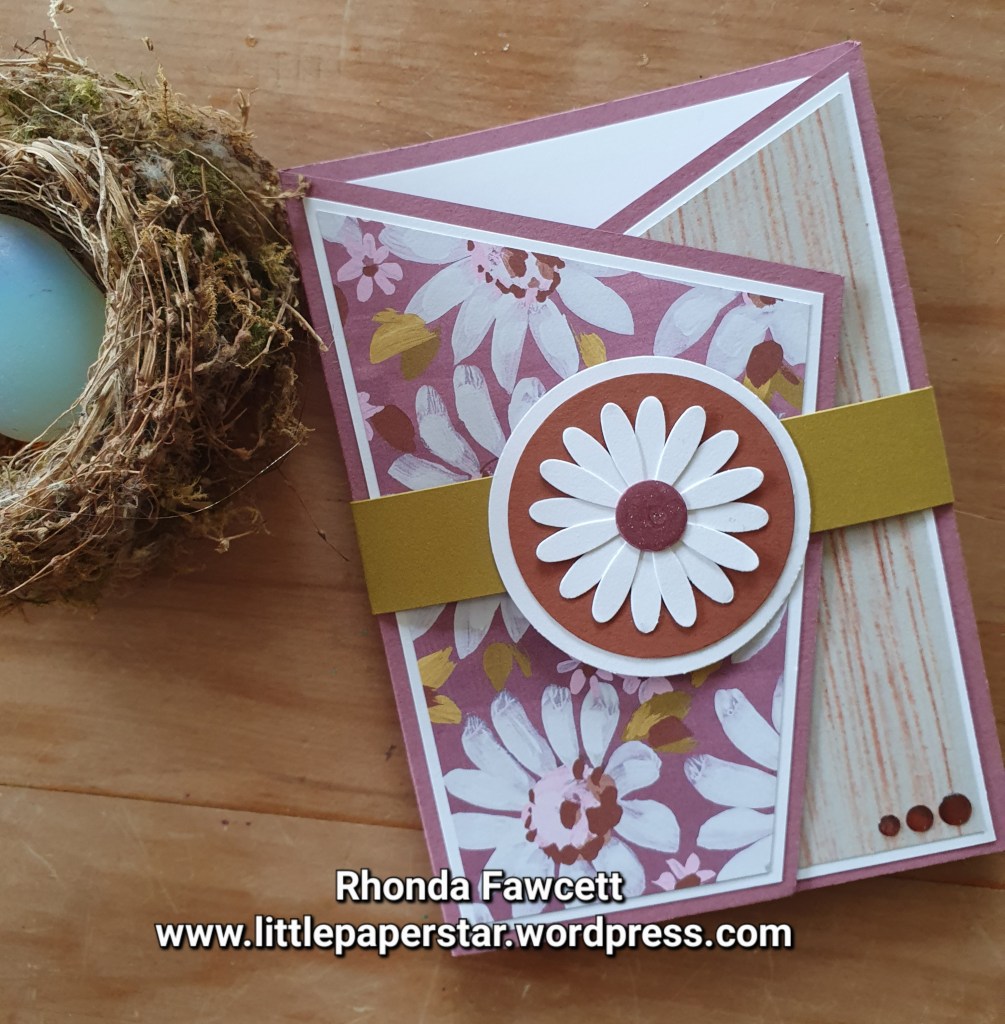
I didn’t have the coordinating Cheerful Daisy dies so I used a retired Daisy punch instead as the focal piece on my belly band. I used in colour glossy dots embellishments and emulated the look on the centre of my daisy flower, using Wink of Stella and Fine Tip Glue.
Inside the card, I used the flowers from the Hello Ladybug stamp set and Bubble Bath ink. They worked beautifully. The sentiment is from the Layering Leaves stamp set.

If you want to receive instructions to make this card please send me an email to rhondafawcett22@gmail.com

This fun card features the new “Lighting the Way” bundle and “Enjoy the Journey” designer series paper, DSP.

Instead of using foam tape and creating a window to be a feature for the shaker pieces, you use a clear envelope, (cellophane bag). You insert both the decorative dsp (my one measured 14.4 x 10 cm) and sequins into this clear envelope and then attach this to the card front with tear n tape. Then add any extra embellishments on top of the clear envelope. I added my sentiment and lantern on last. But the die cut bees are glued to the DSP and are inside the clear envelope.

Use a few of the same stamps that were used on the DSP to decorate inside your card as well.


This is a project that we made in class recently using the pretty Dainty Delight DSP. One of the sheets of paper has these floral oval wreaths printed on, which became the base for our card.

Because of the sizing of the wreaths, the card size was slightly shorter and wider than our standard NZ card size. (Perfect for the American card sizing though). So I decided to do a custom made envelope for it. We even put some floral paper inside the flap.
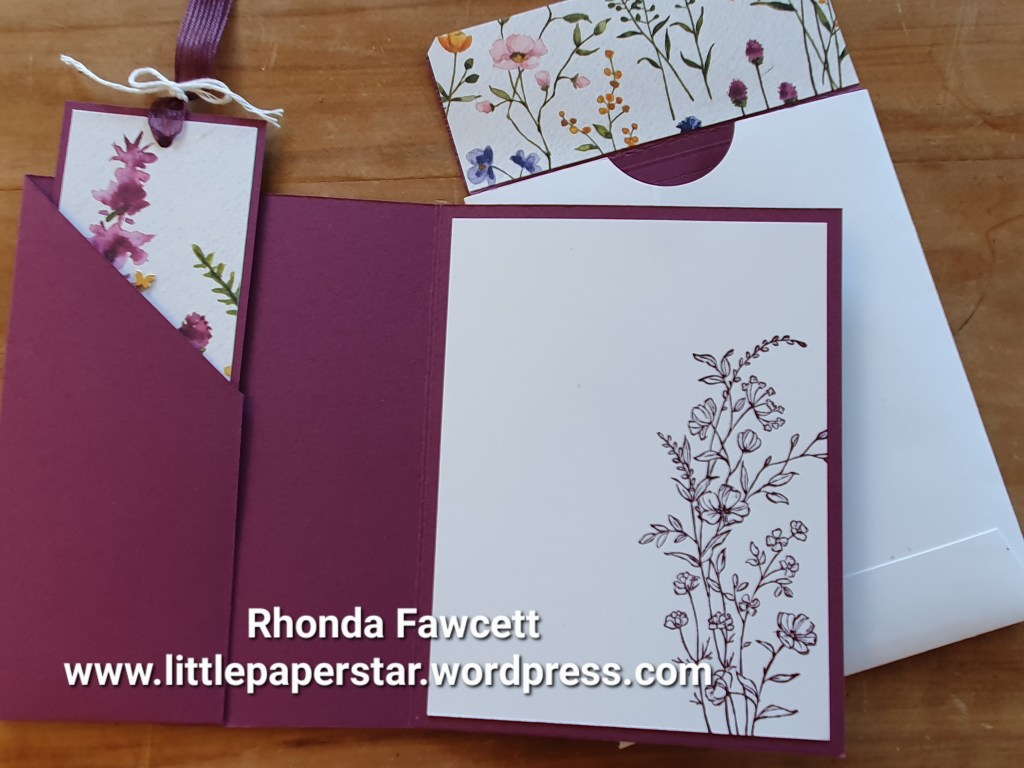
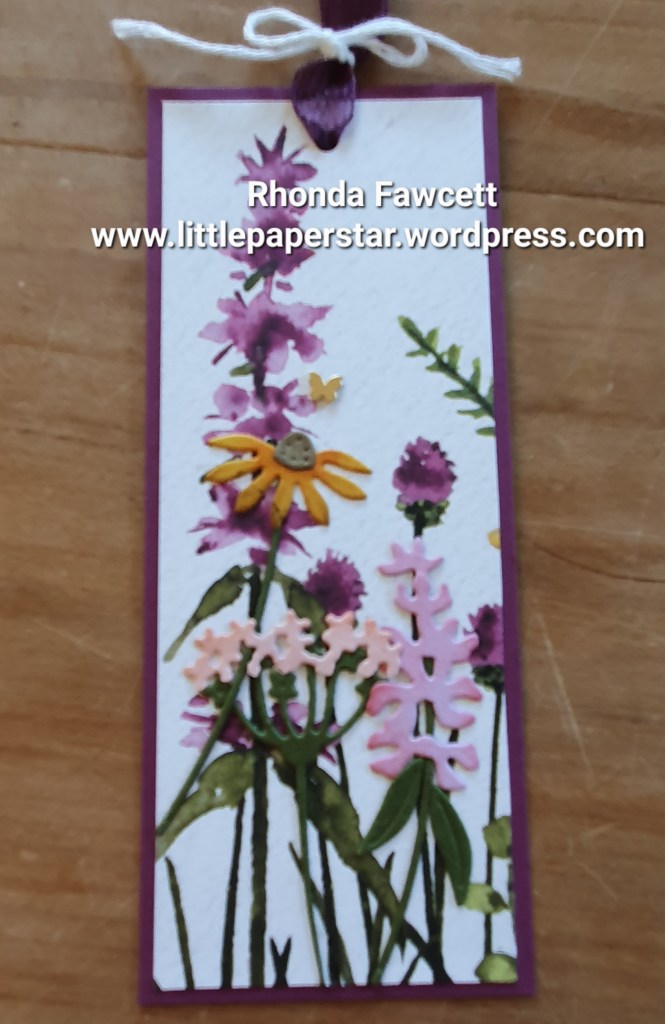
The bookmark is a strip of DSP mounted on some Rich Razzleberry card and with a few flower die cuts added for extra dimension. It will be a pretty gift for someone’s birthday.

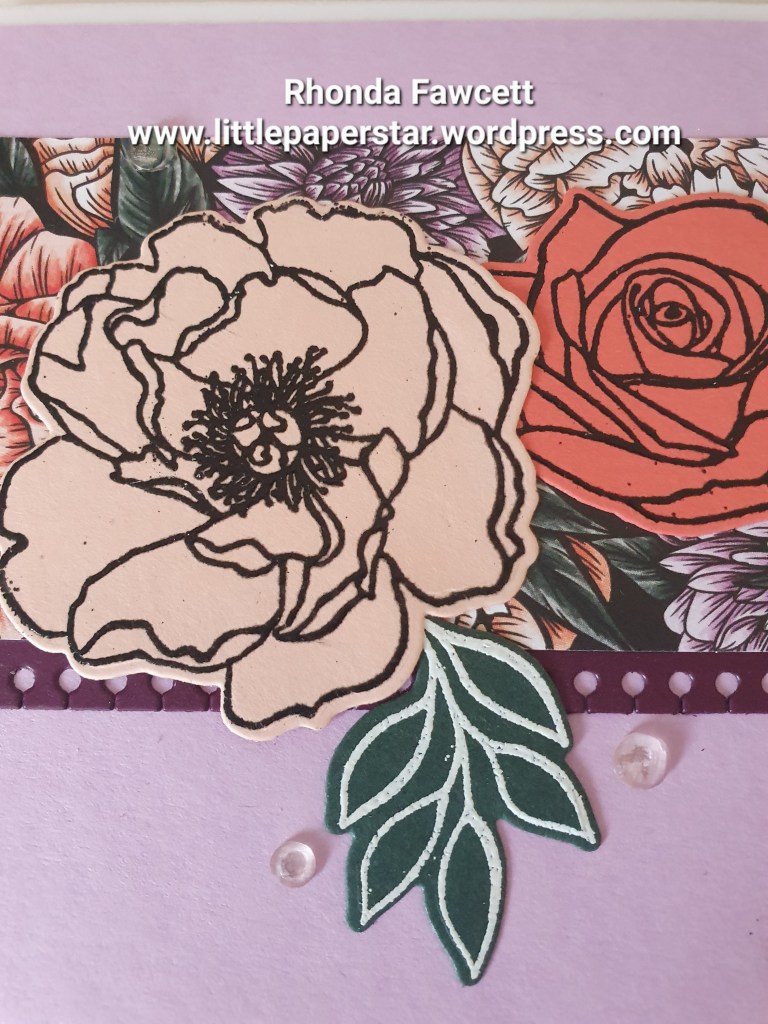
This is a fun pop up card using the free SAB designer series paper and the Hues of Happiness bundle.

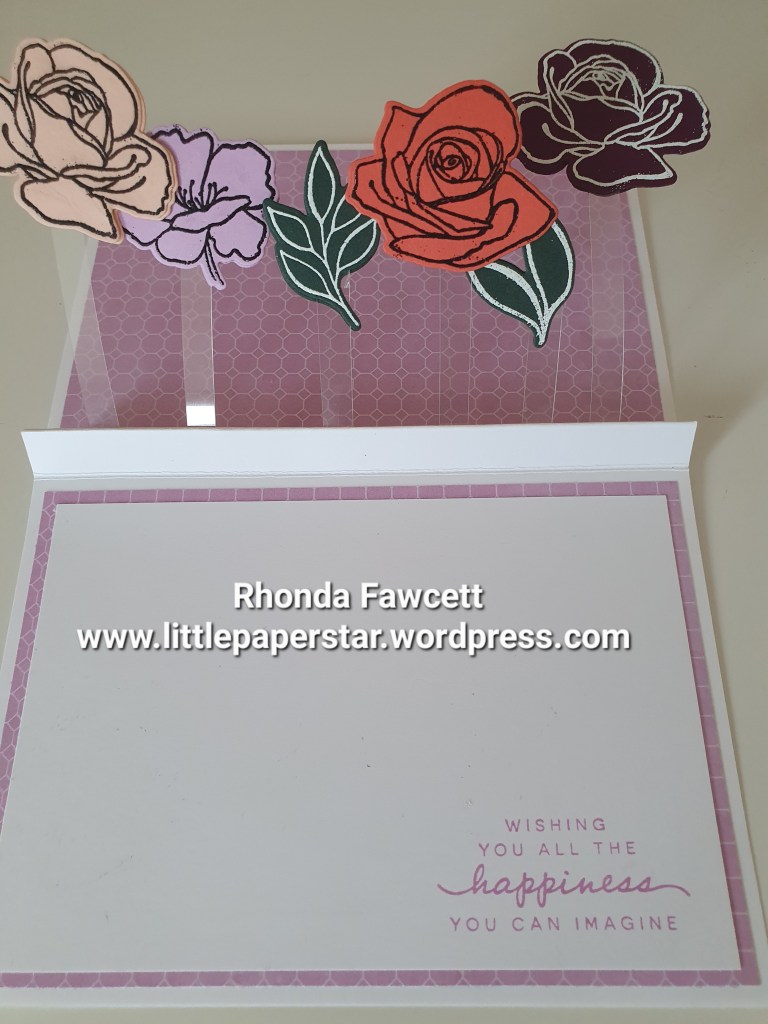
The flowers are all stamped with versamark and heat embossed with either black or white embossing powder.
I embossed them on various pieces of coloured cardstock so I had the colours I wanted without needing to colour any in. It is a quick and effective way to add colour.


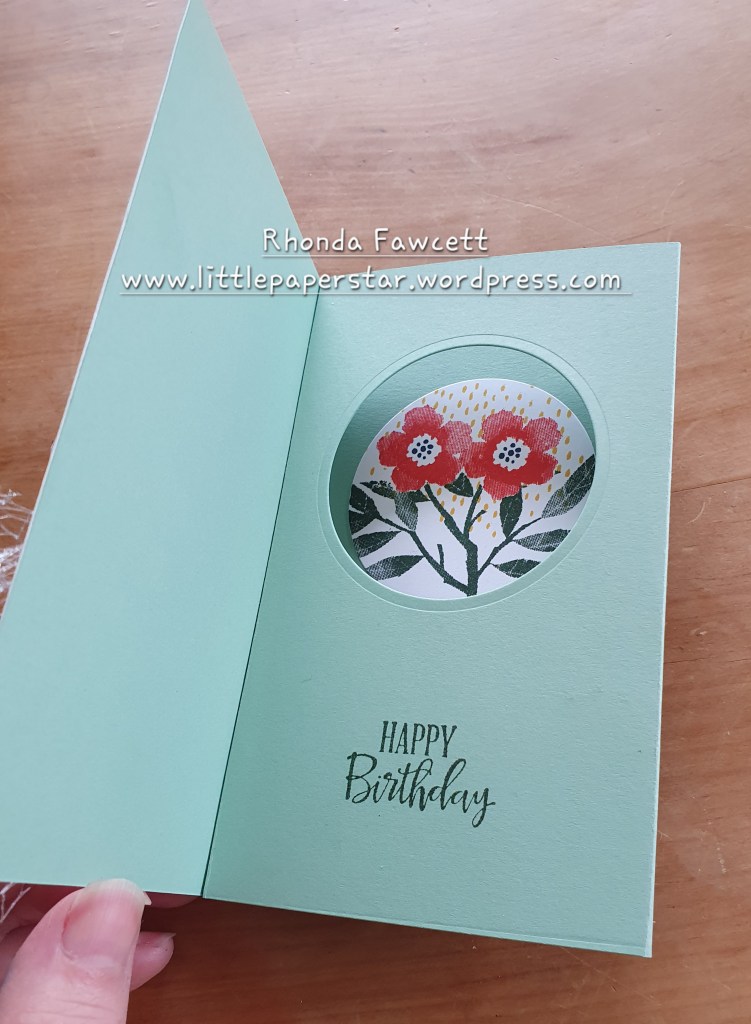
This was a fairly quick card to make for my group of ladies. It features the free Sale-a-bration papers, called Rings of Love. The sentiment stamps come from the Peaceful Moments stamp set and the flower image inside the card is another free Sale-a-bration item called Perfect Pomegranate.

This is such a great fun fold because even though it has the depth and box shape to it when it is open, it still will fold flat for posting.

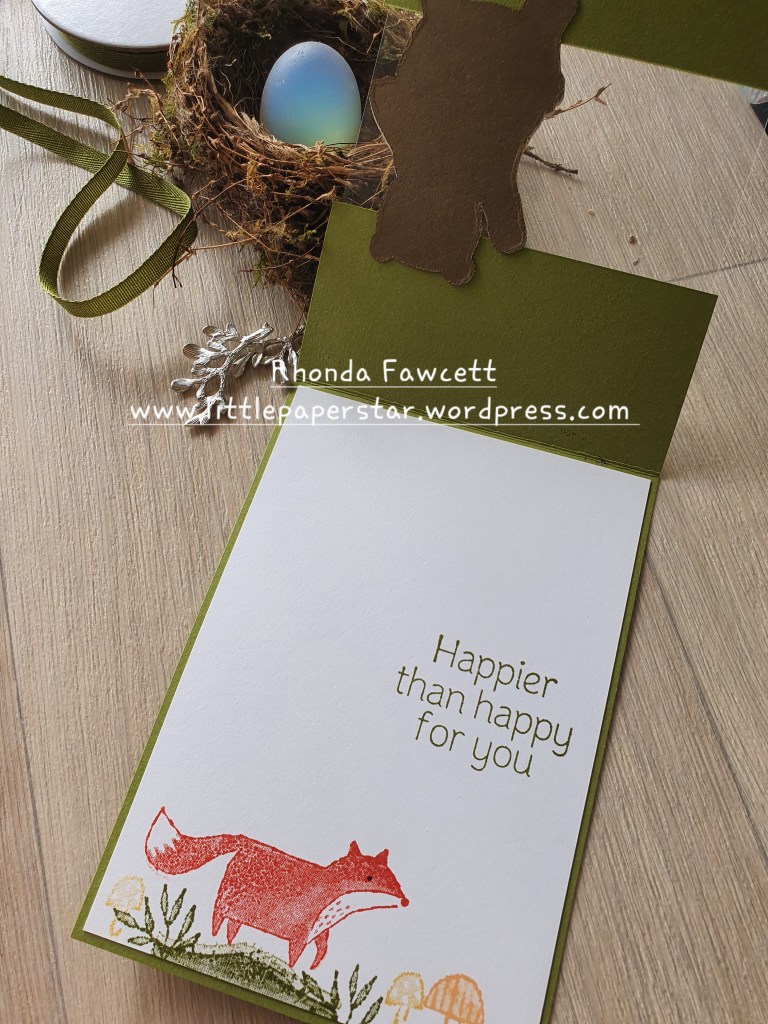
This is an easy fun fold card to make. Just cut a sheet of Old Olive A4 card in half lengthwise and fold in half. Then cut at 4.5 cm from the fold. Trim the cut off piece to measure 5 cm wide and discard the rest. Cut two pieces of DSP (Designer series paper) one at 10 x 4 cm and the other at 10 x 4.5 cm. Also cut a piece of window sheet to 10 x 11 cm. Lay the cut off Olive piece at the bottom of the folded Olive card so the bottom edges line up. There will be a gap in the middle. Glue or tape the window sheet to the Olive card to bridge the gap. Then glue DSP on top
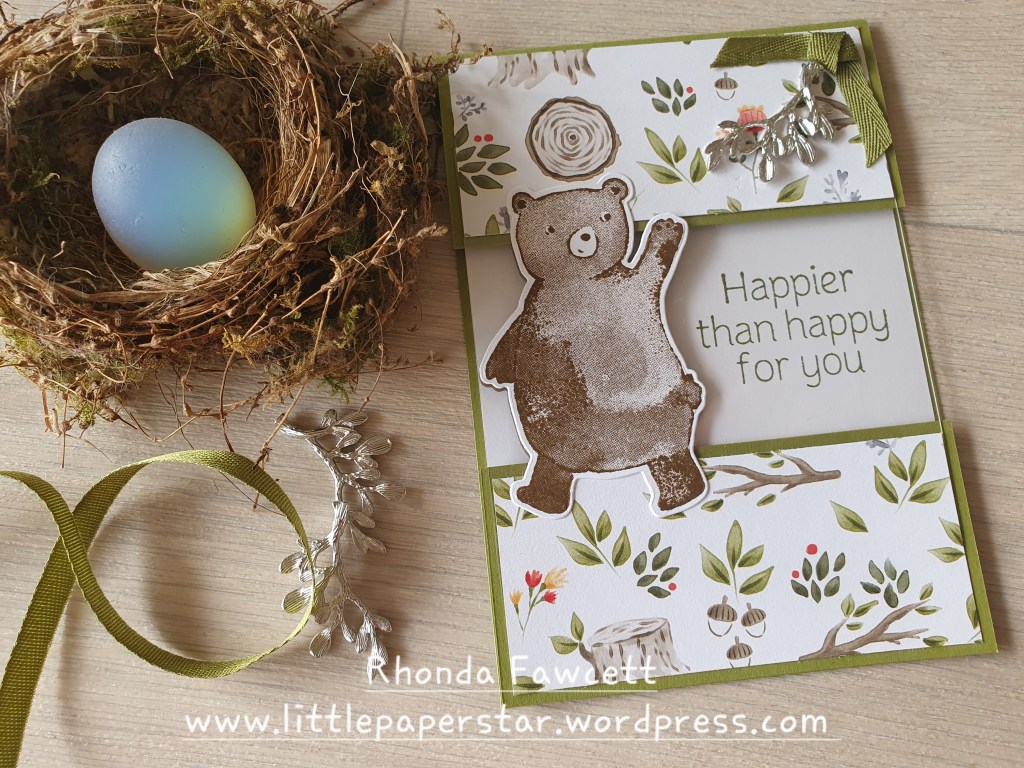
Decorate with the stamps and dies from the Happier than Happy bundle. Glue bear onto window sheet to the left hand side. Die cut a second bear shape from Soft Suede card and glue it on the underneath side of the window sheet to line up with the bear on the front. When you stamp the greeting inside, take care to position it so that it shows through the window at the side of the bear.


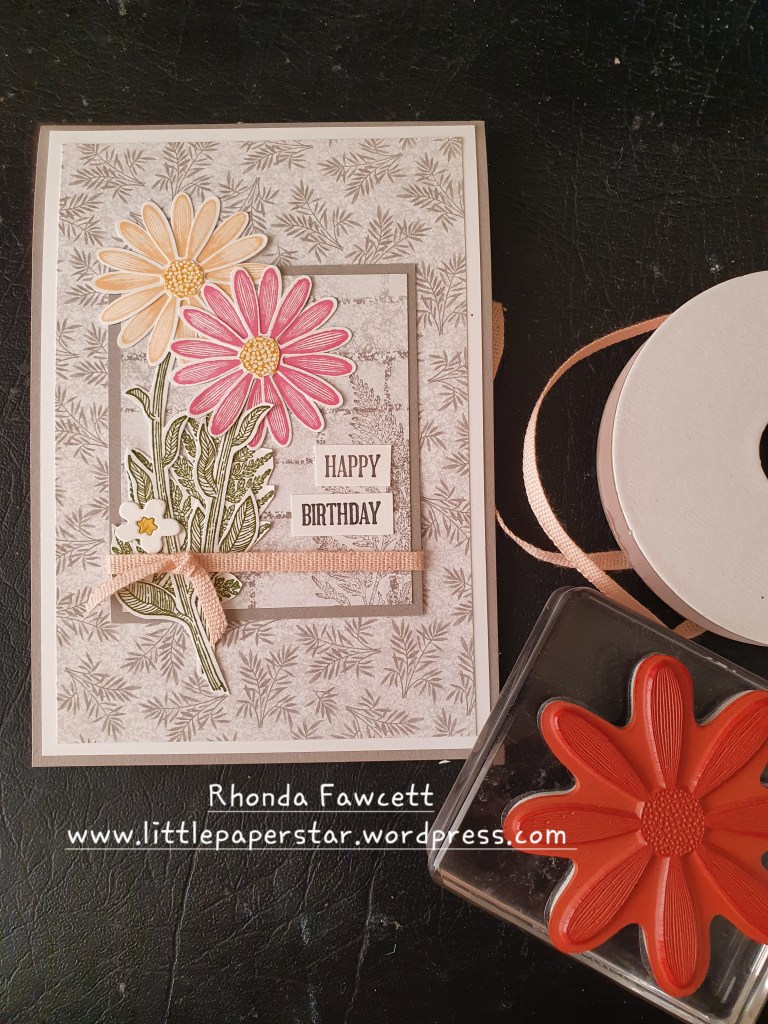
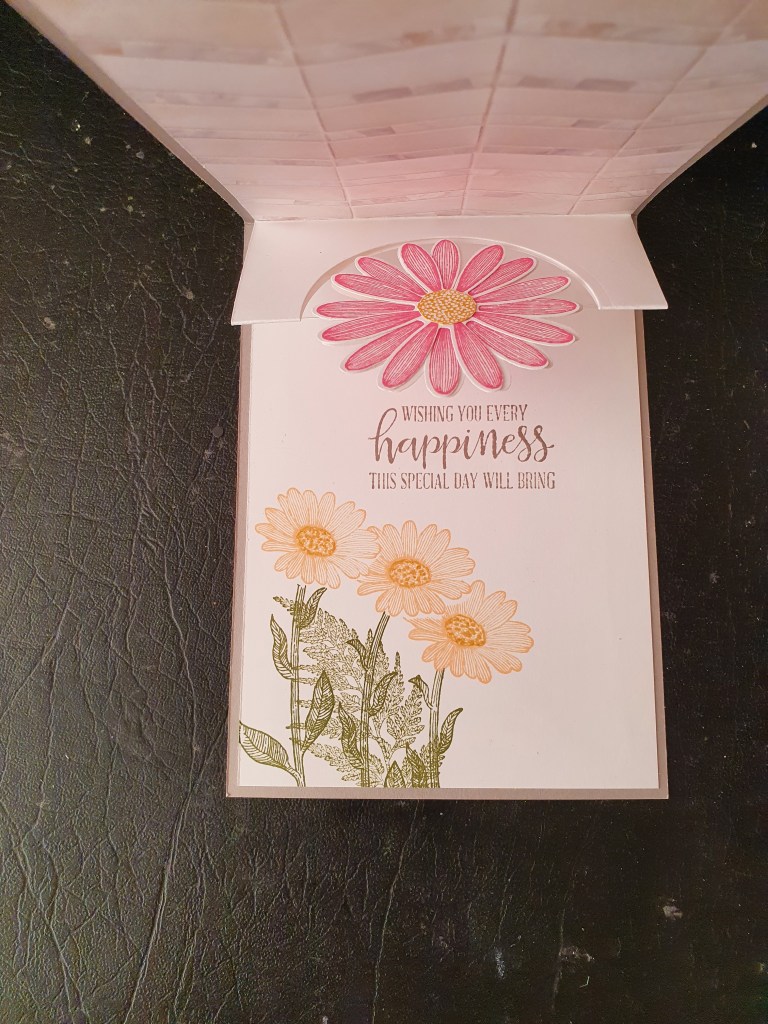
I used the Daisy Lane stamp set and Bloom where you are planted DSP. (Plus a bit of In Good Taste DSP for inside the card).
I taught this card in a class last week and gave the ladies the option of what sentiment they wanted on the front, using A wish for everything stamp set. Some chose to do a Mother’s day card and some chose to do an Easter card.
We added a small white flower die cut from the Cherry Blossoms dies and for those who chose the Easter card, they added a small chicken die cut from the Birthday Chick dies.

The special thing about this card is that it has a surprise pop up with a floating daisy inside.
I followed a tutorial from Julie Davidson to create the pop up piece inside. It is basically a circle cut out of a piece of white card and folded in the centre of the circle. There is a piece of window sheet inside the half circle which the daisy adheres to.


I love this time of year when Stampin’ Up! has the Sale-a-bration specials. I have earnt myself some freebies so over the next few days, I will show you what I have made with them.
This is a double panel gate fold card using the Friendly Hello Bundle. It is a beautiful stamp set with pretty, delicate images and coordinating papers in soft colours.

You can earn some freebies too with every NZ $110 spent. Visit my online store at http://www.rhondafawcett.stampinup.net or contact me for more information.

