Unknown's avatar

About littlepaperstar

I am a Stampin' Up! Demonstrator based in Matamata, New Zealand. I love all things paper-craft. This is my platform to share ideas and knowledge with others.

Memories and More

I have been making the most of my holidays to catch up on scrapbooking. Here are some pages that I have put together. It is super quick using our pocket albums from Stampin’ Up!

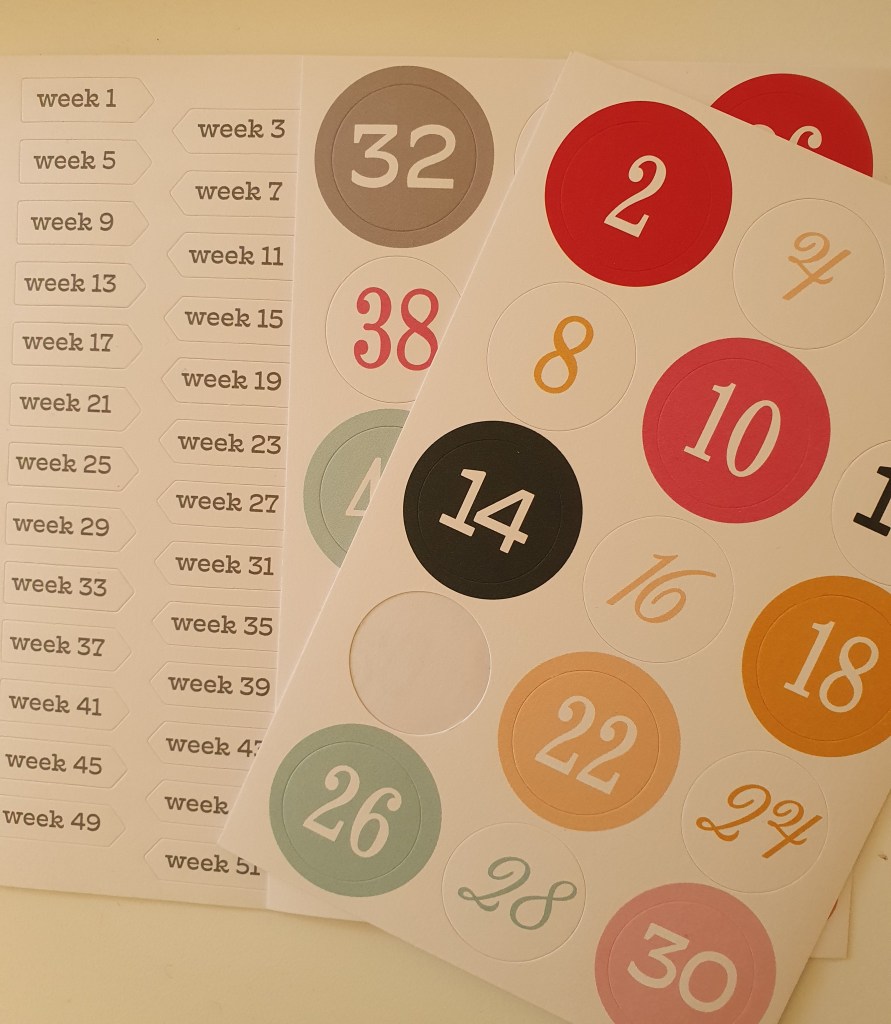
The card pack that I have used for fillers is called “What a year”. It comes with 3 sheets of stickers as well as the variety of cards that you can use for journaling, titles or just to add interest by filling in a pocket.

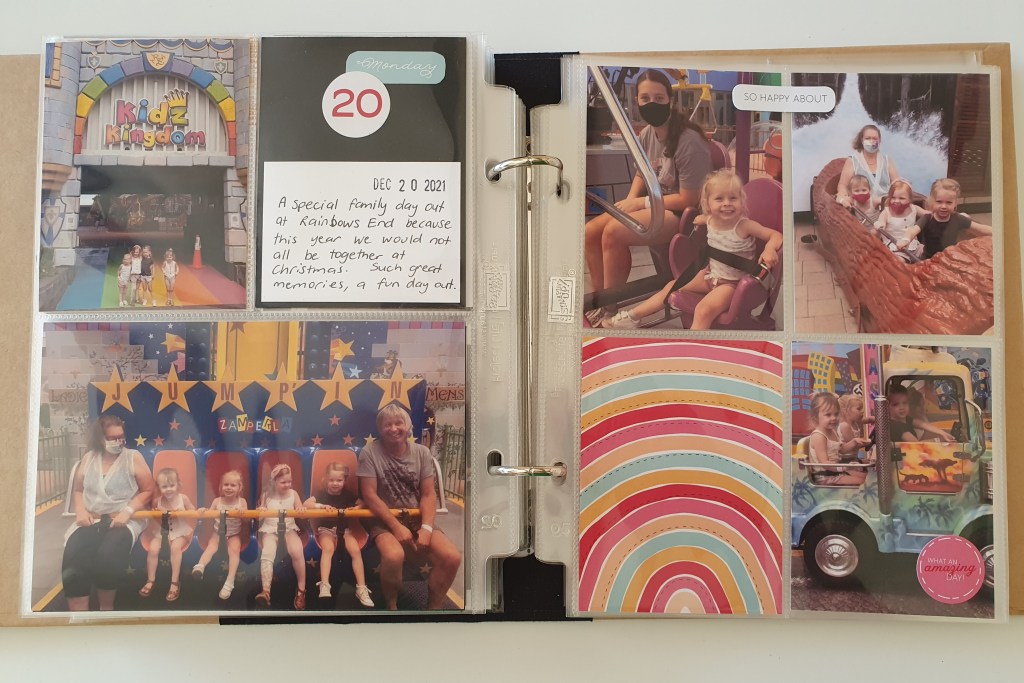
I love the “What a year” card pack because it comes with stickers that allow you to scrapbook a week a year.
What better way to start the new year?
Start scrapbooking your new year now. Include everyday things, like walking the dog, gardening, baking, going out for coffee etc. Use the weekly stickers to highlight each week. There are small arrow label for the odd weeks and larger circles for the even weeks. Stickers for all 52 weeks of the year!

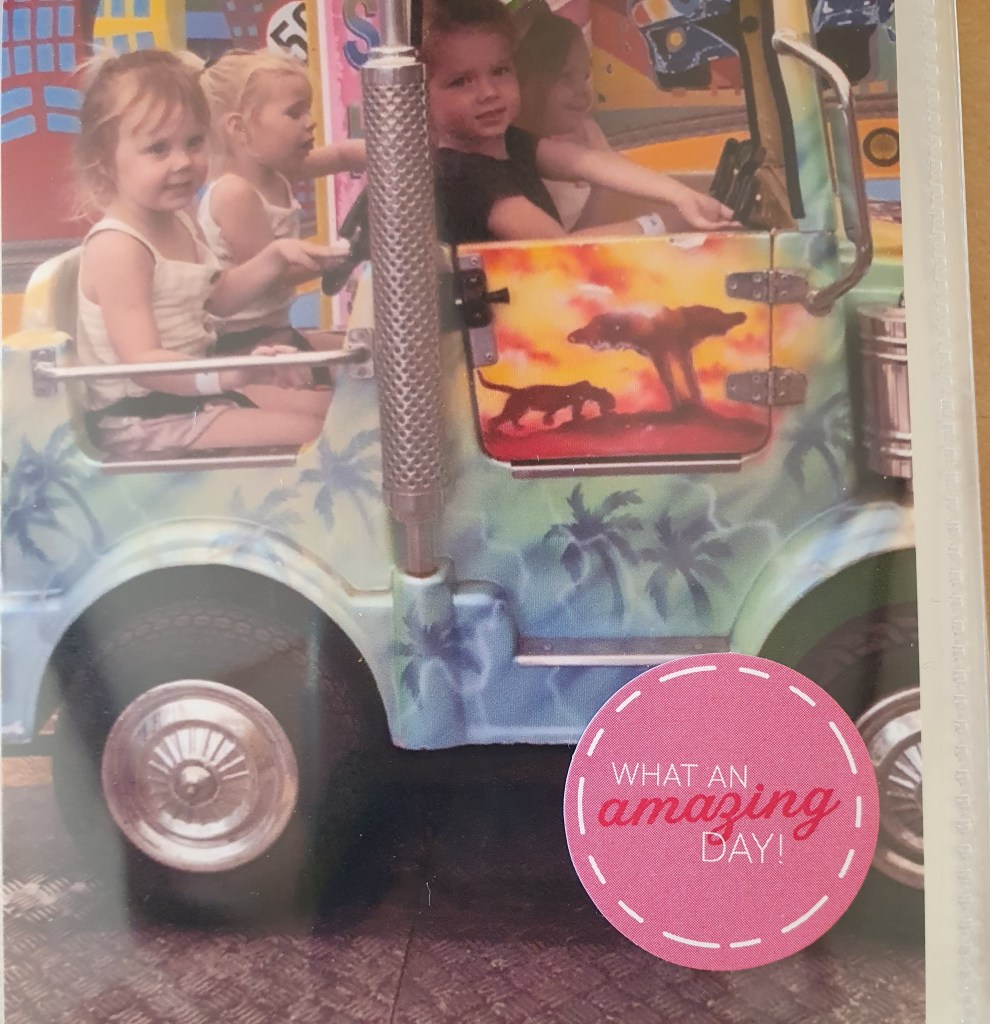
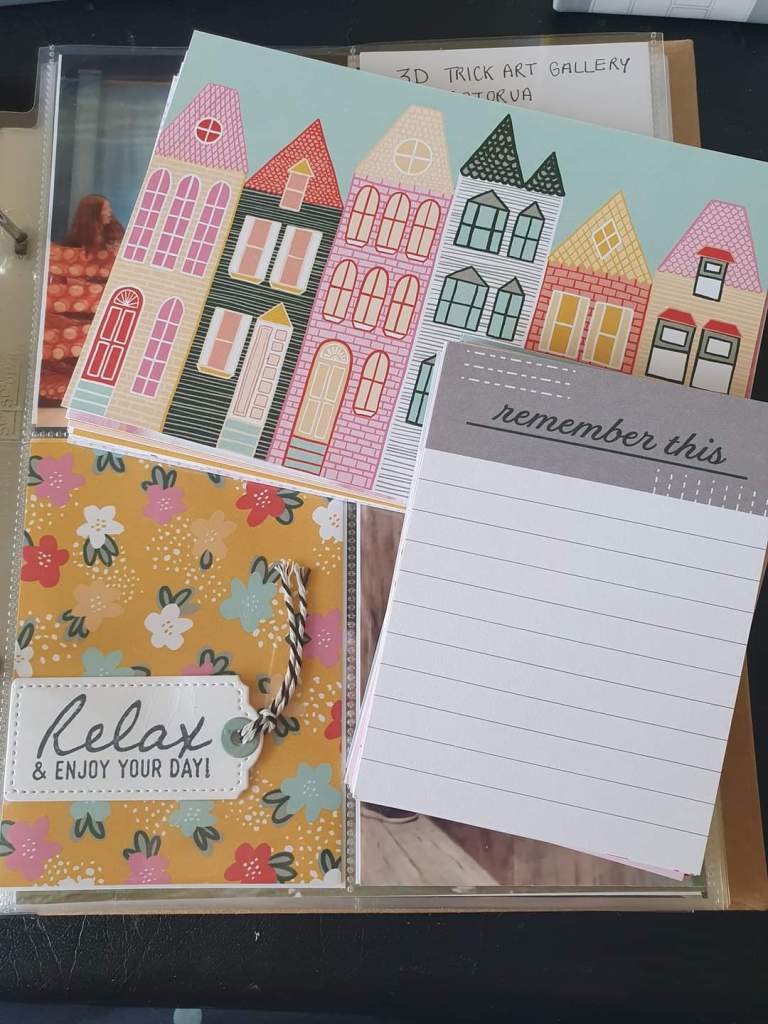
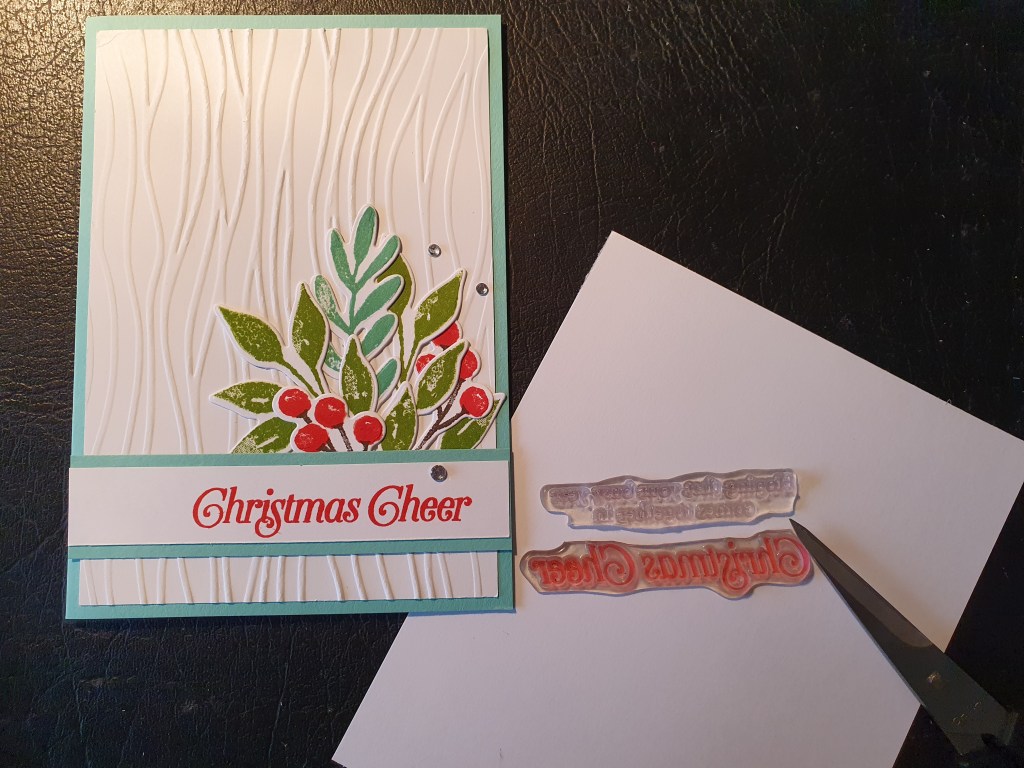
Occasionally when there is not a card suitable to use include in a pocket, I will make my own, using stamps and dies.

Brighten someone’s day with a card

This is our class project this week. I am still trying to decide whether to use a Basic Black card base or Misty Moonlight. Leave a comment with which one you prefer.

I just love this stamp set, Hand-Penned Petals. It is so easy to colour the flowers in as it is a two step stampin set but not one that you have to line up perfectly. It is meant to give a watercolor look, with a swipe of colour on the flowers and leaves. Colours I used were Memento black, Granny Apple Green, Crushed Curry and Misty Moonlight. I used Pumpkin Pie and Poppy Parade markers to colour in the flower centres. The pretty paper is a hostess reward paper and is called Pattern Party.

The paper is embossed with a matching embossing folder which makes the flowers stand out even more. The embossing folder is called Pretty Flowers.

The greeting on this card is from the Dragonfly Garden stamp set. The embellishments are from the Expressions in ink ephemera pack and the twine is from the playful pets ribbon combo.

The inside of the card deliberately has no sentiment, so that you could use this card for a variety of purposes.

Pretty Flowers embossing folder

I had so much fun with my magnolia card that I decided to try it again with a different embossing folder. This time I used the Pretty Flowers embossing folder and coloured in the raised areas with ink and daubers. I used Flirty Flamingo, Granny Apple Green and Fresh Freesia.

The sentiment is from Friends are like seashells bundle and so is the leafy card that is tucked underneath. I included some folded ribbon for more texture and finished it off with a cute little bee embellishment.

Magnolia Card

This card came together quite quickly. I used the magnolia 3D embossing folder then coloured in the raised images with my Blends. I used Granny Apple Green and Old Olive on the leaves and Petal Pink on the flowers. The flower centre was dark So Saffron and Daffodil Delight.

I also used a sponge dauber with Petal Pink ink to rub over the petals to add some softer colour.

The sentiment is from the Sweet Strawberries stamp set. It is die cut with one of the Ornate Frames dies and raised up on dimensionals. I finished the card with some elements from the Expressions in ink ephemera pack; a few sequins and the gold frame.

This really was an easy card to do and it creates a great impact for the small amount of effect required to make it.

I hope you will give it a go!

Christmas Season Home Decor Project

I found all these door hanging signs at a discount store. They had happy Christmas on in Grey felt and were very poorly glued on. I ripped off the felt and made my own decoration using the birch stamp on Soft Seafoam card.

This was one of the projects we made in class this week. We also made a small note card to match.

I stamped the berries in Fresh Fushia ink as I thought they were mistletoe, which is either white or pale pink or mauve. But my husband said they should be red for Christmas and he thought they were holly berries, so I had to make another one for him. 😊

Which colourway do you like best?

The bunches of Christmas leaves, cones and berries are made using the Christmas Season bundle. The words are from the playful alphabet and are cut out using the adhesive foam sheets.

Penguin Playmates

I finally got around to making a this card with the free paper that I got during the recent Stampin’ Up! sale-a-bration. The Paper is called Penguin Playmates and have large images that you can fussy cut out as well as patterned pieces that you can use for the background.

I love this layout from Jacque Williams. Such an easy way to showcase your designer paper. I will definitely be doing more layouts like this.

Have you used your free paper yet? Show me some of your designs.

Colour Charts for Missing Blends Colours

There are 14 colours in our Stampin’ Up! range that do not have a corresponding Blends pen to go with them. I recently needed both Coastal Cabana and Crushed Curry to go with a card I made. It needed to match the DSP also so I decided to try and blend some Blends pens together.

I was pretty happy with the results and would love to share them with you all.

Please email me with Blends chart in the subject bar and I will email you back the charts. (The charts file have all writing printed on, not handwritten as in the photo).

There are a couple of tips that I will email you also.

I am trying hard to direct people to this website so please do not pass on the chart. Instead direct people here so they can request their own.

Many thanks from Rhonda

School Day Embellishments

One of my customers was telling me recently how hard it was for her to find any school related embellishments for her scrapbooking. I told her that I always make my own embellishments.

I decided to do a few for her to get her going.

The apple is a 2 1/4″ circle with the top and bottom cut out slightly with just a curve of my scissors. The leaf is from the sunflowers dies. The ruler is diecut from a retired bundle called Nailed it. The scissors I drew by hand on scrap paper and then cut them to how I wanted them. I used the retired bird punch to punch the centre of the handles first, then cut around that. Did you notice the little screw on the scissors?

The screw is a stamp also from the Nailed it bundle.

The paintbrush I handcut and then used a corner rounder punch to do the end. The top of the paintbrush is from the bird punch. The crayons are just a strip of card, measuring 7 x 1.2 cm. The top of the crayon is punched out using the top of one of the retired gleaming ornaments punch duo. Then I just trimmed a narrow slither of each side, so that it looked more like the tip of a crayon. The letter and numbers are from the Playful Alphabets dies.

I think the bright colours work really well on these embellishments. I used Balmy Blue, Old Olive, Daffodil Delight, Real Red, Gorgeous Grape, Pacific Point, Smokey Slate, Pear Pizzazz, Flirty Flamingo, Highland Heather, So Saffron, Crumb Cake and Early Espresso.

Christmas Season

It’s time to get all your Christmas cards done. Who is all organized this year? 🤔 Let me know if you have finished your Christmas cards already.

Did you know that you can cut your stamps?
I frequently use the words “Christmas Cheer” from the Perfectly Plaid stamp set but I don’t always use the rest of the sentiment. So I got out my paper snips and cut the stamp in half. Now it’s so easy to stamp just what I need. If I decide to use the whole stamp, the two halves fit nicely together (like a jigsaw) on my block and the whole sentiment stamps perfectly.

Stamps Perfectly Plaid and Christmas Season