Sharing my love of all things paper-craft: Card making, Scrapbooking, Gift Boxes, Invitations, Party Favours, Craft Supplies and more. (Formally Stampin'Fantastic)
I am a Stampin' Up! Demonstrator based in Matamata, New Zealand.
I love all things paper-craft. This is my platform to share ideas and knowledge with others.
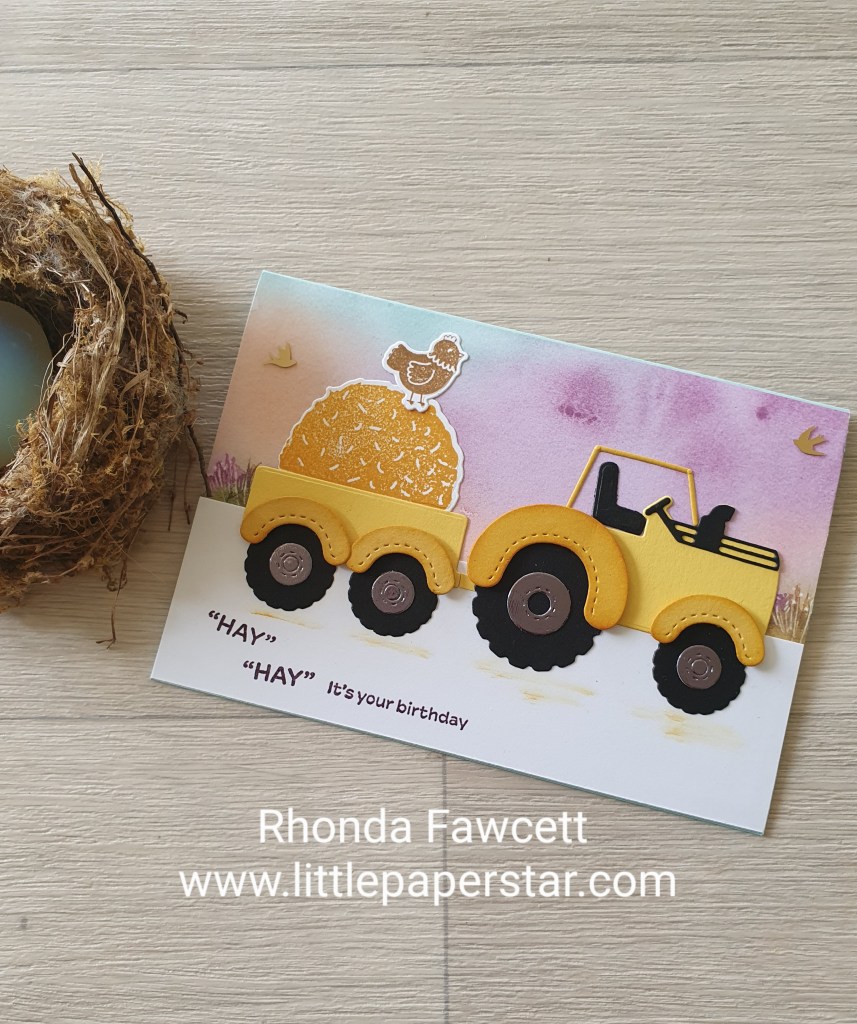
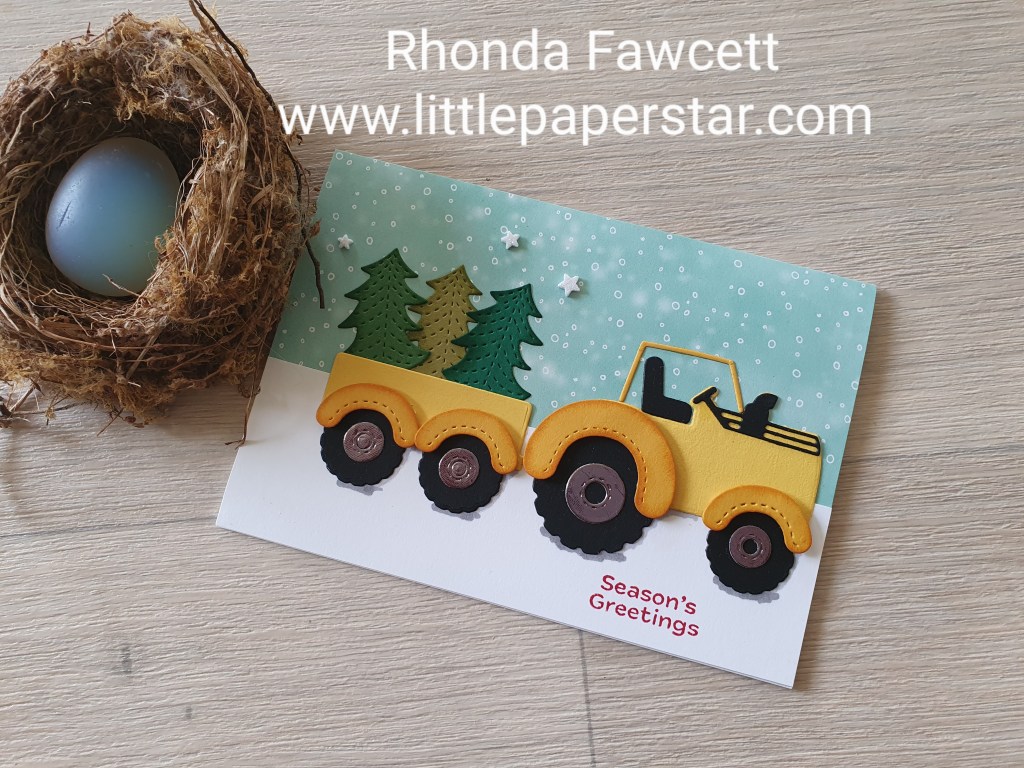
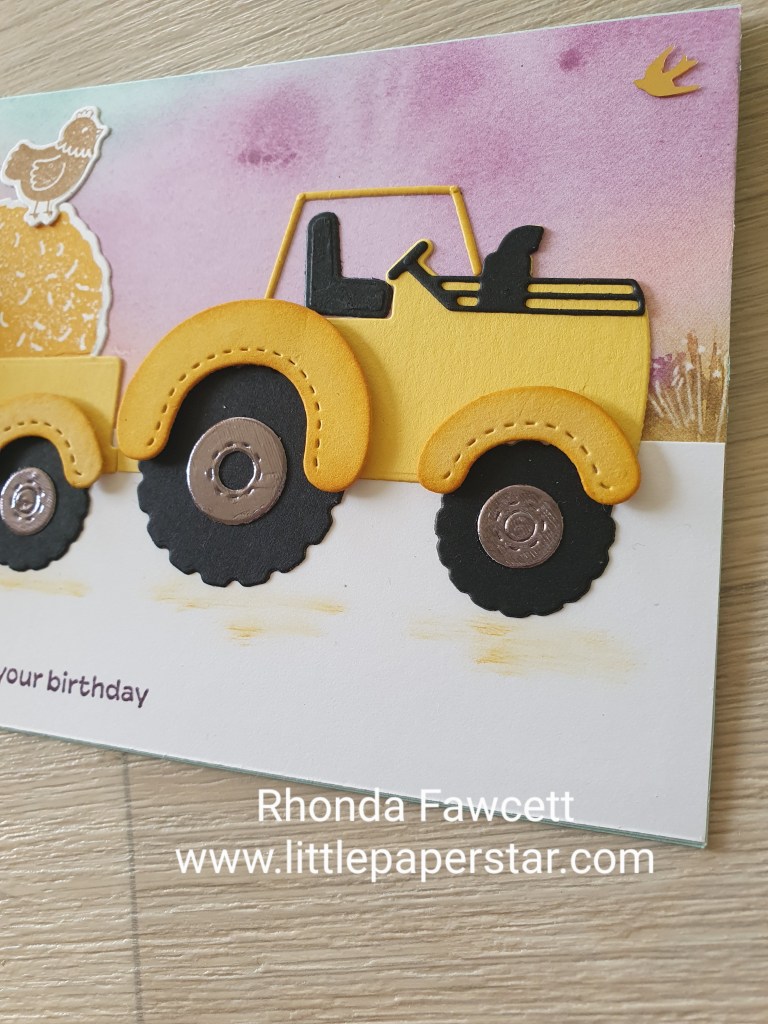
This birthday card was fun and easy to make using the Tractor and Co Bundle from Stampin’ Up!The Christmas version was taken from the Stampin’ Up! website and the birthday version was adapted from that.
The Thoughtful Journey DSP made the perfect sunrise background for the feeding out of the hay. The Christmas version had glitter foam star embellishments so for the birthday card I decided to use the brushed brass birds instead.
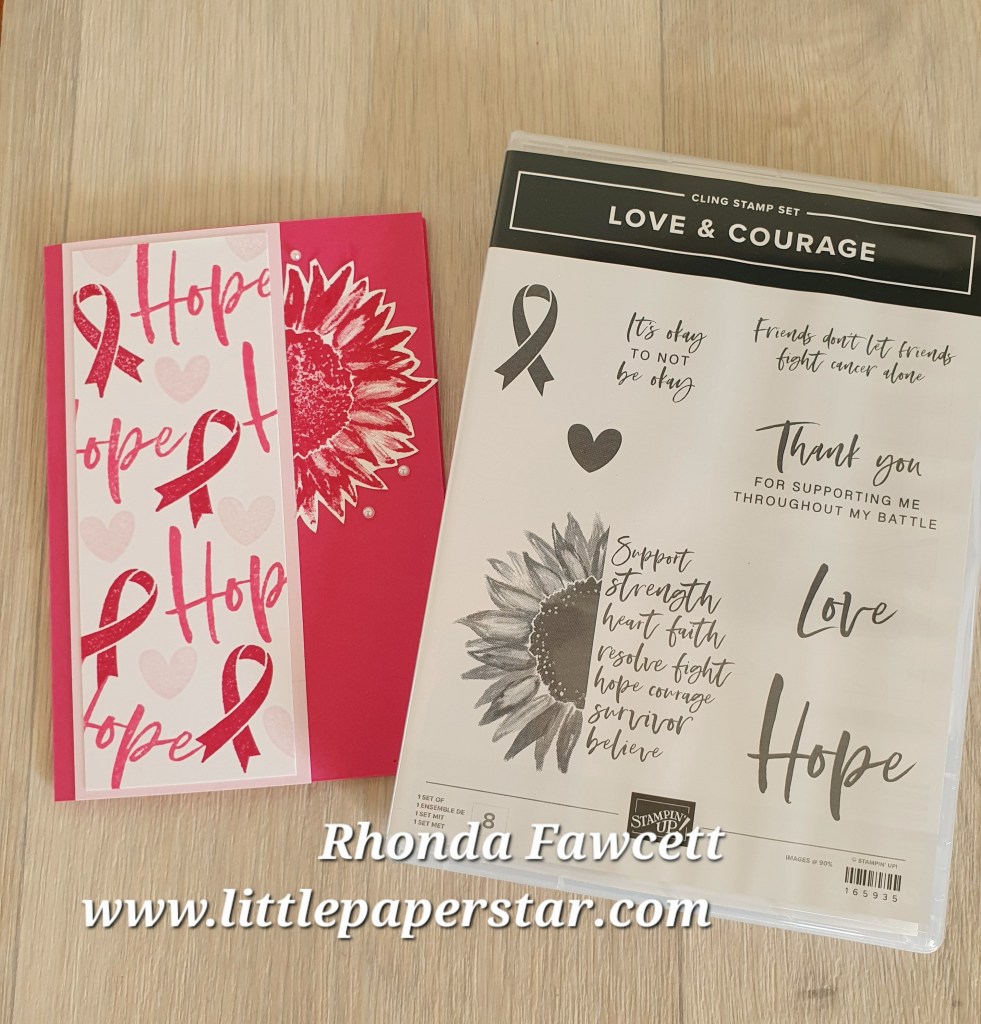
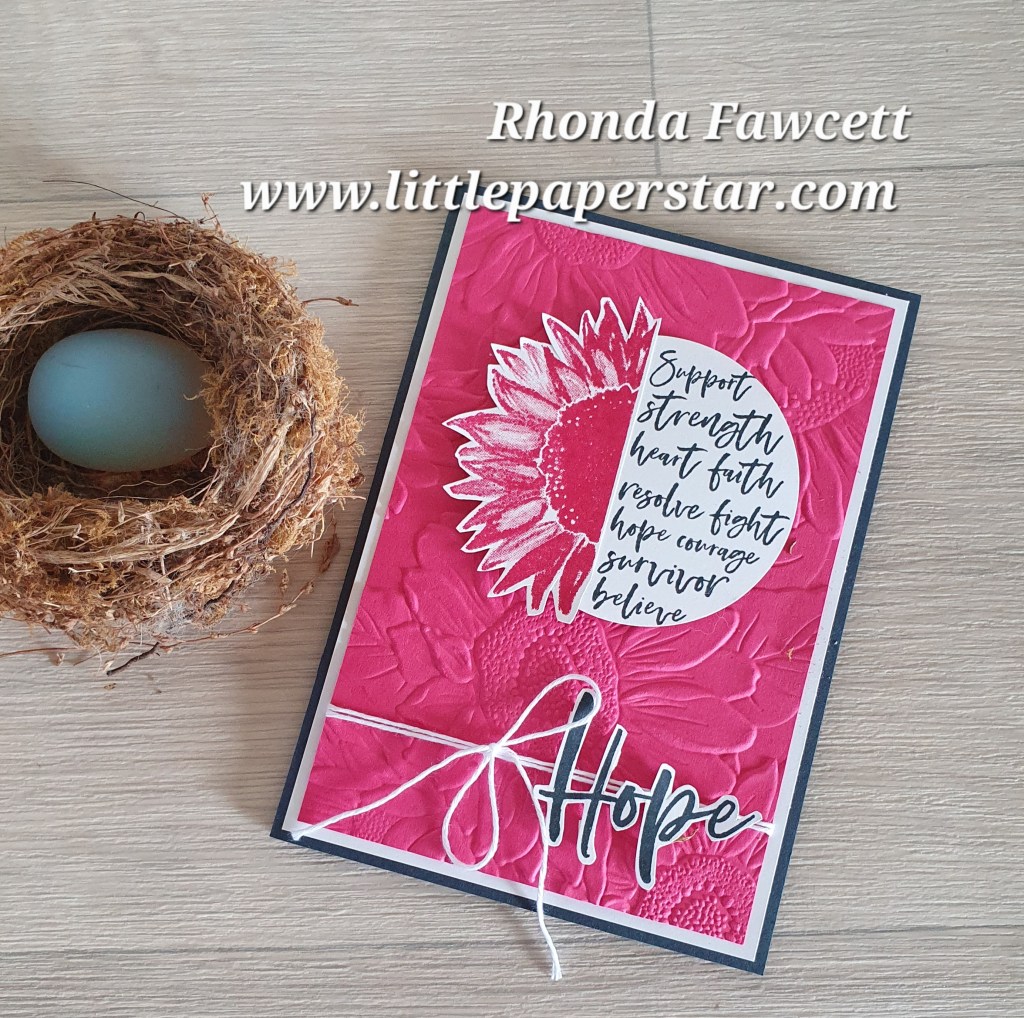
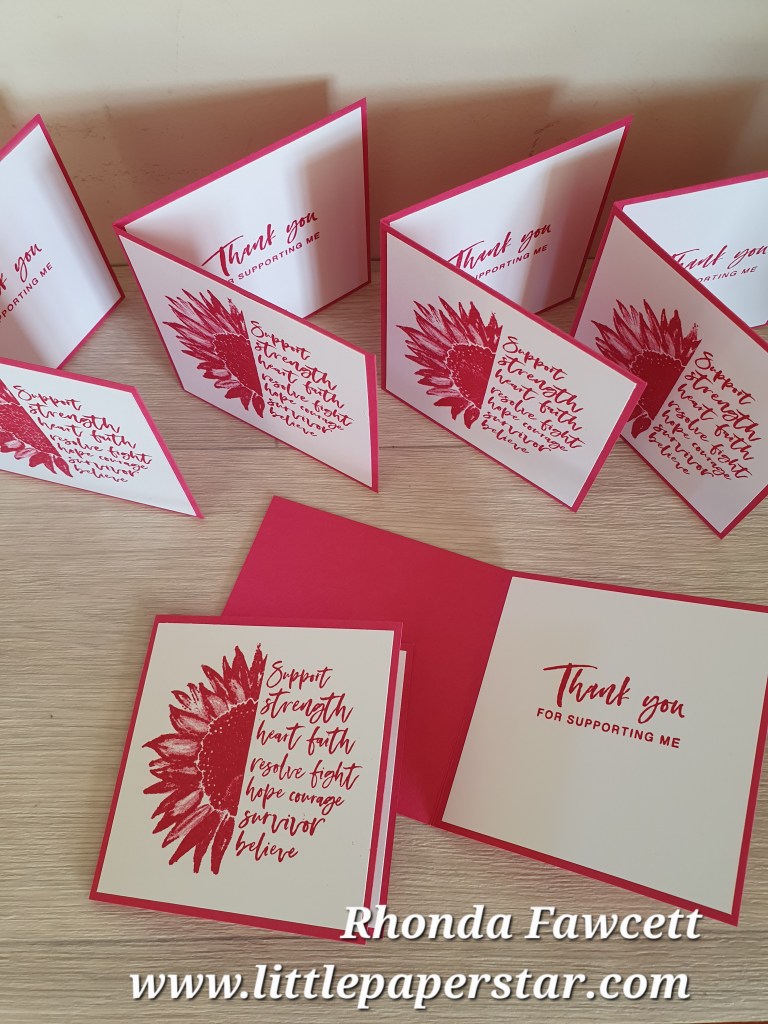
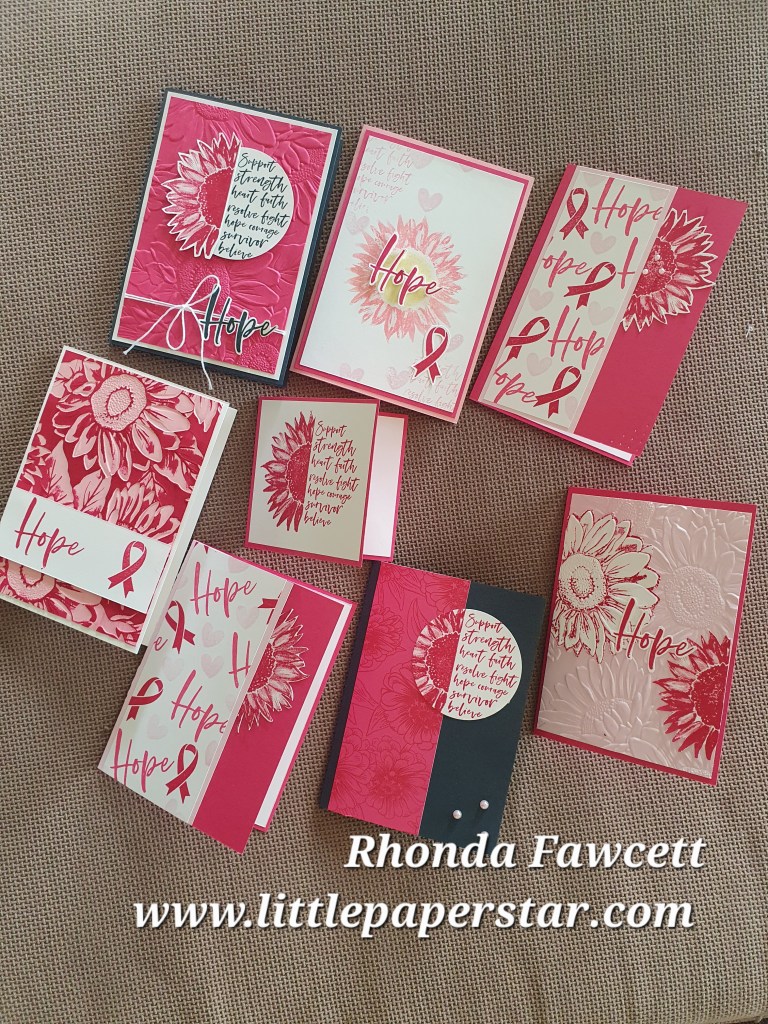
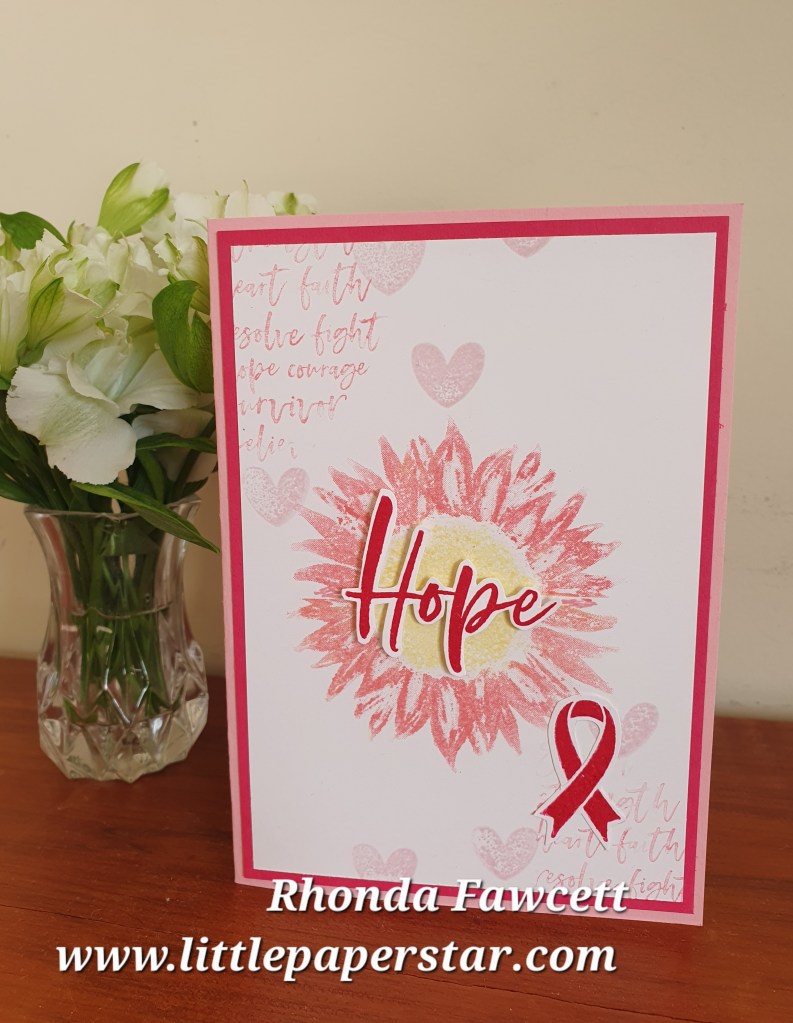
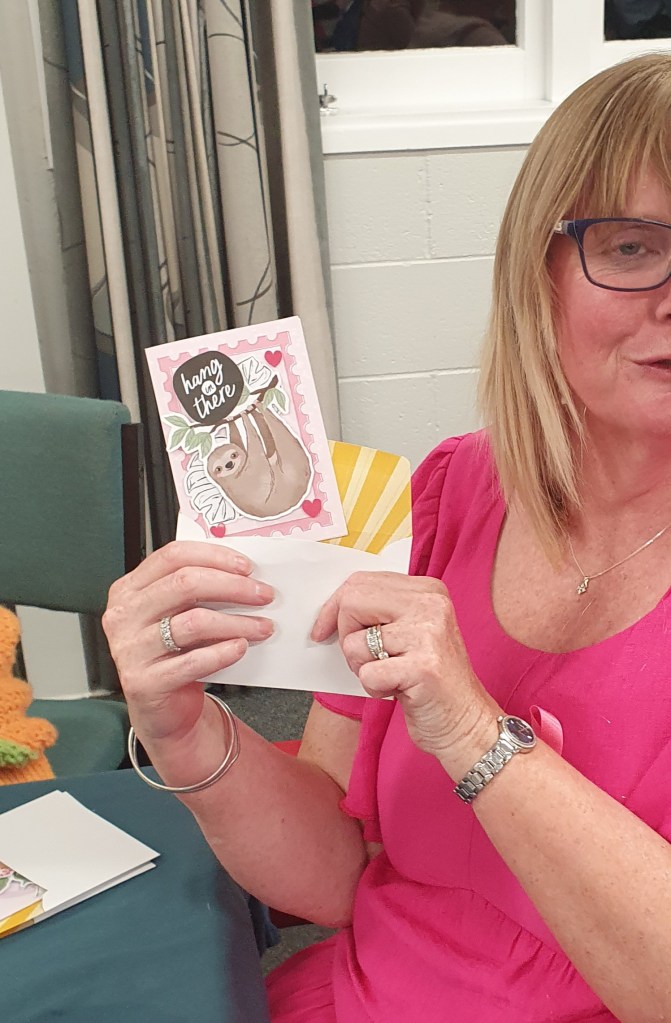
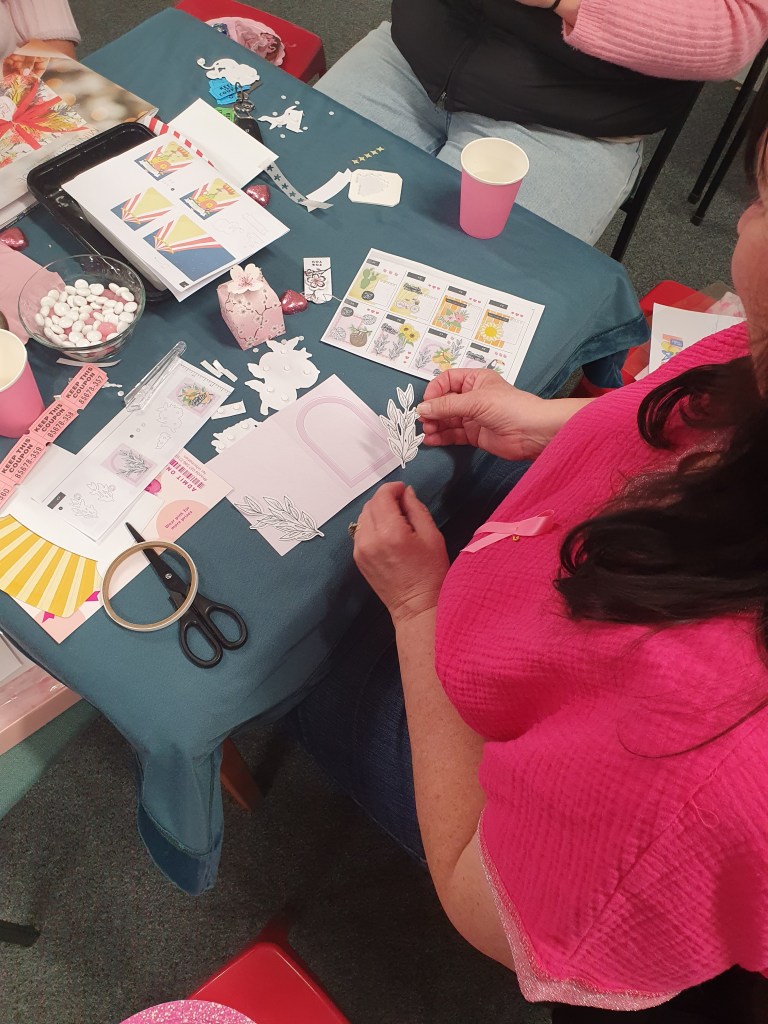
I have been busy lately with fundraising for Breast Cancer support. Some of my team and I have run a very successful fundraising night where we made cards using the Stampin Up kits. We also promoted the Love and Courage stamp set.
This stamp set is special because it is Pink Ribbon Month this month and Stampin Up are donating $4.25 from every one of these stamp sets sold to support the fight against breast cancer.
We made several cards to give away and a ton of thank you cards for the businesses who supported our event.
This is a beautiful stamp set,worth having in your stash as so many people today are affected by cancer either directly or indirectly and giving a card of support, hope and encouragement is a great way to show that you care.
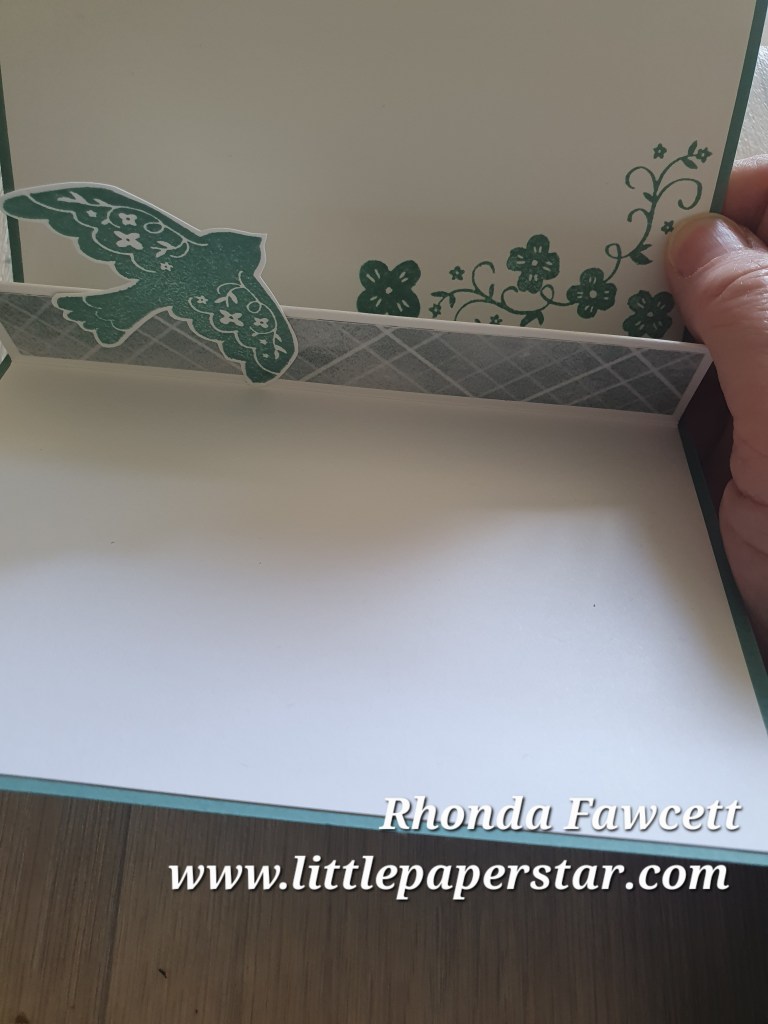
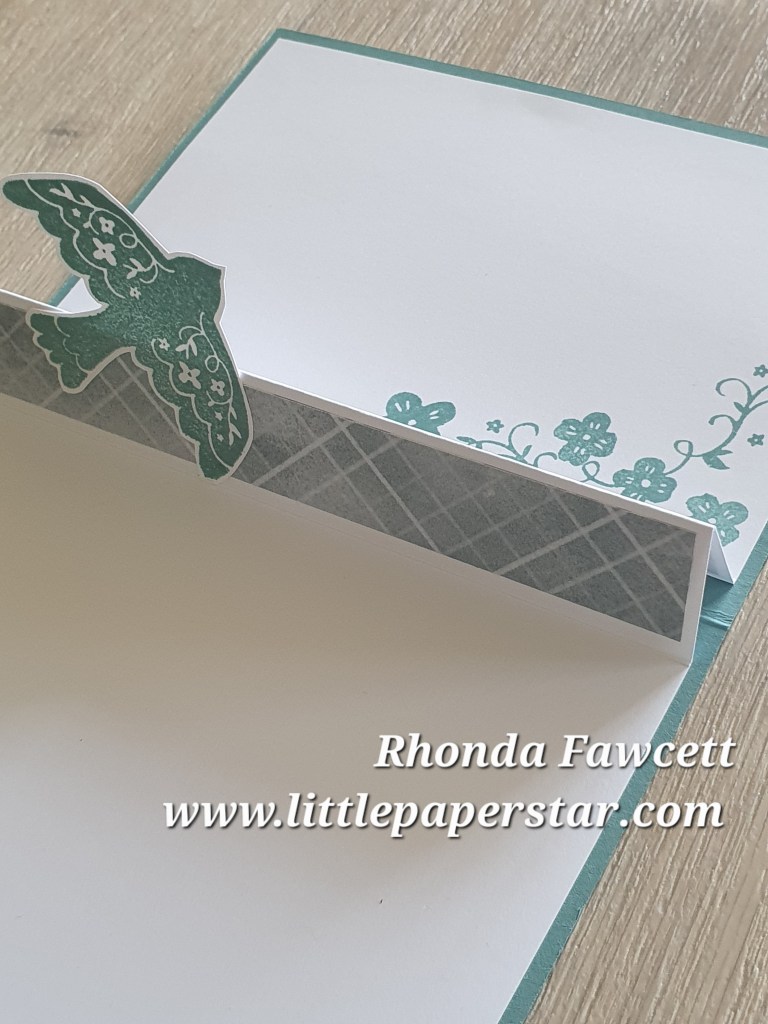
This is a card I made for a recent card swap. The pretty paper is called Peaceful Garden Designer Series Paper. I matched it up with the Peace on Earth dies.
Aren’t those little die cut envelopes cute? The sentiment is from the Notes and Totes stamp set. I used the new Black and White and Gold baker’s twine for a touch of elegance.
There is a pop up surprise inside…
I don’t know what the name of this type of pop up card would be. It’s quite small and triangular.
I glued on a stamped dove from the Peaceful Days stamp set to the pop up middle .
I added some extra stamped flowers too. These flowers match the DSP ones on the front.
This was an easy card to make. We put white card through the Sunflower embossing folder, then swiped our Early Espresso ink pad over the debossed side. It filled in all the raised areas with brown ink and left the debossed flowers white.
We then coloured in the flowers using a mix of Blends and daubers.
The sentiment is from the Notes and Totes stamp set.
I used this fun tractor and Christmas tree die set to make a kiwi Christmas card. Tractors are a common sight around NZ but our Christmas time is always in summer so I wanted a Christmas card that showed that, and this is what I came up with.
I chose green and yellow to be like a John Deere tractor. These tractors also have a yellow stripe along the side, so I used the thin piece that makes the roof to die cut the side stripe.
Aren’t the Christmas lights cute? They are die cut from the heads of corn die (which is part of this same tractor set). They’re the perfect shape to make little lights!!!
Inside the card, I used the sentiment from the Notes and Totes stamp set and I sponged a bit of yellow on first to keep it looking bright and summery.
What do you think? Does it still look like a Christmas card even though it’s a summer Christmas?
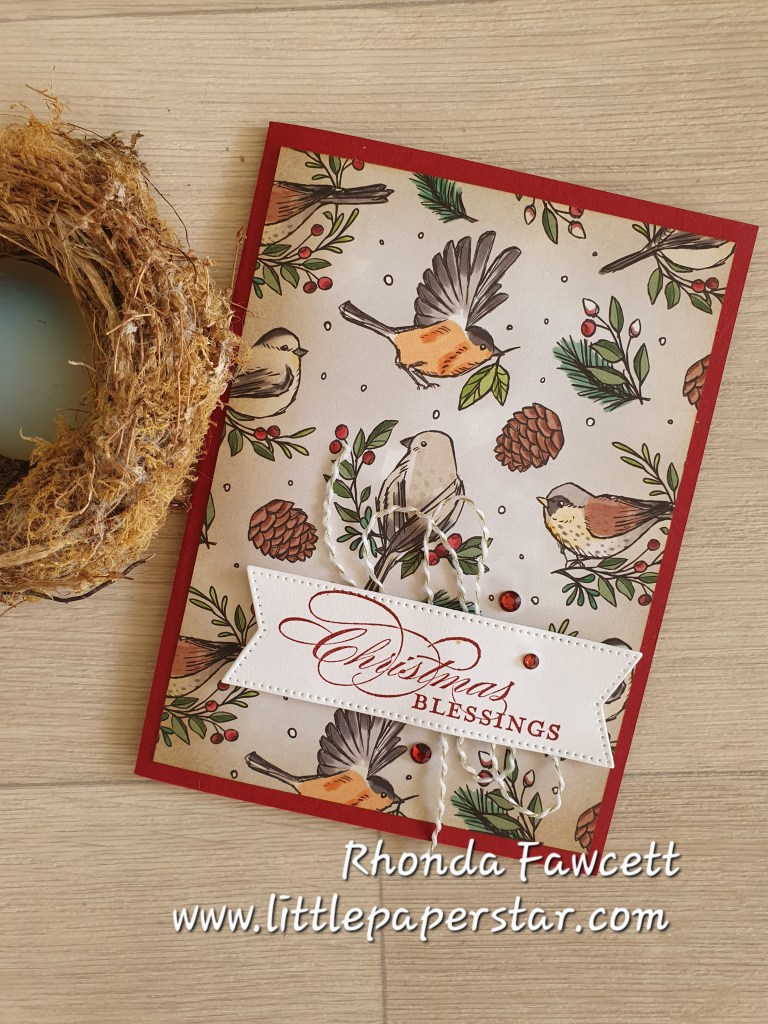
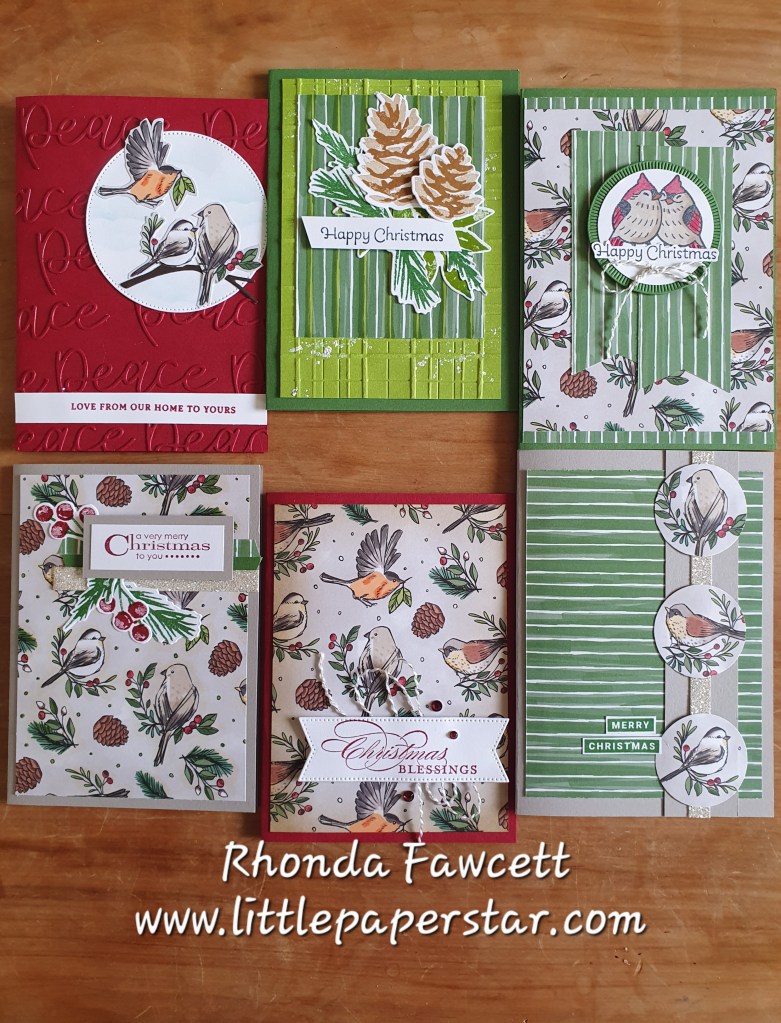
I recently participated in a demonstrator online event which showed us how to get the most out of one sheet of Designer Series Paper. (DSP). We made 6 cards, all using different techniques and using sketches from page 52 of the new Christmas mini catalogue.
We cut our DSP into the separate sections that we needed for each card, then using different colouring and cutting techniques we made our 6 basic cards. Once we completed the 6 templates we went back and added sentiments and embellishments.
For this card, I used a retired Christmas greeting and cut it out with a Stylish Shape die. I matted it on top of the new gold and white twine.
The technique used here is sponging ink over the DSP for a different look. I chose to just sponge the edges with Crumb Cake ink. It gave a antique look for this card which I really loved.
Here are the rest of the cards I made using the sketch guide and techniques on page 52. If you want to learn what I did, follow me on Friday the 3rd of October where I will be doing a Facebook live demonstration of this One Sheet Wonder.
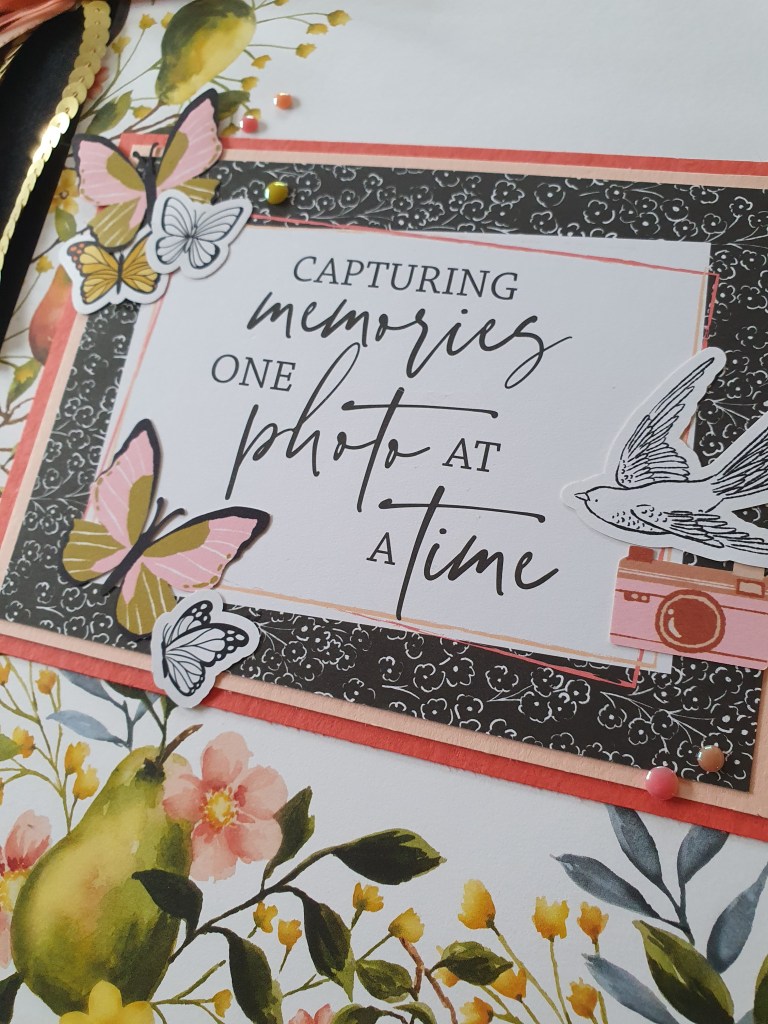
I had a bit if a dilemma when I was decorating my album cover. I had put off doing it for so long but my album was full. It was finally time to finish it properly.
Originally, I kept it simple. Just stamps and ink.
I love the words from this new Peaceful Days stamp set. They are perfect for scrapbooking.
Then I decided I wasn’t completely happy with how plain it was, so I got out my Memories and More Mixed Media Floral card packs and some Stampin Up ephemera, plus retired ribbon and trim to create this cover.
The Designer series paper for the front was a perfect base. Plenty of colour but not too busy, with the pattern only around two edges. The paper is called Painterly Pears and is a new Online Exclusive.
I love this double z fold card, that was taught to me by Irene Wardlaw at our annual stamp camp earlier this year.
One of the great techniques is the use of the two tone paper. This paper has a white core, which once embossed can be sanded to bring out the textures even more, by revealing the white core.
The birch wood embossing folder was perfect to make waves for this card. Who would have thought a wood grain type of embossing folder would make such effective waves and clouds?
The stamps and dies used are from the Sunrise Sailing bundle. The sailboat dies reminded me of a punch I had a few years ago. The middle Sunrise Sailing die is very similar in size to my old punch. The retired punch is on the left with Basic Beige sails. The current die is on the right with white sails.
Another great thing about this card, is that it can be folded flat for posting.
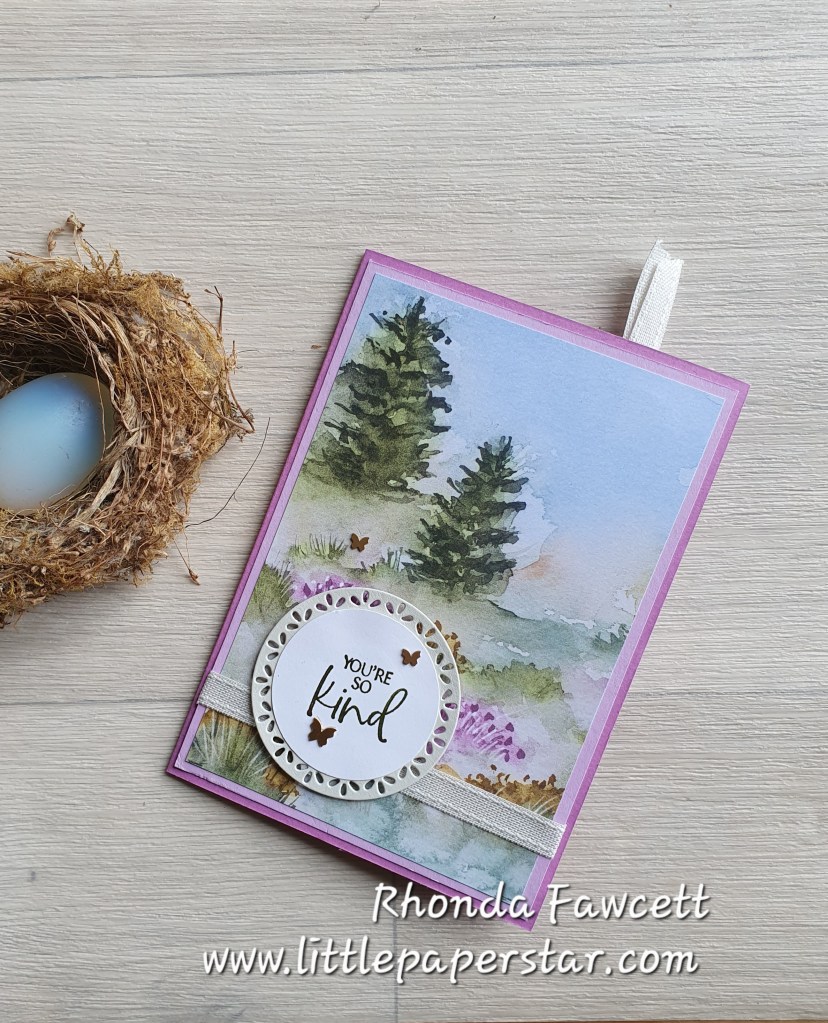
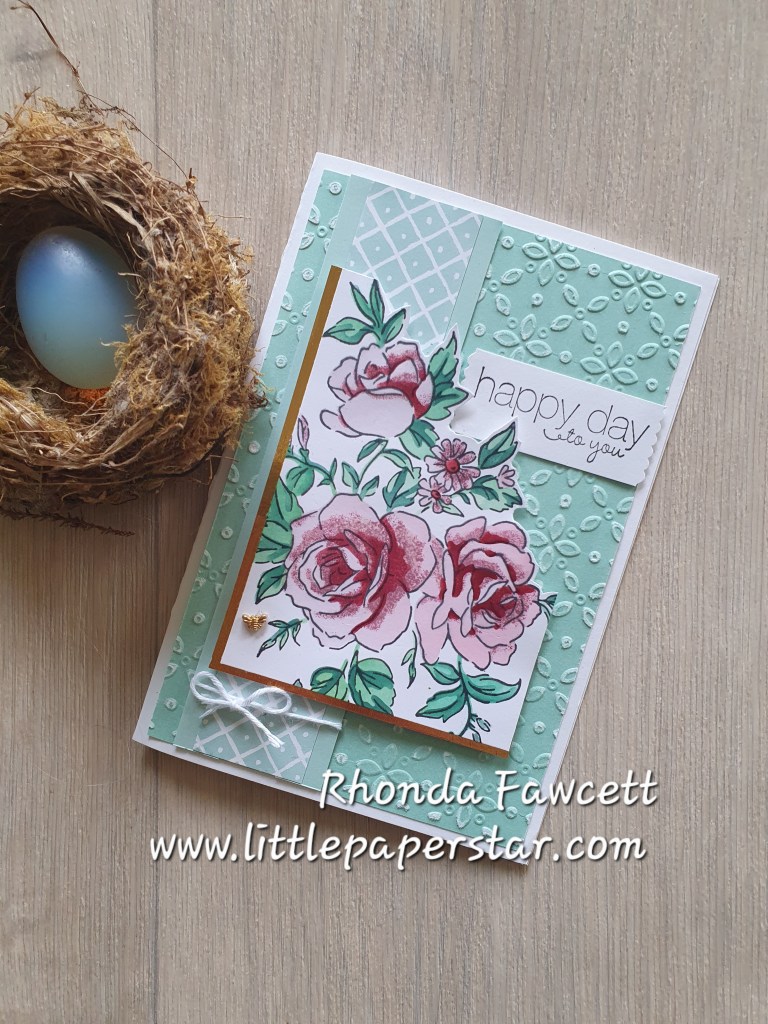
Here’s a card I made at our recent Stamp Camp. It was taught by Leoni Cane. I loved the technique of sanding the two tone paper to further highlight the pretty embossed background.
The stamp is from the Layers of Beauty bundle, which includes decorative masks, (stencils), dies and stamps.
The DSP is from Nests of Winter paper pack. It worked well with the Pool Party two toned paper.
The stencils make colouring the flowers so easy. For the lightest and darkest colours, I used a blending brush. For the middle colour, I used a sponge dauber and dabbed colour on. It gave a more mottled effect, whereas the blending brushes give a very smooth finish.I added Wink of Stella to my flowers for an extra sparkle.
How cute is the little gold bee? A perfect finish to this card.